Ever found yourself gazing out at a wide patch of Queensland dirt, dreaming of that perfect shed? Whether you’re sheltering tractors from a north Queensland downpour or stacking hay bales under the Darling Downs sun, a sturdy farm shed is your farm’s best mate. In fact, I’ve spent lazy afternoons leaning on my own corrugated metal shed, sipping a cold one, and picturing the shed of my dreams. It’s surprising how much personality and planning goes into these big steel structures – not to mention dollars.
So what’s this all about? Well, farm sheds come in every shape and size – from open-front hay shelters to fully enclosed machinery workshops – and each has its own rules for cost and council nods. In this guide I’ll walk you through the nitty-gritty of farm sheds in Queensland: how much they cost, what steps you need for permits, and how to plan them so you don’t end up with a rusty surprise. Ready for a deep dive? Let’s crack on.
Farm sheds aren’t just random bits of tin and beams; they’re custom pieces of farm tech. If you ever want inspiration from the more homely side of things, check out custom sheds for homes in Queensland – you’ll find clever design tips that apply to both backyard studios and rural workshops. That link is packed with ideas for style and setup on a domestic scale, but the principles (like site prep and sizing) carry over to big old farm buildings too. In short, planning a shed on your farm can be a lot like planning a big custom garage for your house.
Most farms in Queensland have at least one shed for gear, livestock or hay. Machines sheds store tractors and machinery, hay sheds keep feed dry, and livestock sheds (like cattle/crush sheds) protect animals and fencing gear. There are also all-purpose sheds for workshops or storage. The right type of shed depends on your farm’s needs. For example, a cattle farmer might joke that the cows care more about how cool their shade is than the color of the paint – but a solid roof and good airflow are a must for keeping animals happy.
Insert image: A large machinery shed on a Queensland farm, sheltering tractors and gear. Farm sheds are tough by necessity. A machinery shed often stands wide and tall – think 4–5 metres high – to let forklifts and trucks roll in. Inside, you’ll see big roller doors and lean-to wings on the side. In the tropics, they also need extra ventilation and storm resilience. Even a light gale can rattle an empty shed, so builders factor in the local wind rating (Cyclone C, D etc.) by adding extra bracing. The end result is a kind of giant steel cave, designed more for function than looks – although a fresh coat of Colorbond paint doesn’t hurt!
Types of Farm Sheds (Uses and Designs)
Farm sheds come in all flavours, and each has its charm:
- Open-Front Hay Sheds: These are classic roof-only shelters (no walls on one side) where you can stack hay bales or park equipment. They’re the cheapest and easiest because one side is wide open. Good news: an open shed is often considered a Class 10a building (non-habitable) and might skip some approvals, but you’ll still need strong posts to stop sideways collapse.
- Enclosed Machinery Sheds: These are fully walled, garage-like buildings. They protect valuable tractors and tools from dust and weather, and might include a small office or workshop area inside. Because they’re enclosed, they cost more (doors, walls, insulation) but give you a versatile space.
- Livestock/Cattle Sheds: These have reinforced floors and often special gates or crushes for handling animals. A cow cover is a type of livestock shelter; it’s essentially a shed frame (as shown) without fixed walls. It gives cattle a sunny courtyard plus shade over feeding or handling areas.
- Americana/Barn Sheds: These are tall, often with gabled roofs or loft spaces. Think big barns with high ceilings, maybe even a storage loft for hay. They look classic, but those steep roofs and lots of bracing add to the price.
- Custom Sheds: If your farm doubles as a lifestyle block or small homestead, you might want one shed to do everything: a workshop, a studio, even part garage/part home.
Each type of shed can be built with Colorbond steel or plain Zincalume sheeting. Colorbond costs a bit more but comes in colours (helpful for that flash homestead aesthetic) and usually has better warranties in seaside or humid areas. Zincalume is silver and cheaper – it’s fine in dry inland farms. Metal choice can bump up cost by around 10–15% for premium colours or corrosion-resistant grades. Also, bigger eaves, insulation, skylights or extra windows will jack up the budget.
Budgeting: Farm Shed Pricing and Cost Factors
Alright, let’s talk dollars. I won’t sugarcoat it – sheds aren’t cheap, especially when you include all the extras. But with some smart choices and a realistic budget, you can avoid sticker shock. Here are the main cost pieces:
- The Steel Kit: This is basically the “shell” – the engineered steel frame, roof and wall panels (and maybe guttering/flashings). Industry examples suggest kit-only prices for Queensland sheds are roughly:
- Small open-front hay shed (~12m×6m): $12,000–$18,000 (cladding kit only).Medium machinery shed (~18m×9m): $28,000–$45,000 (kit only).Large farm shed (~24m×12m): $55,000–$85,000 (kit only).American barn style (~12m×12m with lean-tos): $40,000–$70,000 (kit).Enclosed workshop (~12m×9m): $22,000–$36,000 (kit).
- Concrete Slab & Footings: You’ll almost always need a solid concrete floor or footings. Guide figures are roughly $90–$140 per m² for a 100–150mm reinforced slab. For a 10m×10m slab, that’s about $9,000–$14,000. Difficult access or big footings (like piled footings) could cost even more.
- Erection/Labour: Putting up the shed kit can be DIY if you’re brave, but most farms hire a licensed builder or erection team. Their rates are around $60–$120 per m² for assembly, depending on site difficulty. If your farm is remote, hilly, or has big black-soil swings, figure on the high end. (In tropical Queensland, a misaligned beam due to mud can turn into a comedy of errors!)
- Council/Engineering Permits: These can be a sneaky cost. Budget roughly $1,200–$4,500+ for a basic engineer’s drawing and permit set. A lot here depends on whether your council demands full structural certification (often the case in cyclone areas). Getting an engineering stamp or a building certifier on board isn’t free.
Putting it all in a chart makes it clearer:
| Item | Typical Cost (QLD) | Notes |
|---|---|---|
| Steel shed kit (Quality) | $120 – $300 per m² | N1–N3 wind: ~$120–220/m². C2–C3 (cyclonic): ~$180–300/m². Kit only, excludes doors, slab, extras. |
| Concrete slab (100–150mm) | $90 – $140 per m² | Reinforced concrete. Economies of scale above ~30m². |
| Erection by installer | $60 – $120 per m² | Crane hire, labour. In remote or steep sites, add more. |
| Permitting/Engineering | $1,200 – $4,500+ | Depends on council, flood zone, stormwater, etc. |
| Roller & PA doors (2m–3m) | ~$1,200 – $3,500 each | Varies by size. (Two doors common on larger sheds.) |
Above all, size matters most: a shed that’s twice as long costs roughly double (or a bit more). A key point: if you’re building in a cyclonic area (C2 or above), expect at least 50% higher metal costs compared to non-cyclone zones. The extra steel for wind, plus stronger bolts and footings, really adds up.
Here are some cost tips in bullet form:
- Buy a Kit, Save on Price: Pre-engineered kits from a shed supplier usually undercut hiring a designer plus separate builder. You get all the engineered plans included. Just add slab and builder.
- Go Open vs Enclosed: Removing one or two walls (open-front hay shed) can cut thousands off the price because you skip wall panels and roller doors. Of course, that means less security. Choose based on your priorities.
- Multiple Bays vs One Big Bay: Two smaller sheds side by side (with a gap) can sometimes be cheaper than one giant internal frame. You avoid super-wide spans, which require bulky steel beams.
- Negotiate Color/Extras: Colorbond and extras like skylights or insulation are optional line items. You can often pick a cheaper standard colour to save a few percent. Decide if you really need that evaporative aircon in the shed (fancy, but $$$).
- Plan for the Slab: Rough, crushed-earth floors are cheap ($20/m²) but you’ll regret it when you need to weld or keep livestock off mud. Even if it’s extra $100/m², a proper slab is worth it for functionality and for meeting building rules.
Remember, these are ballpark ranges for kit + build. A completely DIY job could slightly lower labour, but skip engineering and permits at your own risk. That path can backfire: if the council later finds out a shed was built without the required approvals, you could face fines or even be ordered to dismantle it. In any case, always get at least 3 quotes and compare kit specs carefully.
Planning & Council Approvals in Queensland
Now for the not-so-fun but absolutely essential part: red tape. In Queensland, farm sheds fall under building laws and local planning rules. The good news is: the State recognises that farmers don’t need the same firewalls as shopping malls. The Queensland Development Code (QDC) has a section MP 3.7 – Farm Buildings and Vehicle Storage Farm Sheds that specifically reduces red tape for rural builds.
Business Queensland notes that “QDC MP 3.7 reduces red tape and costs for the primary industry sector.” That means concessions on fire safety equipment and egress in farm sheds that wouldn’t apply to a regular factory.
However, you still must follow the basics. For example, Queensland’s regulations generally allow a “small tool shed” up to 10 m² (non-cyclone areas) to be self-assessable (no permit needed). Sunshine Coast Council spells it out plainly: no building approval is needed if a shed is under 10 m² in floor area, no side longer than 5m, and below 2.4m in height. In practical terms, this means a tiny garden shed or horse-feed shelter might slip through without paperwork.
If your shed exceeds those dimensions, or if it’s a proper farm shed (say 6m×8m or larger), you’re in the building-approval territory. In QLD, almost all sizable farm sheds are Class 7 or 8 structures (non-habitable, like garages or warehouses) under the Building Code of Australia. Even as a Class 10a (outbuilding), it usually needs a private building certifier’s approval. The certifier will check your engineer’s drawings, make sure footings are right and your site plan (setbacks from boundaries) is compliant.
Don’t forget council planning rules too – on a rural block you likely fall under “Rural Zone,” but some councils still require a development application if the shed is very large or if it’s on certain soil (flood-prone or heritage sites, for example).
The key takeaway: Always check with your local council and engage a professional. Even if you think your shed is “accepted development,” councils love to surprise you (in a bad way) if one hungry subdivision plan goes around. The number one rule is this: if you build without approval and it causes a complaint, you can be fined or forced to remove it. That’s what reliable sources warn us about – compliance now is worth avoiding a $10,000 fine or worse later.
The council fees themselves can add up. Town planners remind us that application fees depend wildly on the shire and type of permit. We’re talking anything from a few hundred dollars (for simple certifier fees) to potentially thousands if it triggers a full “impact assessment.”
For example, Planning Approval Group notes Queensland councils charge fees on a cost-recovery basis – it might be $1,000 or $10,000, depending on council policy. Infrastructure charges (road/ sewer contributions) can also apply if your shed is linked to something like increased business use. Bottom line: budget an extra few grand for approvals, or talk to a town planner to get a clearer estimate early.
Once you’ve decided size and site, the typical process goes like this:
- Preliminary Planning: I chat with council or a certifier to see if I need a full DA (development application) or just a building permit.
- Design & Engineering: Get a draftsman/engineer to draw the shed plans (including footings, wind bracing). They know QDC MP 3.7 rules and will ensure the design (especially for cyclone or flood zones) is compliant.
- Lodge Permits: Submit plans to a private certifier (or council) for approval. This includes a site plan showing setbacks, drainage plan, and the engineering certificate. Sometimes councils need a soil report if conditions are tricky.
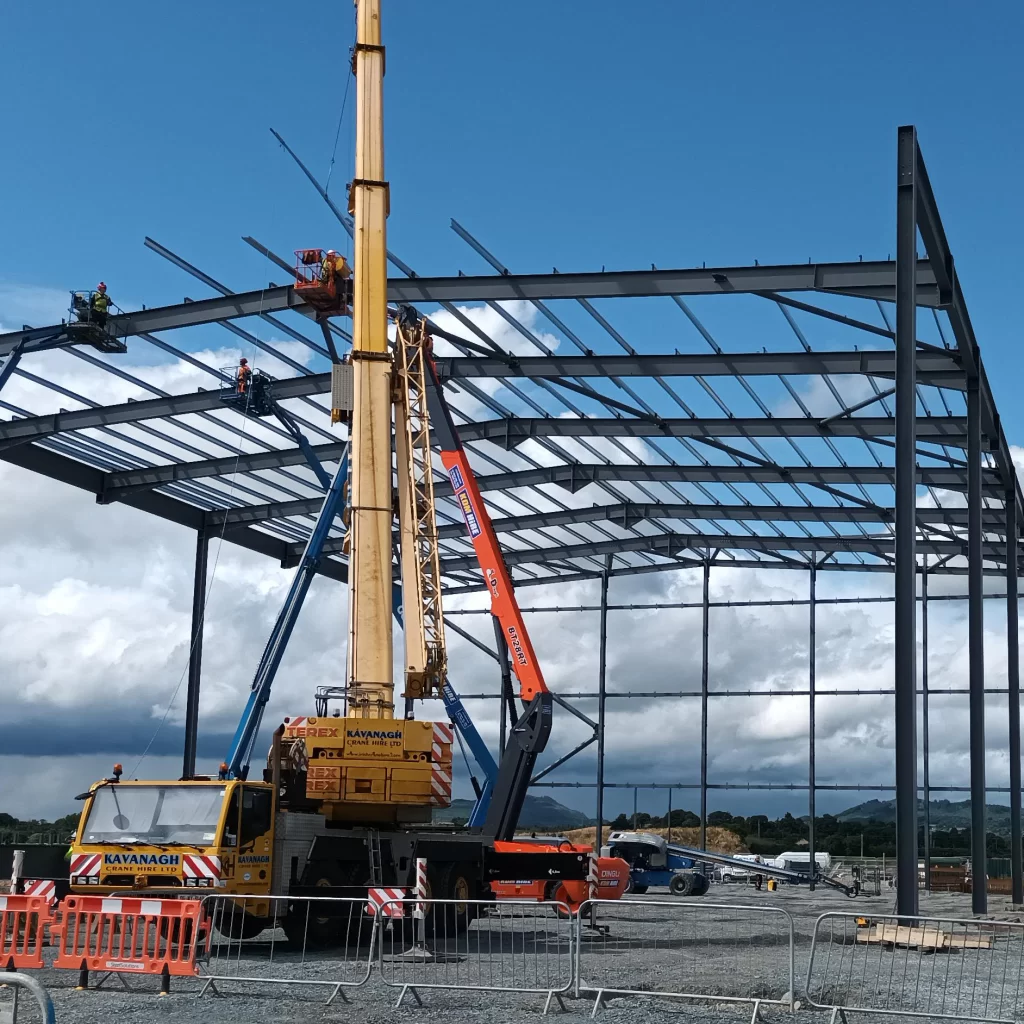
- Construction: After permit is granted, pour the slab/footings, then erect the shed kit (like in the image). Don’t forget to schedule inspections (usually footing, frame, completion).
- Finalization: Once finished, a building certifier issues a Compliance Certificate. Keep all paperwork – you’ll need it if you sell the farm or insure your shed.
If this sounds like a lot, it is! Farmers often hire the process out. There are firms that do a “design-and-approval” package for a flat fee, and some shed companies even handle permits as an add-on. It’s tempting to skip the form-filling, but trust me, it’s cheaper than legal trouble later.
Farm Shed Construction Insights
Building a farm shed in Queensland is a team effort. For example, at our farm we learned quickly that site preparation can make or break your budget. A previously uncleared block might need leveled pads and drained ditches before the slab goes down – factor that in. The shed kit itself usually comes with a structural certificate from the manufacturer; give that to your engineer so they don’t have to recalc the beams.
Another quirky tip from experience: order your shed early. Australian steel prices have been rising, and lead times can be 2–3 months (or more for custom colour). By the time you get it, the perfect weather might have passed!
Finally, think long-term: a farm shed is a lifetime investment. Adding features like skylights for natural light or an insulated roof can make the space more usable (and cooler in our Queensland heat). Even though these upsides aren’t strictly necessary for compliance, they affect your day-to-day comfort and the building’s resale appeal.
FAQs
How much should I budget for a farm shed in Queensland?
Roughly, a mid-sized farm shed (say 10×12m) could cost $40k–$70k for the steel kit, plus ~$10k–15k for slab and install. Cyclone regions add another 30–50% to steel costs. Don’t forget permits and possible site prep – it’s smart to add 10–15% contingency on top of the kit price. Use the tables above as a baseline and get quotes early.
What planning approvals do I need for a farm shed?
It depends on size and location. In Queensland, small sheds (≤10m²) in rural zones usually don’t need a permit. Anything bigger typically needs a building permit from a licensed certifier. Some councils may also require a development application if the shed is very large or the land isn’t zoned rural. Always check with your local council or a town planner. For larger projects, a private certifier will confirm setbacks and structural design too.
What factors affect the cost of a farm shed?
Size is the biggest factor (twice the length ≈ twice the cost). Steel grade matters too – sheds in cyclone zones need stronger steel and cost more per m². Materials (Colorbond vs Zincalume), number of doors, roof insulation, and extras (gutters, skylights) all bump up price. Site factors like steep slope or long distance from a road (for hauling materials) also increase costs.
Are Farm Sheds insurable in Queensland?
Yes, most farm sheds can be insured, but insurers typically require that all the approvals were done properly. If a shed is fully permitted and engineered, a normal rural property insurance policy will cover it (subject to options like cyclone loading). If it was built without approval, some insurers may refuse coverage. Always declare new sheds to your insurer.
How long does it take to build a farm shed?
From signing contracts to completion, a typical shed project might take 2–4 months (kit manufacturing can take weeks, then slab curing time, then erection). If you’re doing approvals, add another 1–2 months for approvals. Of course, a simple open-front shelter can go up in a couple of weeks once everything’s prepped.
Each farm is unique, and so is each shed project. But with solid planning (and a little Aussie common sense), you can build a farm shed that meets your needs, respects the rules, and doesn’t blow your budget. Good luck with your project – and here’s hoping your new shed becomes the backbone of your farm (or at least a great party spot on weekends)!