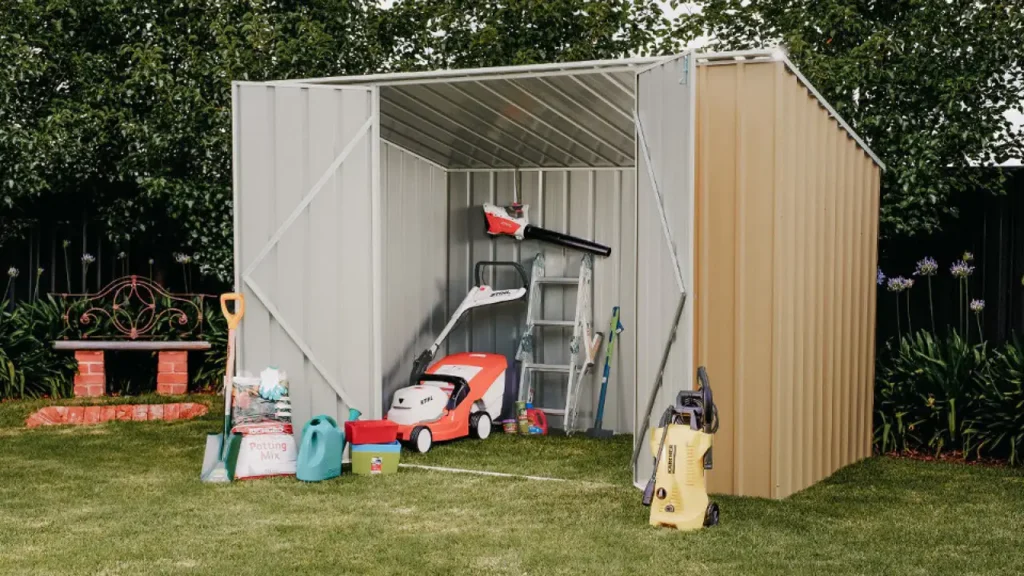
A well-built shed is more than just a storage space, it is a functional extension of your home, protecting tools, equipment and valuable belongings from the elements, and proper Shed Repairs play a critical role in keeping it structurally sound. In Queensland, where intense sun, heavy rain and strong winds are part of everyday life, sheds are constantly exposed to conditions that accelerate wear and tear. When maintenance is delayed, small issues such as leaks or corrosion can quickly escalate into costly damage.
In this Shed Repairs 101 guide, I’ll explain why sheds deteriorate, what common repairs cost, and how you can take practical steps to protect your shed before minor problems become major ones.
Sheds are meant to be reliable sidekicks, not surprise fountains. But Queensland’s tough climate (think blazing sun, monsoonal rains and the occasional cyclone) puts our backyard outbuildings to the test. A steel shed can look like a disco ball by midday if UV glare does its thing, and morning fog might make it feel like a sauna. Too much humidity and you might spot rust forming on your Colorbond walls by the time you finish your weekend barbie.
Worst of all, a turbocharged storm can crank up winds that would make Dorothy’s house jealous, loosening panels or uprooting the whole shelter. Your humble shed didn’t sign up for this drama, and neither did you.
Unless you have a bottomless toolbox and endless free time, there’s a point where calling a pro makes sense, someone like a Shed Repairs Expert in Queensland can diagnose and fix problems you might not even see. But before you ring up the specialists, let’s break down what typically goes wrong. We’ll cover the usual suspects – from wayward wood worms to sneaky steel corrosion – and how much patching them up might set you back. Grab a cup of coffee, and let’s unpack the mysteries behind every creak and drip.
Common Causes of Shed Damage
Before slapping on a new coat of paint, it helps to know what’s eating your shed. Here are the usual culprits in Queensland:
- Crazy Weather: With humidity levels that could soak a sponge and summer storms that drop tree limbs like confetti, weather is the number-one foe. UV rays fade and warp materials; rain and hail punch holes or loosen screws; and cyclonic winds can literally pick your shed up (if it’s not well anchored).
- Rust and Corrosion: In coastal areas, salt air accelerates rust on metal sheds and fixtures. Even inland QLD can see steel parts oxidize over time. The result? Holes in the roof or walls, and weakened bolts or hinges.
- Pests: Queensland is termite country. If your shed has any wooden beams, floors or furniture, white ants can quietly hollow out supports, leading to sagging floors or even partial collapse. Rodents and possums, bless them, love chewing wires and nesting in nooks.
- Foundation and Floor Problems: Sheds on dirt or poorly prepped slabs can shift, causing cracks or uneven floors. One rainy season of ponding water can wash out the soil under a shed, making it tilt like the Leaning Tower of Pisa (not in a cool way).
- Neglect: Debris in gutters, leaves piled on roofs, or old paint peeling off all contribute to faster damage. A few dry leaves blowing onto your roof might seem harmless – until mold or rust gets started under cover of darkness.
- Construction Flaws or Age: Maybe the shed was built on the cheap, or it’s simply old. Loose screws, outdated sealants, or materials that never really suited the climate will give out sooner. Over time, even a sturdy shed can get rattled at its seams.
Each of these enemies can cause specific problems: leaks, sagging walls, broken doors, or terrible squeaks whenever you open that rusty lock. The key is spotting the signs early (like checking for leaks after rain or soft spots on wooden floors). Next, let’s match those problems to fixes and see roughly what they cost.
Typical Shed Repairs and Solutions
Here’s a quick rundown of common shed ailments and their fixes:
- Leaky Roofs: The telltale puddle or drip when it rains means your roof’s seal is compromised. Solution: Re-seal flashing, replace any cracked panels or roof sheets, and check ridge caps. For small metal sheets, resealing or bolt-tightening might do (a DIY might cost ~$200–$500 in materials). For bigger damage, panels or even a partial re-roof ($800+) may be needed.
- Rusty Panels: Rust holes in the walls or roof are sneaky – they spread under paint. Solution: Cut out the worst rust, patch with metal from hardware, and coat with rust-inhibiting paint. Minor rust can be sanded and painted over ($50–$150 materials). Severe cases might require replacing an entire panel ($200–$600 each, including labor).
- Doors & Windows: Stiff or sagging doors, jammed locks, or broken screens are annoying and let weather (or burglars) in. Solution: Realign door tracks, replace rollers or hinges, swap seals, and maybe install a new door panel. A simple fix (lubricate tracks, tighten screws) costs almost nothing; replacing a roller door can run $300–$1,000 depending on size and style.
- Foundation/Floor Issues: If you see cracks in the concrete slab or one corner that’s sinking, that’s serious. Solution: Lift and re-level sections (often with jack screws or new footings) and fix drainage so water doesn’t pool. Budget a pro at $500–$2,000 or more, depending on how much is sunk or settled.
- Pest Damage: Seeing termite mud tubes or hollow wood means termites are already feasting. Solution: Call a pest pro for treatment (around $300–$600), then replace any eaten supports or floorboards. The repair bill here can skyrocket – untreated termite damage in Australia can run into the thousands (often $5,000–$20,000 for full treatment and rebuild in bad cases).
- Broken Gutters: Overflowing or collapsed gutters lead water under the roof edge. Solution: Clean them or replace broken sections. A half-day DIY clean and a fresh gutter might be $50–$200; a total gutter replacement is more.
- Cosmetic Wear: Faded paint, minor dents or scratches. Solution: A fresh coat of Colorbond-safe paint and a few hours of buffing can keep your shed looking sharp. Expect $100–$300 materials for paint and primer.
Here’s a quick table to visualize typical repair tasks and ballpark costs (Aussie dollars):
| Issue | Repair Task | Estimated Cost (AUD) |
|---|---|---|
| Roof leaks | Reseal flashing, replace sheets/panels | $200 – $800 |
| Wall panel damage | Replace metal or wooden panels | $150 – $600 per panel |
| Door/Window fixes | Realign, replace rollers/hinges, new frame | $100 – $1,000 |
| Rusty parts | Sand/treat rust, patch or replace sections | $100 – $500 (minor) |
| Termite infestation | Pest treatment + wood replacement | $5,000 – $15,000+ |
| Foundation settling | Re-level slab or footings | $500 – $2,000 |
| Gutter cleaning | Remove debris, repair gutters | $50 – $200 |
- These are rough ranges. The exact price depends on shed size, material, and severity. Always get multiple quotes for big jobs.
For example, fixing one small hole in a Colorbond roof might just be $50 for sealant and screws, whereas a major re-roof on a bigger shed can cost several thousand (sometimes nearing the price of a whole new shed!). That’s why it pays to fix small issues early and not let them multiply.
Best Repair Practices and Maintenance Tips
So, what’s the magic formula for a shed that lasts? Think preventive love, not emergency racing suit. Here are some strategies I’ve learned (and borrowed from shed gurus and official guides):
- Regular Inspections: Aim for a quick check 2–4 times a year, especially after storms. Walk around your shed: check the roof for dents, the gutters for clogs, and inside for leaks or mold. I keep a note on my phone of any shifty areas (a “repair log” if you like) so I don’t forget what needed attention.
- Clean Up Debris: Queensland’s leafy days can bury your roof in twigs and leaves, especially if big trees tower nearby. Clogged gutters or a pile of leaves on the roof can trap moisture and rust or rot the sheeting quickly. Every few months (or after a big storm), get a broom or leaf blower and sweep off any organic buildup.
- Tighten and Treat: Screws and bolts vibrate loose over time. Tighten them every six months so panels don’t flap. If you have any exposed or rusty fasteners, swap them for new stainless or Galv screws. A dab of silicone sealant in joints and around windows/doors does wonders to keep water out. Even coating a bit of Touch ‘n’ Zap rust-proof spray on seams helps delay corrosion.
- Paint and Protect: A fresh coat of protective paint or primer can double a shed’s life. If you spot peeling paint or bare metal, sand it smooth and repaint with a metal-safe rust guard. QLD’s sun can bleach colours, so lighter shades might fade; consider repainting every 5–10 years. Don’t forget the under-eaves and seldom-seen spots; rust loves to start in hidden corners.
- Ventilation: Condensation can rot the shed faster than rain. Install vents or whirlybirds (spin ventilators) on the roof so moist air escapes. I once walked into my shed in summer and felt a blast of hot, humid air – installing a couple of vents made the place feel like a gentleman’s workshop again (no more dripping ceiling!).
- Treat Pests Early: Got termites? Don’t play stoic. Call in pest control at the first sign (mud tubes, hollow-sounding wood). Also keep wood off the ground: concrete slabs or treated timber bases deter termites. Use termite-resistant timber for any floors or framing you add. Even storing pet food in airtight containers and sealing tiny wall cracks can keep rats and bugs out.
- Anchoring: In cyclonic regions or high-wind zones, tie your shed down. Guy wires, concrete anchors or straps can hold the structure firm. The NEMA (National Emergency Management Agency) warns that untethered sheds can flip in strong winds. It’s a low-cost job (a few ground anchors and straps, maybe a day’s work) and might save you ten times that in disaster repairs.
Imagine you’ve done all that, cleaned the gutters, tightened screws, repainted a panel. Your shed now looks sharp and solid. That’s the dream right? A well-maintained shed not only looks good in your yard (like a crisp suit on a Saturday), it also means no nasty surprises. Preventive maintenance is like an insurance plan: a bit of effort now avoids a huge fix later.
Repair vs Replace: When to Call It Quits
Sometimes a shed is just too far gone, or your needs have changed. How do you know if repairing is worth it, or if you should start fresh with a new build? Here are some life hacks:
- Compare Costs: Keep track of how much each repair is adding up. If you find yourself pouring money into an old shed (say hundreds here and there) while still noticing new problems, do the math. Many Aussie shed experts note that if repair costs approach 50–70% of the price of a new shed, replacement might be a smarter long-term play. Especially if a new shed would have updated materials and warranties.
- Function vs Fit: Maybe your old shed was a basic tool hut, but now you need more space or better insulation. Instead of hammering on an awkward fix, sometimes scrapping the old and building new (or customising a fresh design) boosts your property value and sanity. It’s like upgrading from beat-up sneakers to sneakers that actually fit – why limp along?
- Structural Damage: If the shed has major structural cracks, rotted timbers, or the foundation is shot, small fixes won’t save it. Extensive termite damage, or a roof that’s caved in large sections, often means rebuilding is cheaper. Safety first, so don’t risk collapse by patching a crack that keeps growing.
- Modern Codes: Queensland building codes have strict rules. A 20-year-old shed might not meet current standards for wind ratings, anchoring, or materials. Starting fresh can ensure you tick all legal boxes (especially for large sheds). A new shed might come with 20+ year warranties on Colorbond steel – a huge relief!
- Sustainability: Many new sheds use recycled or eco-friendly materials. If your old one is literally rusting away, replacing could be greener in the long run. Plus, a new energy-efficient design (better roof insulation, solar panel ready) can save costs down the road.
In short, a patch can be great for small issues, but don’t let thrown-together fixes become a money pit. Consult local shed builders or repairers for quotes. They’ll tell you if it’s worth “DIY and spit and glue” or time to invest in a new backyard fortress.
Conclusion
Your shed doesn’t have to be a sad, sagging eyesore. With a bit of knowledge and elbow grease, you can tackle leaks, rust, and squeaky doors before they turn into emergencies. We’ve covered the usual suspects – harsh Queensland weather, pests and simple wear-and-tear – plus what those repairs might cost and how to do them. Remember to inspect regularly, clear debris, tighten things up and call in professionals when the job’s too big (or dangerous).
Think of shed maintenance like a style routine for your home’s sidekick – a quick refresh and some care can keep it looking sharp and lasting longer. By being proactive and mixing DIY smarts with the occasional expert hand, you’ll keep your tools dry, your bike safe, and your wallet happier in the long run.
If in doubt, get a second opinion. It never hurts to have a shed guru swing by and give you tips (or take on the messy work). Or just bookmark this guide for future reference. Now roll up your sleeves, crack open that spare tool kit, and show your shed some love – it’s the least it deserves.
Frequently Asked Questions
How often should Shed Repairs be done in Queensland?
In Queensland, Shed Repairs should be checked at least once a year due to harsh sun, heavy rainfall and seasonal storms. Regular inspections help catch rust, loose panels and leaks early, preventing costly structural damage later.
What are the most common Shed Repairs needed in Queensland?
The most common Shed Repairs in Queensland include fixing roof leaks, replacing rusted steel panels, strengthening footings, and repairing doors damaged by wind or moisture. Coastal areas often require extra corrosion protection.
How much do Shed Repairs typically cost in Queensland?
Shed Repairs in Queensland can range from a few hundred dollars for minor fixes like sealing leaks to several thousand for structural repairs or roof replacements. Costs depend on shed size, material type and extent of damage.
Can weather conditions in Queensland shorten the lifespan of sheds without Shed Repairs?
Yes. Queensland’s extreme weather can significantly reduce a shed’s lifespan if Shed Repairs are ignored. Prolonged exposure to UV rays, humidity and storms accelerates corrosion and structural wear.