Ever dream of escaping to your peaceful hideaway in your own backyard? You’re not alone: a she shed (your private outdoor retreat) might be exactly what you’re craving. Picture a bright, airy space of your own – maybe a cosy studio, home office or creative nook – set just steps from the family hub but all yours.
I can almost smell the coffee as you relax in your little slice of paradise, knowing it’s built tough enough for Whitsundays weather. In this guide, I’ll show you how she shed kits come together, from sizes and materials to costs and setup, so you can start planning your dream space today.
She sheds can be tailored to any passion or lifestyle. Think of a she shed as your multi-purpose backyard studio. Common uses include:
– Home office or study space
– Art, craft or creative studio
– Yoga, meditation or wellness retreat
– Reading nook or chill-out lounge
– Guest room for visitors
– Garden retreat or greenhouse space
– Workshop or hobby room
These little buildings let you escape the daily grind. One day it can be your painting studio, the next a private yoga spot – you name it. The great thing is, you can tailor your shed exactly to your needs. Pick the size (from a tiny 3×3 m up to a multi-room layout), roof style (skillion or gable), doors (sliding, roller or glass) and windows to fit your vision.
Insulation, power points and colour choices turn it into a comfy year-round hangout. Many locals talk to a Trusted She Shed Kits Supplier in Whitsundays to nail the details (like cyclone-proof engineering) and make sure the design ticks all the right boxes.
She Shed Sizes & Styles
She sheds come in all shapes and sizes to fit your yard and needs. A compact 3×3 m kit (about 9 m²) might hold just a desk and shelf, while a 6×6 m one (36 m²) feels like a mini studio with room to spare. You can string multiple bays together or add lean-tos for extra space.
In practice, small sheds are great for a hobby room or single office, medium sheds (like 4×4 m) can serve as a lounge + work area, and larger sheds (6×4 m or more) can include a lounge corner, storage, and even a guest bed. Here’s a quick look at typical kit sizes and uses:
| Shed Kit Size (W × D) | Area (m²) | Typical Use |
|---|---|---|
| 3 m × 3 m | 9 m² | Small home office or hobby room |
| 4 m × 4 m | 16 m² | Art studio or spacious workspace |
| 6 m × 4 m | 24 m² | Office plus lounge area |
| 6 m × 6 m | 36 m² | Large workshop, guest room, etc. |
Larger than this? No worries – most kit suppliers do custom lengths, widths and even multi-room layouts. Just remember: bigger means more space and more cost, so choose the size that matches how you’ll actually use it.
Materials & Durability
Modern she sheds are mainly made of steel – think Colorbond or Zincalume – which is built for Aussie conditions. I recommend Colorbond coated steel (walls and roof) because its factory-painted surface fights rust (perfect for the salty Whitsundays air).
Zincalume is also tough (it’s zinc-aluminium coated steel) and cheaper if you want a simple, unpainted look. Either way, look for higher-gauge (thicker) steel if you’re right on the coast, since thicker steel resists corrosion longer.
To deal with heat and humidity, ventilation and insulation are key. Install ridge vents, whirlybird roof vents or louvres, plus windows on opposite walls so you get a cool cross-breeze. Add reflective foil insulation under the roof – it will seriously cut down the heat radiating in (and quieten the rain). A couple of quick tips:
– Colorbond Steel: A fantastic choice for walls/roof in North Queensland. It comes in many colours and handles sun and salt spray.
– Ventilation: Plan whirlybirds or ridge vents + wall vents/large windows. Good airflow stops your shed turning into a sauna on hot days.
– Insulation: A foil barrier under the roof sheets keeps things cool and dampens rain noise. Lining the walls adds comfort too.
– Corrosion Care: Seal any cut edges or drill holes with the supplied touch-up paint (it prevents rust). Every few months give it a spray-down to rinse off any salt spray.
For the floor, a concrete slab is ideal. Aim for at least 100–150 mm thick with steel mesh reinforcement. Pour it level and put a slight slope away from the doors so water runs off (and consider a drain near the door if your yard floods).
A sealed concrete floor won’t rot or warp, so it stays looking sharp and level over decades. (It’s also a breeze to sweep clean or roll out flooring if you like.) This solid base plus the right materials and airflow will make your she shed survive both the wettest summer and the fiercest storm.
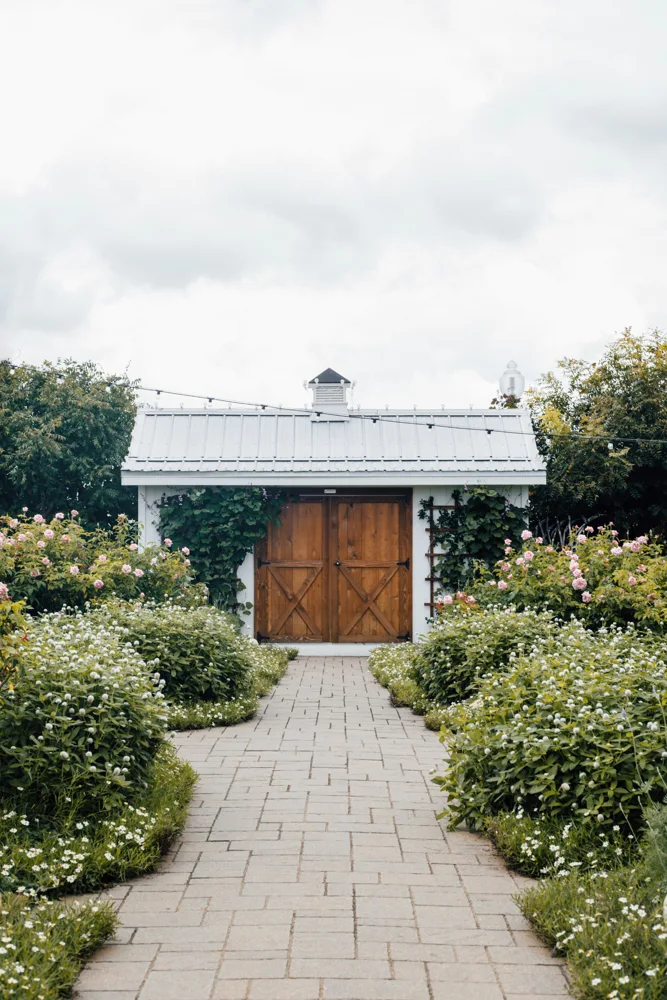
An inviting backyard studio can feel like a personal oasis – a smart mix of practicality and beauty.
She Shed Costs & Budgeting
So, what’s a she shed kit going to set you back? It really depends on size, materials and extras. In general, small steel kits (say 3×3 m) might start around a couple of thousand dollars. A mid-size kit (4×4 m to 6×4 m) typically runs several thousand more once you add in all the upgrades.
Each feature adds cost – for example, sliding glass doors, double-glazed windows or premium Colorbond will bump up the price. Insulation, electrical wiring and any plasterboard fit-out are usually extra too.
If you’re handy and build it yourself, you save a ton on labour. Many people DIY-assemble the kit (just grab some mates, the drill and a ladder). That said, fully finishing a she shed (insulation, cupboards, wiring) can push a mid-range project into the low five-figure bracket once all is said and done.
Hiring a builder for the slab or the entire assembly will raise the price further, but guarantees a professional result – useful in cyclone country.
One important rule in Queensland: if your whole project (kit plus any hired trades) costs $11,000 or more, you must lodge for a building approval (an owner-builder permit or licensed-builder contract).
In short, keep an eye on quotes and check with Whitsunday Council or your certifier early on. Planning in this budget phase pays off: design wisely, compare supplier quotes, and you’ll end up with a great space for much less than you might think.
Building & Setup Steps
Putting up a she shed kit is surprisingly straightforward if you prepare well. Here’s the basic process:
- Design & Approvals: Finalise your ideal shed plan (size, doors, windows, roof style). If needed, get that building permit sorted now. Tiny sheds under 10 m² often skip it, but larger ones or any project over $11k requires approval. It’s worth checking the rules or hiring a certifier to avoid hiccups later.
- Site Prep: Clear and level the site. Lay out string lines for corners. Pour your concrete slab (100–150 mm thick with mesh) or set concrete footings. Be sure it’s flat and angles slightly away from where the doors will open (this prevents water pooling). If any trees or roots are near, deal with them now.
- Assemble the Shed: Time to build! Most she shed kits come with a comprehensive manual. Start by bolting together the frame – you may need a couple of hands or even a small crane for big bays. Tack up the roof sheets next, then the wall cladding, doors and trim. In cyclone areas like the Whitsundays, make sure you follow the supplier’s instructions exactly: use all the provided anchor bolts and bracing (builders handle this, ensuring the wind rating is met). Whether DIY or pro, double-check every bolt and flashing.
- Fit-Out Interior: Once the shell is up, it’s all yours to dress. Install insulation in the roof and walls, run any wiring for lights or power, and pop in windows or blinds. A sturdy workbench, shelves or a sofa are next – make it feel like “you”. Paint or colour your walls and roof panel, then add finishing touches like overhead lighting, air conditioning or a ceiling fan.
Whether you tackle it yourself or hire a local shed expert, remember: good planning is key. A 6×6 m shed frame can go up in a couple of days with the slab ready. I’ve seen homeowners and tradies proudly step back after a weekend and say, “We actually built this!” Just take it step by step (or tick off our checklist above). In the end, you’ll have a solid, well-installed kit that’s ready to enjoy.
Conclusion
A she shed is more than just a storage space – it’s your own slice of sanctuary in the backyard, custom-built to your dreams. We’ve covered a lot: the possible sizes and layouts, strong materials for the tropical climate, rough pricing, and the nuts-and-bolts of putting it together.
The key takeaway? Plan carefully, consult the rules, and choose a kit that fits you (both in style and budget). With a sturdy concrete base and that rugged Aussie steel, your she shed will weather cyclones and hot summers while you enjoy movie nights or studio time inside.
So, what are you waiting for? Grab a tape measure and sketch your ideal floorplan. Talk to a local shed supplier for quotes. Gather your must-haves, and maybe a mate who’s handy with tools. Then watch as that shed kit turns into your new favourite spot. You deserve this retreat and with the right kit, it’s easier (and more affordable) than you might think.
Ready to get started? Reach out to a qualified shed builder or designer today and turn that she shed dream into reality!
Frequently Asked Questions (FAQs)
Q: How much does a She Shed kit cost?
A: A basic 3×3 m she shed kit starts from a few thousand dollars. Mid-size sheds with better materials and features cost more, while fully fitted setups with insulation, flooring, and power can reach five figures.
Q: Do I need council approval in Whitsundays?
A: Small sheds under 10 m² may not need approval, but most she sheds do. Projects over $11,000 require permits in Queensland. Always check local council rules before building.
Q: What foundation is best for a she shed?
A: A concrete slab is best—100 mm thick with reinforcement. Keep it level and slightly sloped for drainage. It’s durable, low-maintenance, and ideal for cyclone-prone areas like Whitsundays.
Q: Can I build a she shed myself?
A: Yes, many she shed kits suit DIY builds if you’ve got basic tools and help. For larger sheds or complex setups, hiring a professional ensures proper assembly and long-term durability.
Q: How do I keep a she shed cool and dry?
A: Use roof vents, windows, and insulation for airflow and heat control. Reflective foil helps reduce heat. Add fans or aircon if needed, and ensure proper drainage with gutters and a sloped slab.
Q: What’s included in a typical she shed kit?
A: Most kits arrive with the main ingredients: pre-cut steel frame sections, roof and wall cladding (Colorbond or Zincalume sheets), fasteners (screws, bolts, rivets), guttering, and trims (flashing). Doors and windows may be included depending on the package (often you can choose roller doors or a glass sliding door). Detailed assembly manuals are almost always provided. Things like concrete, flooring boards, electrical wiring, insulation, paint and furniture aren’t usually in the kit – you or your builder add those on top.