Author name: alchemist-admin

Backyard Studio Shed
Blog

Studio Shed Kits vs Custom-Built Studios: Which Is Better?

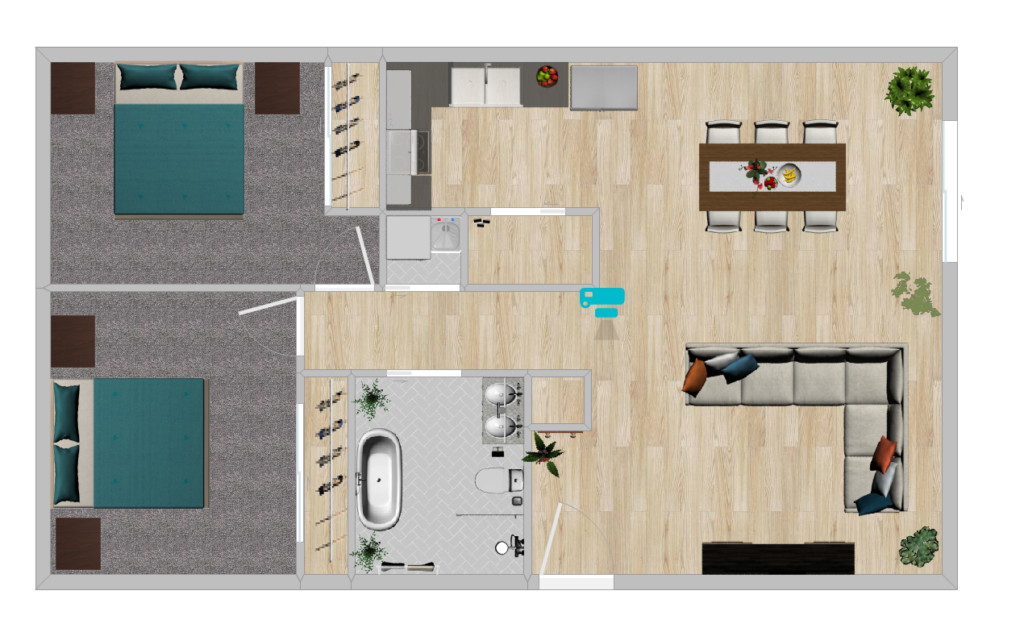
You’ve finally decided to reclaim a little space at home. Maybe you want a quiet office away from the family chaos, a creative workshop or somewhere to work without balancing your laptop next to yesterday’s dishes. A studio shed sounds perfect. But then comes the big question: should you buy a ready-to-build kit or invest in a custom-built studio? For homeowners in Bowen, Mackay and the Whitsundays, this decision involves more than appearance and price. North Queensland throws plenty of sunshine, humidity, coastal air and wild weather into the mix. Your backyard building needs to suit your lifestyle and handle local conditions without becoming an expensive headache. I always suggest exploring your options before choosing a design. Modern studio shed kits offer practical layouts, flexible features and customisation options that suit different properties. Meanwhile, a custom-built studio gives you greater freedom over the overall design. Both approaches have their advantages, but the better choice depends on what you want from your new space. 1. What Do Studio Shed Kits Actually Offer? Think of a studio shed kit as a building system that gives your project a clear starting point. A supplier typically provides pre-engineered structural components, cladding, roofing and other items according to your selected design. You then arrange the required approvals, site preparation and installation. The biggest advantage? You don’t need to start every design decision from scratch. Why Homeowners Choose Studio Shed Kits Straightforward planning A kit gives you a defined structure, which can make design decisions, material ordering and installation planning easier. Flexible design choices Many modern kits let you adjust dimensions, roofing styles, window positions, doors and cladding colours. You can create a practical home office or creative space without commissioning an entirely bespoke structure. Potentially lower building costs Pre-engineered designs can reduce some structural design and fabrication expenses. However, you’ll still need to budget for site preparation, foundations, installation and interior finishes. Predictable material requirements A detailed kit package helps you understand what the supplier will deliver. You can then organise the remaining work around those components. I wouldn’t assume every kit offers the same inclusions, though. Some suppliers provide the structural shell, while others offer additional insulation, windows or fit-out options. 2. What Makes a Custom-Built Studio Different? A custom-built studio gives you more freedom to shape the building around your exact requirements. Instead of selecting a starting design and modifying it, you work with a designer, builder or building specialist to develop a solution for your space. Maybe your backyard has an awkward corner. Perhaps you need extra ceiling height for photography equipment or a separate recording booth that keeps noise away from the house. A custom approach can accommodate these requirements more directly. When Custom Construction Makes Sense I’d consider a custom-built studio if you need: Custom construction also gives you greater control over materials and interior finishes. However, that freedom usually brings more decisions, additional design work and potentially higher costs. The key distinction is simple: a kit starts with an engineered building system, while a fully custom studio starts with your individual brief. There’s also a middle ground. A configurable kit can offer substantial personalisation without requiring a completely bespoke design. 3. Before You Choose: Check Approvals and Cyclone Requirements Here’s where I become a little less interested in beautiful window frames and a lot more interested in structural engineering. In Bowen, Mackay and the Whitsundays, your studio shed must suit local wind conditions, property constraints and its intended use. Understand Local Building Approval Requirements Don’t assume a small backyard structure automatically avoids building approval. The Queensland Government’s guidance on building work that may not need approval explains that the small tool shed exception excludes tropical cyclone areas. Before ordering your kit or finalising a custom design, ask a licensed building certifier to assess your plans. Check: Can You Use a Studio Shed as a Living Space? A backyard shed doesn’t automatically qualify as a legal dwelling. Queensland building rules distinguish non-habitable Class 10a sheds from buildings that provide habitable accommodation. If you want to sleep in the studio, add residential facilities or create a separate dwelling, discuss the appropriate building classification and approvals with your certifier before construction. Even a dedicated home office deserves an early discussion about its intended use. Neither a prefabricated kit nor a custom design automatically gives you permission to use the building for every purpose. 4. Studio Shed Kits vs Custom-Built Studios: Key Differences Both options can create a comfortable, attractive backyard workspace. Their biggest differences involve design freedom, project management and overall construction complexity. Feature Studio Shed Kits Custom-Built Studios Initial design Starts with a pre-engineered system Starts with a tailored design brief Cost Often more economical for straightforward projects May cost more due to bespoke work Design flexibility Good, depending on supplier options Greater freedom for unusual requirements Construction timeline Can reduce some material preparation time May need longer design and procurement stages Installation Requires suitable foundations and assembly Requires coordinated custom construction Interior finishes Usually separate or optional Can form part of the overall design Cyclone compliance Requires suitable site-specific engineering Requires suitable site-specific engineering Best suited to Offices, hobbies and uncomplicated layouts Specialist spaces and challenging sites I wouldn’t choose based on this table alone. A premium kit with insulation, specialist glazing and complex site work might cost more than a simple custom structure. Image suggestion: Insert a side-by-side comparison of a compact kit studio and a larger custom-built studio, highlighting differences in layout, windows and design features. 5. Which Option Costs Less in Bowen, Mackay and the Whitsundays? Let’s talk money, because a beautiful backyard studio won’t feel quite so relaxing if the final bill catches you off guard. For a straightforward layout, a studio shed kit often offers a more economical starting point. Standardised components can simplify material planning and reduce some design costs. A custom-built studio may require additional design, engineering, fabrication and specialist labour. However, the initial construction price tells only part of the story.
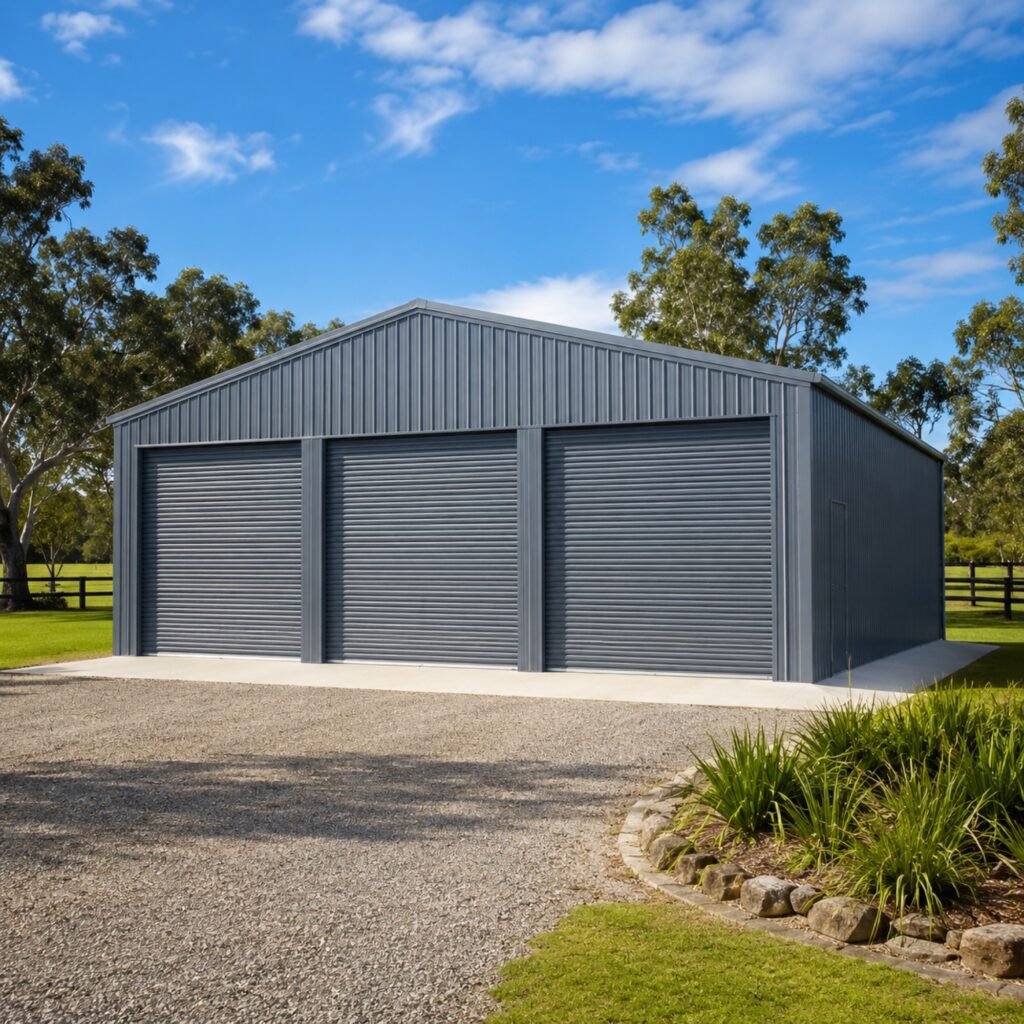
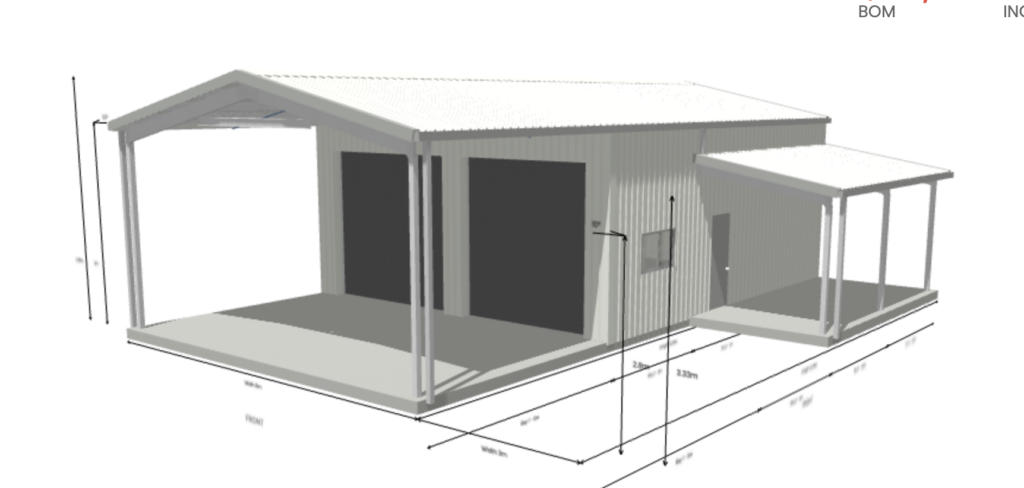
triple garage
Blog

Planning a Triple Garage in QLD? Compare Sizes, Layouts & Costs

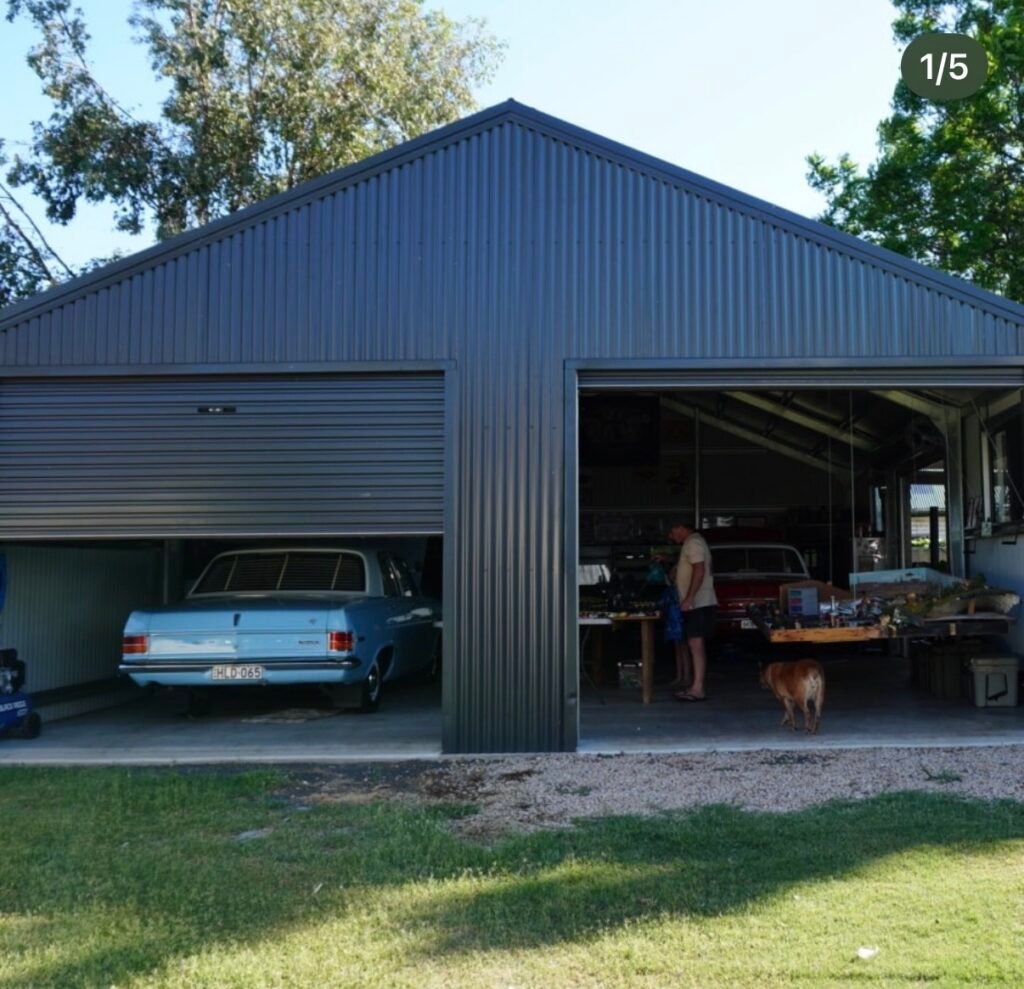
A double garage sounds spacious until you park two cars inside, add a few bikes, squeeze in the mower and suddenly find yourself playing Tetris every time you need a screwdriver. If that sounds familiar, a Triple Garage could give your Queensland property the breathing room it needs. But how big should you go? Is a standard 9m × 6m garage enough for three vehicles? Would a larger layout make more sense? And, perhaps most importantly, how much should you budget? I always suggest looking beyond the initial shed price because the right size, layout and site preparation can make a huge difference to your final cost. Whether you want secure parking for three vehicles or a workshop alongside your family cars, choosing the right triple garage shed starts with understanding your available space and everyday needs. In this guide, I’ll compare popular Queensland garage sizes, practical layouts, construction costs and budgeting considerations so you can plan with confidence. 1. What Size Triple Garage Do You Need in Queensland? Before comparing prices, work out how much space you actually need. A garage that looks generous on paper can feel surprisingly tight once you open the car doors. A standard Triple Garage commonly starts around 9 metres wide and 6 metres deep, giving you 54 square metres of floor space. However, I wouldn’t automatically recommend that size to everyone. Your vehicle dimensions, storage requirements and plans for future use should guide your decision. Standard Triple Garage Dimensions in Australia Here’s how popular garage dimensions compare. Garage Size (Width × Depth) Floor Area Suitable For 9m × 6m 54m² Three smaller vehicles or two cars with basic storage 9m × 7m 63m² Three vehicles with extra front and rear clearance 10.5m × 7m 73.5m² Larger SUVs, utes and additional storage 12m × 7m 84m² Three vehicles, shelving and a workshop area 12m × 9m 108m² Spacious parking, equipment storage and a larger workshop These dimensions represent example external footprints. Frame positions, wall thicknesses and door openings affect usable internal space. How Much Room Do Three Cars Actually Need? Let’s say you own two family SUVs and a dual-cab ute. A 9m-wide garage gives you three nominal 3m bays. While that might accommodate your vehicles, you still need enough room to open doors, walk between cars and reach storage shelves. I recommend measuring: My suggestion: If your budget and block allow it, compare a 9m × 7m layout against a 10.5m × 7m design before deciding. That extra width can make everyday parking much easier. 2. Compare Triple Garage Layouts Before Choosing a Design Once you settle on a rough size, think about how you want to use the space. Not every three-bay garage needs three identical parking areas. Sometimes, a different layout gives you much better value. Layout A: Three Individual Parking Bays This traditional design places three roller doors across the front. It suits households with multiple vehicles because each driver gets separate access. You can also close one bay while someone uses another. However, three door openings affect your frame design and overall price, so compare their dimensions carefully. Layout B: Two Parking Bays Plus a Workshop I particularly like this layout for homeowners who enjoy DIY projects or need somewhere to store tools. You can dedicate two bays to vehicles and use the third for: Consider a personal access door so you can enter the workshop without opening the main roller door. Layout C: Two Wide Parking Spaces and Flexible Storage If you don’t regularly park three vehicles, consider a larger shared opening with a separate storage or workshop bay. A wider opening can improve access for larger vehicles, although the structural design and garage door specifications will determine what’s practical. The key is simple: Design the layout around how you live, not just how many cars you own. 3. Check Your Queensland Block Before Finalising Garage Dimensions A spacious design means very little if it doesn’t fit your property. Before choosing your Triple Garage dimensions, I recommend checking the building location, driveway alignment, ground levels and distance from existing structures. Think about how vehicles will enter and exit. Will you have enough space to turn? Can you open all the roller doors without blocking another vehicle? What About Council and Building Approvals? Most full-sized three-bay garages require building approval in Queensland. You may also need planning approval, depending on your council area, property zoning and proposed design. The Queensland Government’s building approval guidance explains the limited circumstances where minor building work can proceed without building approval. A full-sized garage generally exceeds the small-shed exemption limits. Before committing to a design, check with your local council and building certifier about boundary setbacks, site coverage, easements and relevant property overlays. Also, don’t overlook your driveway. A well-planned garage should make parking easier, not turn every arrival into a complicated reversing exercise. 4. How Much Does a Triple Garage Cost in QLD? Now for the question everyone asks: What’s the actual price? The cost depends on whether you buy a steel garage kit or arrange a complete build with a concrete slab and professional installation. For preliminary budgeting, here are broad indicative 2026 Australian-market price ranges. Your Queensland location, engineering requirements and site conditions can change these figures significantly. Garage Option Indicative Cost (AUD) What to Expect Standard steel garage kit 15,000–30,000+ Supply-only package; inclusions vary Basic completed steel garage 40,000–75,000+ Typical allowance for slab, erection and standard garage components Larger or higher-specification garage 60,000–90,000+ Additional size, height, structural requirements or upgrades These ranges provide general budgeting guidance, not fixed Queensland prices or supplier quotes. Confirm GST, freight, doors, slab works, approvals and installation inclusions with each supplier. Does Garage Size Affect the Overall Price? Absolutely, but the relationship isn’t always straightforward. A larger garage needs more steel, cladding, roofing and concrete. However, increasing the floor area doesn’t necessarily increase every cost at the same rate. For example, moving from 9m × 6m to 9m × 7m increases the floor

storage sheds plan
Blog

Storage Sheds in Airlie Beach: How to Plan Space, Security, Ventilation & Access

Living in Airlie Beach has its perks. You’ve got beautiful coastal views, warm weather and plenty of reasons to spend your weekends outdoors. But all that outdoor living comes with one familiar problem: where do you keep the gear? Fishing rods, camping equipment, gardening tools and paddleboards can quickly turn your garage into an obstacle course. That’s where Storage Sheds make a real difference. A well-planned shed gives your belongings a proper home without taking over your living space. However, in Airlie Beach, you need to think beyond four walls and a roof. Tropical humidity, heavy rain, salty air and cyclone conditions all influence how well your shed performs over time. If you’re exploring Sheds Airlie Beach, I recommend starting with a practical plan rather than choosing the first design that catches your eye. Think about what you’ll store, how often you’ll need access and what your property can comfortably accommodate. A little preparation now can save you plenty of frustration later. 1. Start With What You Actually Need to Store Before you choose a shed size, take stock of everything you want to keep inside. I know, measuring fishing rods and counting garden tools isn’t exactly an exciting weekend activity. But guessing how much storage you need often leads to one of two problems: a cramped shed or an unnecessarily expensive one. Start by dividing your belongings into three groups: Now consider which items need floor space and which ones can sit on shelves or wall-mounted racks. For example, a lawn mower needs easy access near the entrance, while camping chairs can sit on an overhead rack. Likewise, long fishing rods may fit neatly along a wall rather than occupying valuable floor space. My advice? Plan for your actual belongings first, then allow some room for future purchases. After all, storage needs rarely get smaller. 2. Choose the Right Shed Size and Position When planning Storage Sheds in Airlie Beach, size matters, but usable space matters even more. A large shed with poor organisation can feel surprisingly cramped. Meanwhile, a smaller shed with smart shelving and a practical layout can handle an impressive amount of equipment. Here’s a general guide to help you compare common shed sizes. Shed Size Suitable Storage Uses What to Consider 3m × 3m Garden tools, bicycles, household equipment Compact footprint with limited walking space 3m × 6m Outdoor equipment, shelving and a small work area Good separation between storage zones 6m × 6m Multiple large items, workshop equipment and bulk storage Requires more land and suitable access 6m × 9m Machinery, recreational equipment and extensive storage Larger footprint, structural and approval considerations These dimensions offer planning examples, not guaranteed capacities or approval exemptions. Consider the Location Carefully A suitable position should offer convenient access without compromising drainage or the rest of your outdoor space. I recommend checking: Airlie Beach properties can feature slopes, narrow side access and uneven ground. These conditions may influence earthworks, foundations and installation costs. 3. Check Local Approvals and Cyclone Requirements Here’s something I would never overlook when planning Storage Sheds in North Queensland: the weather. Airlie Beach sits in a tropical cyclone-prone region. Strong winds can place enormous pressure on roofing, doors, wall cladding and structural connections. A lightweight shed without suitable engineering and anchoring can become a serious hazard during extreme weather. Understand Shed Building Approval Requirements Before construction, check your property’s planning requirements, the proposed shed dimensions and any relevant site constraints. Whitsunday Regional Council’s building and compliance guidance explains how building approvals work and when a qualified building certifier needs to assess a project. I recommend confirming these details before ordering materials: Don’t assume a small shed automatically qualifies for an approval exemption. Queensland’s rules include important conditions for cyclone areas. Choose Cyclone-Appropriate Construction A strong shed needs more than thick steel panels. I would pay particular attention to roof connections, bracing, wind-rated doors, structural fasteners and engineered foundations. Ask your supplier or designer how the complete structure handles site-specific wind loads. Even a sturdy roof won’t help much if inadequate connections allow severe winds to lift the structure. 4. Plan Ventilation Before Heat and Humidity Become Problems A shed can look excellent from the outside and still feel like an oven by lunchtime. Airlie Beach’s tropical climate creates challenges for enclosed storage spaces, particularly during warmer, humid months. Poor airflow can encourage condensation, musty smells and mould growth. It can also accelerate corrosion on vulnerable metal items. When designing Storage Sheds, I like to consider ventilation early rather than adding random openings after construction. Allow Air to Move Through the Shed Depending on the design, useful ventilation options may include: Wall vents: Position suitable vents to encourage airflow between different parts of the shed. Roof ventilation: Consider compatible roof ventilation systems that help warm air escape. Insulation and condensation control: Use suitable roof insulation or condensation-control products to help reduce temperature extremes and moisture forming beneath roofing. Natural airflow: Position openings thoughtfully while considering rain exposure, security and prevailing weather. However, there’s a catch. Airflow helps with everyday moisture control, but poorly designed vents can also allow wind-driven rain into the shed. Choose ventilation components that suit the building’s wind classification. Ask your designer to incorporate them into the engineered design rather than cutting extra openings through structural cladding later. For moisture-sensitive electronics, paperwork or valuable fabrics, ordinary shed ventilation may not provide enough protection. You may need additional humidity control or another storage location. 5. Make Security Part of the Original Design You wouldn’t leave expensive fishing equipment or power tools sitting in an unlocked backyard cupboard. So why treat shed security as an afterthought? Modern Storage Sheds can provide practical protection, but effective security starts with the doors, frames and access points. Choose Strong, Reliable Doors I recommend comparing door options based on what you’ll store and how often you’ll access the shed. Roller doors work well for larger equipment, while personal access doors allow quick entry without opening the entire shed.

Garages Cannonvale
Blog

Garage Sheds in Cannonvale: Site Access, Door Clearance, Storage & Coastal Planning

A garage shed sounds like a straightforward addition to your property. Pick a size, choose a colour, add a roller door, and you’re ready to go. But in Cannonvale, a good garage needs more thought than simply finding an empty patch in your backyard. Between the coastal weather, sloping blocks, narrow driveways and everyday storage needs, several small details can make or break your project. A garage might look spacious on a drawing but feel surprisingly tight once you park your car, open the doors and squeeze past a stack of fishing gear. When I look at custom garages in Cannonvale, I always consider how the building will work on the actual property. Site access, door clearance, drainage and storage deserve just as much attention as the shed’s dimensions. Get these details right from the beginning, and you’ll create a garage that makes daily life easier. 1. Start With Site Access Before Choosing Your Garage Size Here’s something many homeowners overlook: having enough backyard space doesn’t necessarily mean you have enough access to build a garage. Cannonvale has a mix of established residential blocks, newer housing areas and properties with sloping driveways. Each presents different challenges when you plan a garage shed. I suggest checking three things before settling on a design. Can construction vehicles reach the site? Your shed materials, concrete trucks and installation equipment need a practical route onto your property. Walk along the access route and check the gate width, driveway slope, overhead powerlines, trees and existing structures. Also consider whether a delivery truck can unload materials safely. A narrow side entrance might suit your car perfectly but create problems when builders need to move long steel components. Can you drive into the garage comfortably? Think about your daily driving routine. Will you drive straight in, reverse around a corner or make a tight turn between the house and fence? I recommend marking the proposed garage footprint on the ground with stakes and string. Then test the approach with your actual vehicle. This simple exercise can reveal awkward turning angles before you commit to the layout. Will the garage affect other access? Don’t forget bin collection, garden maintenance, pedestrian paths and access to outdoor utilities. The best Garages Cannonvale layouts make room for all these activities without turning every weekend chore into an obstacle course. 2. Get Your Garage Door Clearance Right A spacious garage means little if your vehicle barely fits through the entrance. Door clearance deserves special attention, particularly if you own a ute, SUV, boat trailer or vehicle with roof racks. Measure your vehicle, not just the garage Start with your vehicle’s actual measurements, including mirrors, roof accessories and anything you regularly tow. Next, consider how much room you need to move comfortably. For instance, a door opening that’s only slightly wider than your car might technically accommodate it. However, daily parking will require more care than you probably want. When planning Garages Cannonvale projects, I would compare these measurements before choosing a roller door. What to Measure Why It Matters Practical Planning Tip Door opening width Controls how easily you enter and exit Allow comfortable space around mirrors Door opening height Affects taller vehicles and roof racks Measure the vehicle at its highest point Internal garage depth Determines parking and storage space Allow room to walk behind the vehicle Garage ceiling height Affects overhead storage and door mechanisms Check the door’s required headroom Driveway turning space Makes parking easier Test the approach with your largest vehicle Don’t forget future vehicle upgrades Your current hatchback might fit inside a compact garage with room to spare. But what happens if you upgrade to a larger 4WD? I prefer planning around realistic future needs rather than designing everything to suit today’s smallest vehicle. Also, remember that your garage door opening will usually be smaller than the overall wall height. Roller door tracks, motors and structural components need their own space. A few extra centimetres on the drawing can save plenty of frustration later. 3. Check Cannonvale Council Planning and Building Requirements Before you order your shed, make sure your proposed location and building design meet the relevant planning and building requirements. Cannonvale falls within the Whitsunday Regional Council area, so your property’s zoning and site conditions can affect your options. I recommend using the Whitsunday Regional Council’s online planning tools to review your property’s planning information, including relevant flood and storm-tide mapping. What should you check? Your planning review should cover boundary setbacks, building height, site coverage, easements and any applicable hazard overlays. Some properties also need additional attention because of slopes, drainage conditions or existing structures. Another important point involves building approval. Don’t assume every small shed qualifies for an approval exemption. Queensland’s rules place conditions on minor building work, and the small-tool-shed exemption doesn’t extend to tropical cyclone areas. A building certifier can confirm the approvals and engineering documentation your particular garage needs. For Garages Cannonvale homeowners, checking these requirements early can prevent redesigns, approval delays and unexpected expenses. 4. Plan for Cannonvale’s Coastal Weather Living near the Whitsundays has plenty of advantages. Warm weather, beautiful scenery and easy access to the water make Cannonvale an attractive place to call home. But coastal conditions also create extra responsibilities for anyone building a garage. Choose a garage design that handles strong winds Tropical cyclones present a serious design consideration across the Whitsunday region. A garage needs suitable structural engineering for its location, including the roof, wall framing, bracing, connections and foundations. I would pay particular attention to the roller door. Large garage doors face significant wind pressure during severe weather. Make sure your supplier specifies an appropriate wind-rated door and checks how its supporting structure handles those loads. Don’t settle for a vague promise of a “strong shed”. Ask for engineering details that suit your actual site. Consider salt exposure and corrosion Coastal air can accelerate corrosion, particularly around exposed screws, hinges, brackets and metal connections. For Garages Cannonvale properties, material selection should reflect

shed design Mackay
Blog

How to Future-Proof Your Shed Design: Doors, Structure, Access & Extra Bays

Ever built a shed and then wished you’d made it bigger? Whether you’re storing a caravan now or planning to one day, designing your Mackay shed for expansion can save you time (and headaches) later. In this guide, I’ll walk you through planning every aspect from doorways to steel frames – so your shed can grow with your dreams (and your tool collection). I’m talking large roll-up doors, beefy portal frames, and ready-made foundations. By the end, you’ll see how a bit of forward-thinking in your shed design can mean no regrets when it’s time to add a new bay or two. Ready to future-proof your space? Let’s dive in. Planning for Growth: Lay the Right Foundation First up, plan for expansion from day one. Imagine the size you need now (maybe a garage for your ute) and one day in the future (room for a tractor, or a workshop for side-hustle projects). Here’s what to consider: By getting the groundwork right, you’ll have a rock-solid base ready for anything. Think of it as building your shed’s backbone – strong now, and ready for new bones (bays) later. Doors & Access: Open Up Possibilities When you plan to expand, door placement and size become a big deal. You want doors that are wide and tall enough for whatever you’ll store tomorrow, and easy to reconfigure. Here’s how to approach it: By thinking about your future self and future vehicles – you’ll avoid the “oh no, it won’t fit” moment. Remember: installing a bigger door now is easier than cutting a new hole in a wall later. Strong Structure: Beams, Frames & Cyclone-Proofing Mackay sits in a cyclonic wind zone, so our sheds need to stand up to severe weather. Fortunately, robust design is a plus when expanding later. Here’s what I pay attention to: Table: Expansion Methods Compared Method Pros Cons Expandable End Wall Easiest future bay addition; engineered to carry added load. Higher initial cost (stronger posts). Post-and-Beam Wall Cheaper initially; uses less steel. Harder to add; limits door/bench placement. Lean-to (on side) Cost-effective for lateral space; simpler build. Exposed side (weather); different roof slope. Separate Annex Totally independent; no disturbance to original. Takes extra land; double foundations. With these structural choices, your shed will be ready to grow without undermining strength. Think of it like building your LEGO kit: leave exposed studs and connectors so future bricks (bays) click right on. Extra Bays & Layout: Scale Up When You’re Ready So you started with a 2-bay shed and later want a 3rd (or 4th). Here’s how to make that as painless as possible: Visualize, your current shed is just starting, and each bay is like a Lego brick. By aligning them and leaving the edges exposed, you can literally snap on the next brick when the time comes. Climate & Location: Design for Mackay Conditions Let’s not forget local flavor. Mackay’s tropical climate and lifestyle throw in extra considerations: Tailoring the design to Mackay’s heat, humidity and lifestyle means your expanded shed won’t just stand up to weather – it’ll become a better fit for how we live in tropical Queensland. Final Checks: The Big Picture Before you start building, double-check these: Conclusion Designing your shed for future expansion is like planning a road trip with a trailer hitch ready to go – it just makes life easier when the time comes. By choosing the right doors, planning strong steel frames and saving space in the foundation for extra bays, you save money and stress down the track. Remember, Mackay’s climate and regs shape how we build – lean on local expertise for wind ratings and approvals. Now you’ve got the knowledge: go ahead and sketch that dream shed with the next bays already penciled in. And when you’re ready to bring it to life, a local builder can turn those plans into reality. For example, shed design Mackay specialists can help tailor an expandable shed to fit your property, budget and style. Take action – discuss your ideas with a designer or get a quote. Your perfect, future-proof shed is waiting! Ready to make your shed dreams grow? Talk to the team at Alchemist Sheds today and start planning a build that can expand as you do! Frequently Asked Questions Can I add a bay to my existing shed? Absolutely. If your current shed has the right footings and one expandable end wall, a contractor can bolt on a new steel bay. It involves matching the frame, extending the roof, and tying in cladding – but with planning, it’s a straightforward extension. What doors should I choose for a big shed? Go big! Extra-wide roller doors or sliding doors are popular for large sheds. Ensure they’re rated for local wind loads. If you might install overhead crane rails or store tall vehicles, consider heights of 3–4m. Most importantly, choose doors that suit your needs (security, insulation, speed of operation). Do I need council approval to expand my shed? Usually yes if your shed exceeds 10 m² or 2.4 m high, or if it encroaches on boundaries. In Mackay, even adding a bay can trigger a building approval, as you’re extending the structure. Check local regs: you may need a building certifier to approve the plans and a DA if you exceed site cover or height limits. How to prepare for tropical storms? Fasten everything securely. When building (or expanding), use wind-rated brackets and tie-downs on all frames. Install cyclonic door shutters or garage doors, and reinforce the roof and wall fixings (use screws in every second corrugation of Colorbond). Gutters should be sturdy with well-anchored downpipes. Regular maintenance – check anchors and seals each few years – keeps your expanded shed storm-ready.

Single Garage Shed Qld
Blog

Single Garage Shed Dimensions in Australia: Standard Sizes, Clearance & Layout Tips

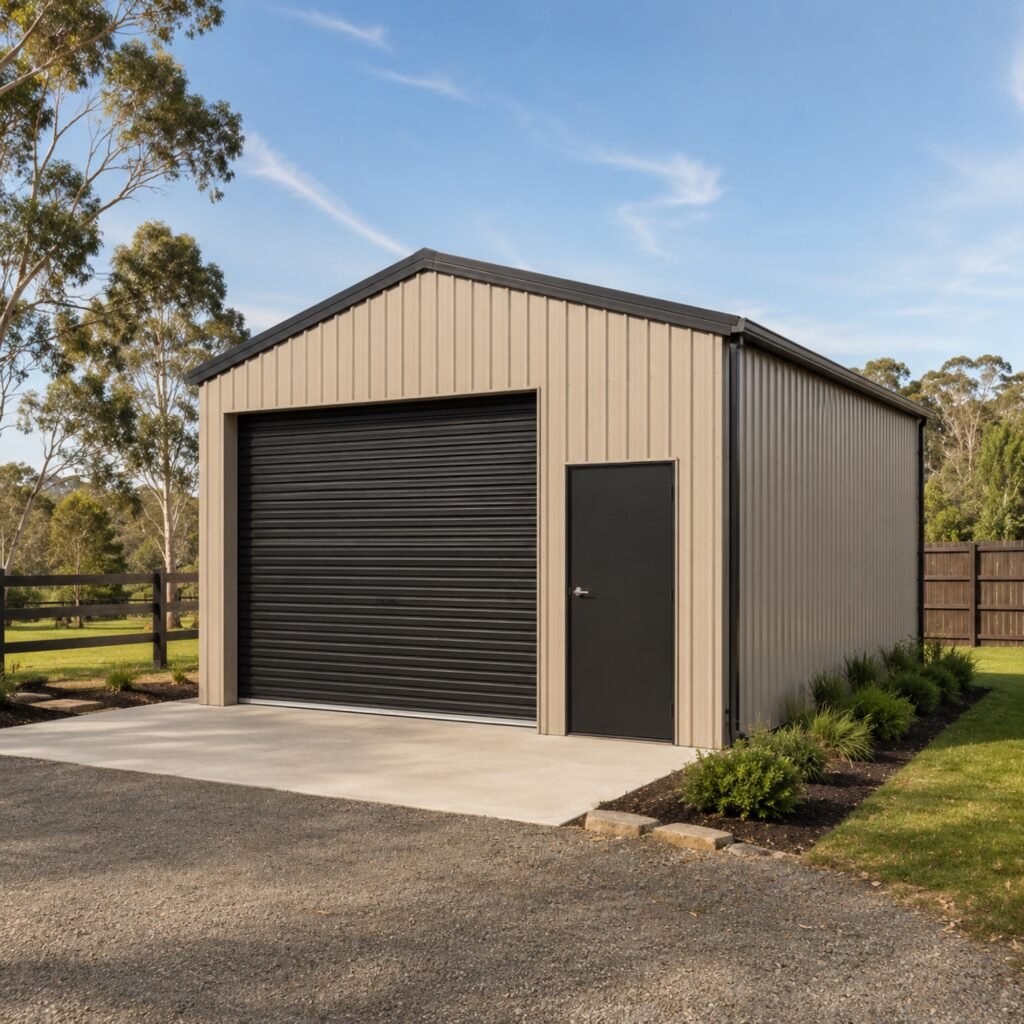
Whether you’re building a new home or upgrading an old one, planning the perfect single-car garage can feel like fitting a square peg in a round hole. The last thing you want is to finish construction only to discover your car barely fits (or worse, doesn’t). I’ve heard all the stories – the family sedan that squeezed in by a whisker, the tall SUV with a roof rack clipping the ceiling – and I’m here to help you avoid those pitfalls. Think of this as a friendly chat about garage dimensions, clearances and layout smarts, Queensland-style. By the end, you’ll know exactly how much room your wheels need, where to leave walking space, and how to align that driveway so you don’t do any parking gymnastics. Let’s dive in! Standard Single Garage Dimensions A single-car garage in Queensland often starts around 3.0m wide by 6.0m long. Aussie standards say the minimum internal width is about 3.0m and length 5.4m, but most builders recommend a bit more breathing room around 3.3–3.6m wide and 6.0m long for modern vehicles. In practice, you’ll commonly see single-garage kits offered in widths of 3.0m, 3.6m or 4.2m, with lengths from 6m up to 9m or more, depending on your needs. These figures are the internal clear space (sheet-to-sheet). Always add a bit extra for wall framing or insulation if you’re lining the walls. For example, a 3.0m × 5.4m internal garage might require around 3.3m × 5.8m on the plan once you factor in frame spacing and insulation. Use case Internal (W × L × Wall H) Notes Compact car 3.0m × 5.4m × 2.4m Bare-bones fit, tight door swing Family sedan/SUV 3.3m × 5.8m × 2.7m Comfortable for sedans or small SUVs Ute or large SUV 3.6m × 6.0m × 2.7–3.0m Fits utes with roof racks or tow bar For tight lots, one trick is a single-piece roller door (no centre post) to maximise the entrance width. Always measure your actual vehicle (often ~2.0m wide for a dual-cab ute) and build in at least 300–600mm of space on each side, or you’ll be doing the squeeze dance every time you park. If you’re still unsure, consider talking to a local Single Garage Shed builder – a pro can help dial in the perfect dimensions for your car and space. Clearance and Door Considerations Even with the footprint set, leaving room around the car is crucial for everyday use. As a rule of thumb, aim for at least 300–450mm clearance on each side of the parked car. For most sedans or small utes, around 0.3–0.5m per side lets you open doors without scraping the walls; if you drive a wide 4WD, you might want closer to 0.6m. Don’t forget the driveway ramp or apron. A garage floor usually sits a few centimetres above outside ground to prevent flooding, so a short concrete ramp (or fully flush slab) is needed. In Queensland, a gentle driveway slope (about 1:8) is comfortable. On a flat block, a 300–500mm concrete apron in front of the door is ideal to avoid bottoming out your bumper. Always check the swing of your car turning in: if space is tight, you may decide to put the garage on the side of the house rather than the front, to make manoeuvring easier. Layout and Positioning Tips Beyond dimensions, consider where to put the garage. It should face your driveway head-on for easy access – don’t skew it at an odd angle unless you have a very specific reason. Orientation matters too: in QLD, a north or north-east-facing door can help keep afternoon sun and heat at bay. If you plan a little workshop bench inside the garage (a workbench along one wall), try to align that wall where you have convenient access from the house or garden. One final tip: keep a little extra on your site plan. Having the slab 300mm longer or wider than the shed means future-proofing – maybe a bigger 4WD or a trailer arrives down the track. Building Permits and Regulations Small garden sheds in QLD (≤10m² and ≤2.4m high) often don’t need approval, but a full-sized single garage usually does. As Brisbane City Council notes, a shed up to 10m² (with height ≤2.4m) is often allowed without a building application. However, a standard garage (say 3.0×6.0m = 18m², at 2.7m high) exceeds those limits, so you’ll need a building permit and compliant plans. That means getting (or working with) an engineer or certifier for a site-specific design. They’ll tie the slab into the house footing (per AS 2870), and check wind-load requirements for your area (remember, North QLD can be cyclonic). In practice, your shed supplier often offers a “permit kit” or will liaise with a certifier. You’ll likely need to supply a site plan, garage elevations (showing eaves height and roof pitch), and a foundation design. In short, a typical single-car garage is a Class 10a outbuilding in the NCC, so just follow the QLD Development Code and Dwelling House rules – your certifier will guide you through the checklists. Conclusion Getting your single garage shed right boils down to space and sense. Allow a bit more room than the bare minimum: those extra few millimetres can save you a lot of scrapes, eye-rolls and parking hassles. Factor in car and door clearances, double-check the driveway slope, and respect the approval process. With these tips in hand, you’ll be armed to plan confidently. Next step? Get a few quotes and have a laugh about how easy this looks on paper. After all, nothing beats the satisfaction of pulling into a garage that fits just perfectly. Ready to lock in your measurements? Talk to a professional about customising your single garage design. Whether it’s DIY or a builder, the right expertise will ensure your wheels slide in smoothly every time. Let’s get building and safe parking! FAQs Q: What are the standard dimensions of a single garage shed in Australia?A: Common single garages start around 3.0m

Blog

Skillion Roof Garage: The Complete Building Guide

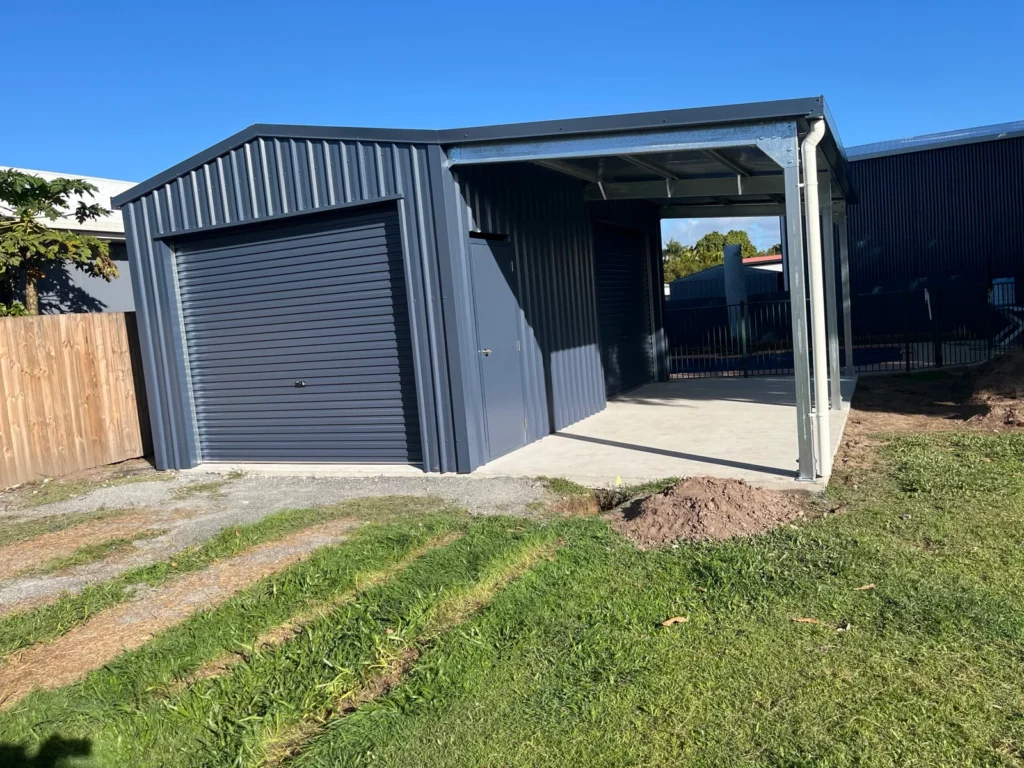
You know that moment when you step off the ferry, feel that Whitsunday’s breeze, and think, “Yep… I live here”? Then you get home and your car sits outside like a sunbaked croissant, slowly collecting salt spray, leaf gunk, and regret. I wrote this guide for that exact mood and for your future self. If you want a garage that looks sharp, handles tropical downpours, and actually fits your lifestyle (kayaks, tools, surfboards, gym gear, the whole personality), a Skillion Roof Garage can hit the sweet spot. I’ll keep this practical, local, and easy to follow—no tradie-speak required. If you want a shortcut to a clean, professional finish, I suggest you talk to a Professional Skillion Roof Garage builder who understands local wind, rain, and coastal corrosion. You still steer the vision, I just don’t want you carrying the whole build alone. A skillion roof uses one single slope instead of two roof faces meeting at a ridge. That one-plane look feels modern and minimalist, and it gives you something even better than style points: predictable drainage. When I plan a Skillion Roof Garage, I decide where the water runs, where the gutters sit, and where the “high side” creates extra internal height for airflow and storage. Whitsunday’s weather pushes hard, so I design for it. Local climate data around the region (think Proserpine/Hamilton Island area) shows roughly 1.4–1.5 metres of rain a year, and the wet season carries most of it. That reality makes roof pitch, gutters, and stormwater management more than “nice extras” ; they become your leak-prevention system. So here’s what I’m going to help you do: choose the right size, nail roof pitch and drainage, pick coastal-friendly materials, and build a Skillion Roof Garage that stays solid in high winds and still looks good when your mates swing by. Before you buy materials or book a slab, handle approvals like the first real build step not the annoying paperwork step. In this region you’ll often work with a private certifier, and they’ll check compliant plans and inspect key stages of the job. For the most local starting point, I use the Whitsunday Regional Council Building, Plumbing and Compliance page. Design decisions that make a Skillion Roof Garage feel “custom” I start a Skillion Roof Garage design with three questions that save you from future annoyance: How do you use it on a random Tuesday?If you only park a car, you can keep it lean. If you’ll store boards, run a workshop, or build a home gym, I’d rather give you extra width now than watch you play Tetris forever. Where should the “wet side” go?A skillion roof sends water to one edge. I point that low edge toward a spot where downpipes and stormwater make sense. I avoid draining toward your entertaining area unless you love the soundtrack of a waterfall during summer storms. How will you keep it cool and breathable?Hot, still air turns garages into ovens. I use high-wall vents, whirlybirds, louvres, and smart eaves detailing so the air actually moves. Now I add the style layer. A Skillion Roof Garage looks premium when you get proportions right: a confident high wall, clean vertical lines, and a wide opening. If you drive a dual-cab ute, measure it and add clearance—because scraped mirrors feel very “not GQ”. Here’s the quick roof-shape comparison I use when people sit on the fence: Roof style The vibe The practical note When I pick it Skillion roof Modern, sharp Water runs one way, so you must plan gutters well You want contemporary looks + controlled drainage Gable roof Classic Water splits both sides You want a familiar shape and balanced runoff Hip roof Full-house look More framing and corners You want a more complex roofline and accept more detail Roof pitch and drainage without the headache I keep one rule at the centre: I match the roof pitch to your roof sheeting profile and roof run length. In high-rain areas, that combo matters more than the “look” of the angle. As a practical example, corrugated-style roofing often needs a steeper pitch than many deck-style profiles. Some deck profiles can run at lower slopes, but I only do that when the product limits, good detailing, and smart gutter sizing all line up. I don’t gamble with water. Step-by-step build guide I run this build like a clean playlist: track by track, no skipping. First, I lock in size, door placement, storage zones, and the low-edge drainage direction. Next, I line up drawings, wind rating, and certification requirements so the project doesn’t stall half-way. Then I prep the site, set levels for runoff, plan stormwater, and pour a slab that matches soil and loading.  After that I erect the frame, bracing, and tie-downs, install roof sheets with clean flashings, and finish with doors, lighting, and power points where you’ll actually stand. If you want one detail that pays off forever, add a personal access door. You’ll use it every day. Materials that survive salty air and storm season On Whitsundays, salt and humidity don’t care about your budget. They chew through the wrong choices with zero remorse. When I spec a Skillion Roof Garage near the coast, I focus on corrosion resistance, compatible fixings, and clean detailing. Component What I prioritise Why it matters here Roofing and walling Coastal-suitable pre-finished steel options Salt spray and humidity speed up corrosion Fasteners Correct grade/coating, matched to the cladding Mixed metals can trigger corrosion issues Gutters and downpipes Capacity + robust brackets One roof slope sends all water to one edge Ventilation High vents + airflow path Hot, humid air needs an exit plan Cost and value: what you’ll pay for, and what you’ll keep I won’t pretend every Skillion Roof Garage costs the same, because access, wind rating, size, and finishes move the number fast. I build the budget in layers. Base layer (non-negotiable): approvals, drawings, slab, frame, bracing, roof, walls, gutters.Comfort layer: ventilation upgrades, insulation, better doors, internal lining.Lifestyle layer: workshop

Blog

Caravan & Boat Sheds: Essential Sizes, Costs & Options Guide

Imagine if you pull into your driveway after a long weekend exploring the Whitsundays. Your shiny caravan glints in the sun as you pat its side, feeling proud as punch. But then you catch sight of storm clouds gathering on the horizon. Heart sinking, do you really want that pride-and-joy stranded under the elements?  Out here in North Queensland, years of salty sea spray, scorching sun, and the odd cyclone will eat away at your favourite rig if it isn’t sheltered. That’s where caravan and boat sheds come in the unsung heroes of Aussie backyard life, keeping our wheeled and waterborne toys safe and dry. Choosing the Right Size Sizing is everything. I can’t tell you how many times I’ve seen someone try to shoehorn a camper into an undersized shed. We’re not talking about your average garden shed here – a caravan or boat is tall, long and heavy, and it needs space. Personally, I always say: treat your shed like planning a small house.  That means at least a 3.6m (12ft) roller door height – 4m is even safer if you can swing it – plus deep, reinforced footings. And remember, North Queensland is a cyclone country, so you want the frame engineered for our wind zone.  That’s why I recommend working with a trusted caravan and boat shed builder, who knows the local quirks (wild winds, hot sun and sandy soil) inside and out. They’ll double-check your clearance, wind rating and permits so you don’t end up with a beautiful shed that doesn’t fit your vehicle. Design & Material Options Once you’ve got the size pinned down, design is pretty flexible. You can pick your roof style – skillion, gable, or even a curved roof if you need extra height for taller boats. Colorbond sheds come in all sorts of colours – pick one that matches your house.  Want extra ventilation? Drop in a louvre or two. Need lights or power? Just add them to the plan. In short, customisation is the name of the game. You can have skylights, gutters, big roller doors or wide sliding gates – your shed will fit your life, not the other way around. Open vs Enclosed Shelters Imagine rolling your trailer under a classic open-front boat shelter: it’s basically a roof plus a back wall and a couple of strong posts. This style is like a giant carport – you drive straight in and out without walls to block you. An open shed still keeps sun and rain off your pride and joy, and costs a lot less steel than a fully enclosed barn.  It’s great for quick access, just pull your boat under cover and back out in seconds. Just remember, you won’t have side walls to lock up or to block flying debris. It’s great for breeze and budget, but not as secure as a fully closed shed. Now picture a fully enclosed boat shed, basically a mini warehouse built just for your rig. Three walls, a roof and a big wind-rated roller door up front mean it locks up tight (think Fort Knox for your boat). It costs more in steel and labor, but gives total protection: no prying eyes, no weather damage, no falling branches.  In cyclone season you can batten everything down and your gear stays snug inside. Add some LED lights, a workbench or even solar panels on the roof – suddenly that shed isn’t just storage, it’s a workshop or man-cave (or even a kitchenette on occasion). Permits & Planning What about approvals and red tape? Good question – rules do apply. In Queensland, any sizable shed typically needs building approval, especially if it has walls or sits on a concrete slab.  On the bright side, if your shed is on rural land, Queensland’s Development Code Part 3.7 cuts a lot of red tape for farm and vehicle storage sheds (for example, it eases up on fire-safety and lighting requirements). Either way, before pouring concrete or ordering that steel kit, talk to your council or a private certifier – their advice can save headaches later. Budget & Costs Let’s talk turkey: how much will it all cost? Great question – and one I get all the time. Costs vary by location (we’re in a cyclonic zone, so expect higher specs here) and by custom features. Generally, a basic steel shed kit starts around $150–$400 per m², plus concrete slab and installation. Here’s a rough breakdown of typical budget items: Item Estimated Cost Steel shed kit $150–$900 per m² (varies by size, style, and region) Concrete slab & footings $120–$350 per m² (standard vs heavy-duty) Installation & labor ~20–45% of kit cost (higher in cyclone zones) Wind-rated roller door $4,000–$12,000 each Insulation/finishes $12–$80 per m² (helps cut heat) Gutters & drainage $1,500–$8,000 total Permits & approvals $500–$2,000 (approx.) Contingency ~10–15% of total budget (always good to have) Prices jump in a cyclonic zone, since heavy engineering and bigger doors are needed. Skimping on specs can cost you later – the cheapest quotes often cut corners. From experience, spending a bit more on a properly engineered, wind-rated shed saves hassles (and roof dents) down the track. Extras like insulation add cost upfront, but can keep your boat or caravan nice and cool during tropical summer. Conclusion & Next Steps At the end of the day, a caravan & boat shed is about peace of mind and protecting your investment. Think of it like insurance you can see and touch. You do the trips; I do the heavy lifting to keep your toys in tip-top shape, mate.  Whether you go open-air or fully decked out, plan carefully and work with someone who knows this part of the world. If you’ve got questions or need a hand, reach out to a local shed expert – they can save you time (and money!). Happy travels, and may your rigs always stay high and dry under a solid roof! Frequently Asked Questions

Blog

Door Garden Shed: A Complete New Build Guide

Building a backyard hideout is both fun and practical and a sturdy door garden shed can add style and storage. Imagine stepping outside to grab tools from a mini-workshop you built yourself. If your yard is a jungle of clutter, a well-planned shed can turn chaos into calm. Believe it or not, it all starts with a simple plan and a bit of DIY spirit. Why Build a Garden Shed? Let’s be honest, storing garden gear in the garage or house is a drag. A well-designed door garden shed gives everything a dedicated place. You can stow bikes, mowers and tools neatly out of sight. Plus, it’s a chance to flex your DIY muscles and add personal style. Whether you plan a mini studio, a workshop, or simply extra storage, a custom shed seriously ups your backyard game. Plan, Permits & Approvals in Queensland Before swinging that hammer, check the rules. In Queensland, small garden sheds (≤10m² area and ≤2.4m high) usually don’t need building approval if they meet setback requirements.  If paperwork and power tools aren’t your thing, Reliable Garden Sheds Builder in Whitsundays can handle the hard parts. Plan carefully, follow the code, and keep neighbours on side. Choosing the Perfect Spot After permits are sorted, pick a flat, dry spot in your yard. Easy access is key, you want to wheel materials in and out without trouble. Avoid soggy or unstable ground (waterproofing is a pain). If possible, build on level ground (sloped sites mean extra work leveling). Leave space around the shed for maintenance and airflow. Think about the sun too: afternoon shade can keep things cooler. In short, level, well-drained ground with clearance around it = happy building day. Material Matters: Wood, Metal or Resin? In Australia, garden sheds are typically built from wood, steel (Colorbond) or resin/plastic. Each has trade-offs: Pros: Durable, fire- and pest-resistant, very low maintenance. Cons: Can get hot inside on summer days and noisy in heavy rain (though modern coatings greatly reduce rust). Pros: Won’t rust or rot, very easy to assemble. Cons: Limited styles/colours and less sturdy in severe storms. Always buy good-quality materials. For wood, choose dry (kiln-dried) timber. For steel, go for genuine Colorbond or galvanized panels. And whatever you choose, anchor the base firmly: a solid concrete slab or secure piers will keep your shed stable (no one wants it sailing away in a wild Whitsundays gust). Doors: More Important Than You Think A door garden shed is nothing without a great door. The door is where style meets function, so let’s pick it wisely. Below is a quick comparison of common shed door types: Door Type Best For Advantages Drawbacks Hinged (single/double) Classic garden sheds Simple design, secure locking Needs clear swing space Sliding Tight corners/narrow plots Saves space, wide opening Complex tracks, higher cost Roller Vehicle or bike access Full-width access, very secure More expensive, needs overhead clearance Bi-fold (accordion) Very small sheds Folds neatly, no swing needed Complex mechanism, usually expensive We also consider door materials. In humid Queensland, metal doors (steel or aluminum) tend to last longer with minimal upkeep. Wooden doors look great and insulate well, but they must be painted or stained every few years to avoid rot. If you’re not confident building the door frame from scratch, try a pre-made door kit (it includes a door, frame, and hardware) to simplify installation. Finally, use a strong lock and weatherstripping a tight seal keeps rain, pests and dust out. Step-by-Step Building Process Measure twice before cutting anything. A small mistake in a DIY project can cause big headaches, so take your time. Conclusion Building a door garden shed is practical and rewarding. With the right planning a good spot, permits in place, and durable materials you’ll enjoy your shed for years. You’ve now learned how to pick a door, pour a solid foundation, and finish the details. It’s true: each step builds your confidence. Ready to get started? Sketch your plan and double-check local rules. Then gather tools or call in a builder. A well-built door garden shed will bring order and style to your home. What will you store in your new shed? Share your plans below or get shopping. Your perfect backyard retreat awaits! Frequently Asked Questions

Blog

Whitsundays Farm Sheds: Steel vs Timber – Which is Best?

Farm sheds hold tools, shelter tractors, and can even double as man-caves or she-sheds, an essential part of rural life. When it comes to picking between steel and timber, the debate is as old as the outback. In this blog guide, I’ll walk you through every factor, cost, durability, style, and more, so you can confidently choose the right shed for your Whitsundays property. Material Showdown: Strength, Style, and Story You might picture a gleaming Colorbond steel shed when you hear “steel,” or a charming rustic barn when you think “timber.” Each brings its own vibe. Steel farm sheds (built with galvanised or COLORBOND® steel) look modern and can handle harsh weather, while timber sheds offer cosy insulation and a classic look.  However, looks aren’t the only factor. Let’s break down the core differences. And if you need expert help locally, consider contacting the Trusted Farm Sheds Builder in Whitsundays for tailored advice. A metal-framed shed in the Whitsundays might stand up better to cyclones and salty sea air, but it can get scorching in the midday sun without insulation. A timber frame would stay cooler underfoot, but termites could see it as a tasty lunch if it’s not treated properly. It’s the age-old tradeoff: strength and simplicity of steel vs. warmth and tradition of wood. Timber sheds can feel downright cozy and fit right into pastoral settings, almost like a vintage farmhouse. That said, mother nature can challenge them: rain, humidity and marine salt air can warp wood over time. Steel, with COLORBOND® coatings tested in tropical conditions, avoids rot but might need the odd touch-up of paint to stay looking slick. Durability and Longevity So, which lasts longer? In hard numbers: a well-built steel farm shed can easily serve 40–50 years or more. Timber sheds, with diligent care, might give you a couple of decades (20–30 years) before major repairs or a rebuild are needed. Of course, any shed needs a proper foundation and anchoring – especially in cyclone zones.  Queensland cyclone guidelines actually insist that even lightweight sheds meet your home’s wind rating and be firmly fastened (otherwise, loose sheds can turn into flying debris). In practice, this means specifying a cyclone rating (Region C in the Whitsundays) and using strong anchors for either material. Here are some durability pros and cons: I usually tip my hat to steel for raw longevity, especially in Queensland’s harsh climate, since maintenance hassles are lower. Maintenance and Upkeep Maintenance can be a deal-breaker if you like set-and-forget projects. Here’s what you can expect: In practice, steel sheds are more “fit and forget,” whereas wooden sheds require more babysitting. Neglect a wooden shed and it can rapidly look sad – rot and rust set in. If you prefer low upkeep, steel will win every time. Cost and Installation Money talks, right? Generally, steel wins the initial budget race. Here’s why: In short: a big metal farm shed kit might be tens of thousands of dollars, while a similar-sized timber structure can exceed that initially. Over 10–20 years, steel usually saves you money on upkeep. Always get a few quotes from local shed builders to nail down your specific costs. Climate and Local Considerations Living in the Whitsundays means lots of sun – and occasional storms or cyclones. How do our materials fare? Basically, if you’re just storing tools in a big slab shed, steel is hands-off and tough. If your shed is shaded by mango trees or right on the beach, you might lean timber (with extra care). Either way, follow local codes and reinforce for winds. The soil and site often decide the outcome more than “steel vs wood.” Environmental Impact If going green is in your blood, think about materials this way: Neither option is a perfect eco-hero. You can go beyond material by adding solar panels, rainwater tanks, or using recycled sheets either way. In the end, pick whichever fits your sustainability values: wood’s natural charm or steel’s recyclability. And remember, designing a shed with smart insulation and rainwater catchment can be just as green as the walls you choose. Conclusion Honestly, there’s no one-size-fits-all answer. I’ve built both – and each time I lay out the pros and cons in my head. For pure durability and peace-of-mind under the tropical sun, steel often wins. For ambience and natural insulation, timber holds appeal. Many local farms even use a steel frame with Colorbond panels (and maybe timber trim) – blending both worlds. At the end of the day, ask yourself: What matters most to you? If upfront budget and low maintenance top your list, lean steel. If style and natural insulation win out, lean timber. Once you know your priorities, talk to an expert about your plans. They’ll tailor the shed design to your needs, whether you want a bare-bones barn or a future she-shed office. So, are you ready to start? Measure your space, draft your dream design, and get a quote. Maybe share this guide or drop a comment with your shed ideas – I’d love to hear what you plan. Before you know it, you’ll be kicking back in your new farm shed, enjoying that shade and shelter through rain or shine. Happy building, mate! Ready to make that decision? Think about your farm’s needs, chat with a builder, and soon you’ll have the perfect shed, steel or wood, that fits your Whitsundays life. FAQs

Scroll to Top