Blog

Your blog category

4 Car Garage Shed Kits
Blog

4 Car Garage Shed Kits: What Should Be Included Before You Buy

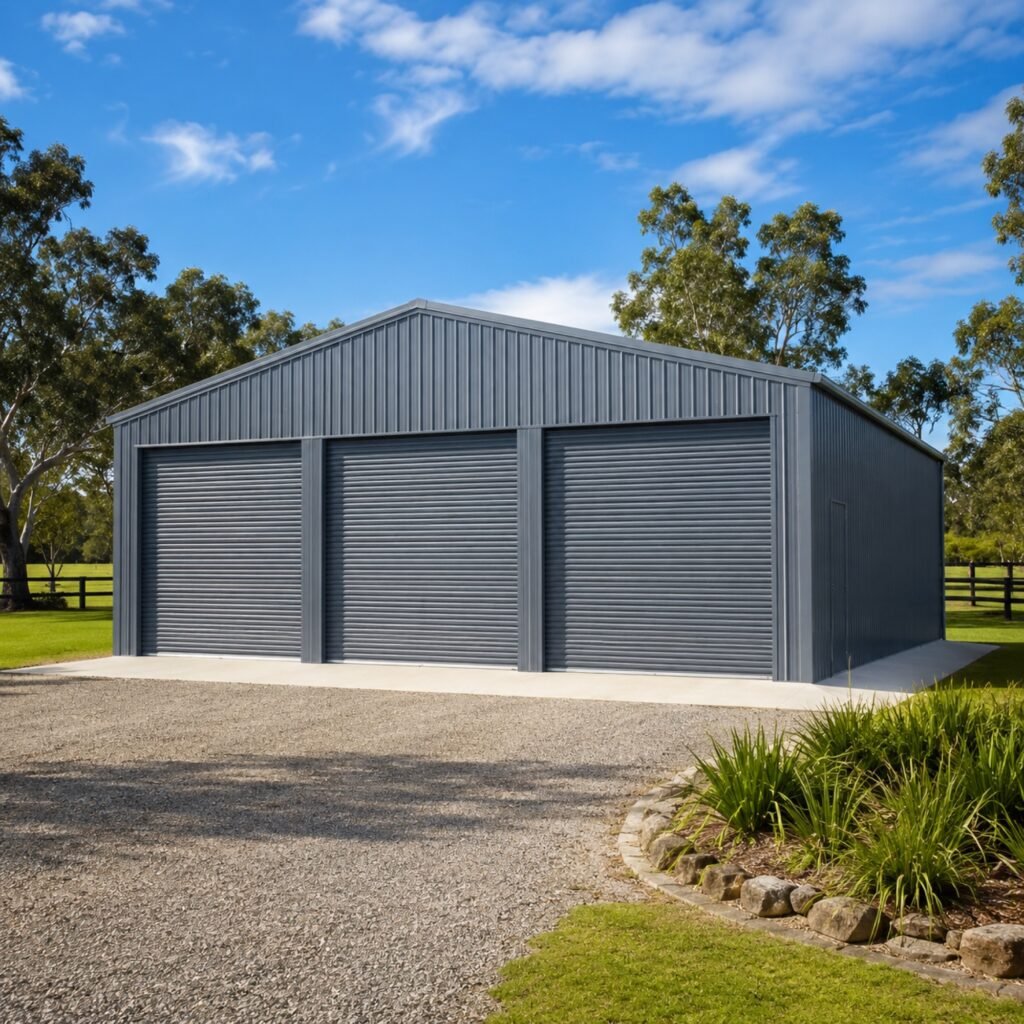
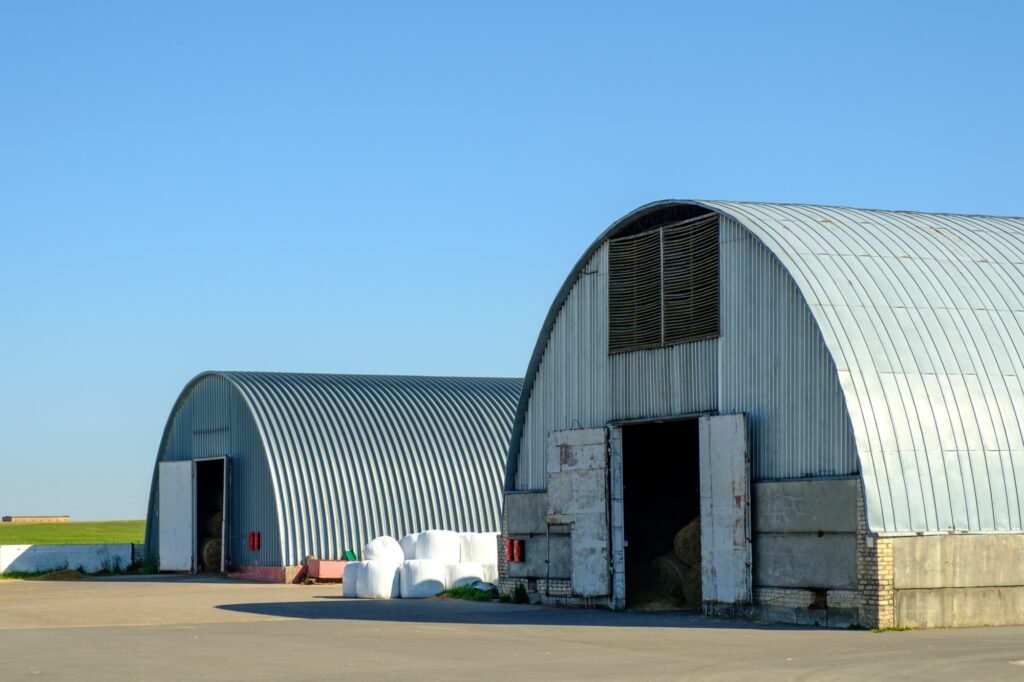
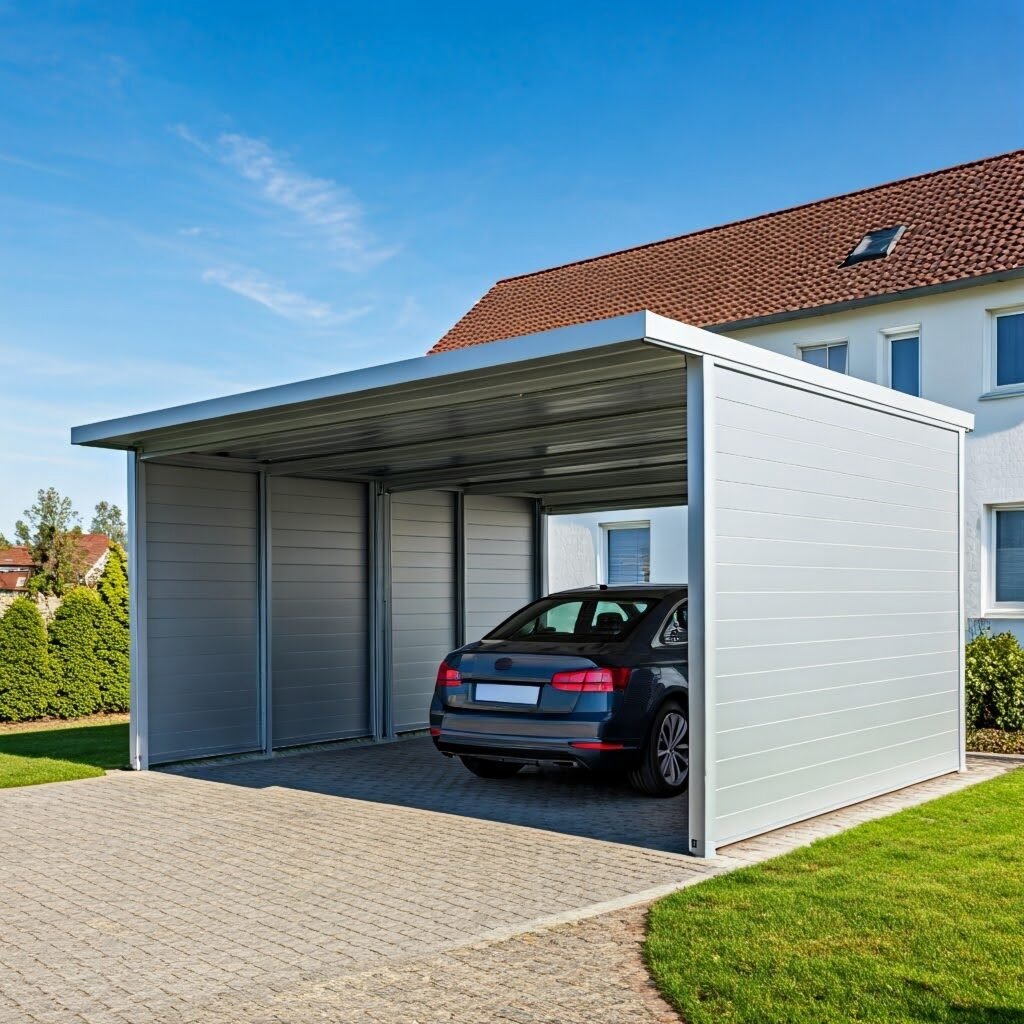
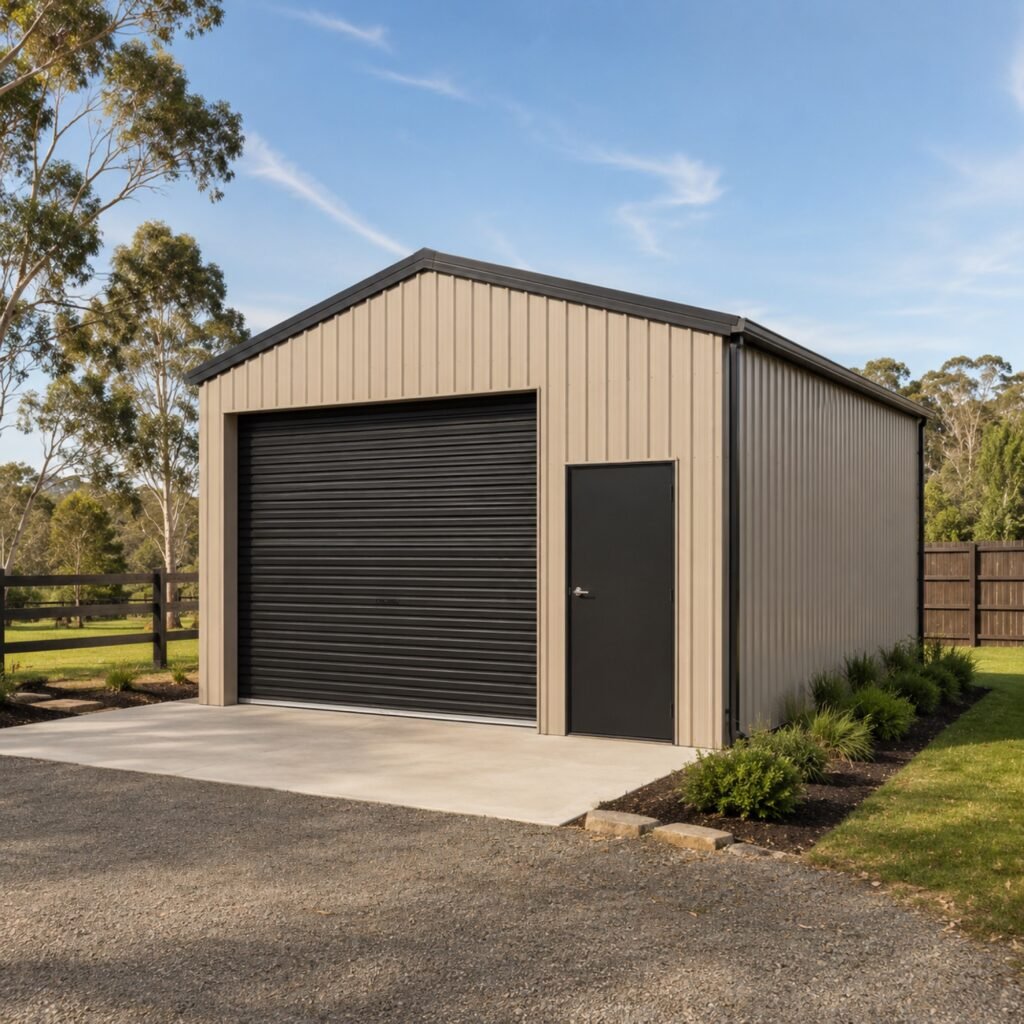
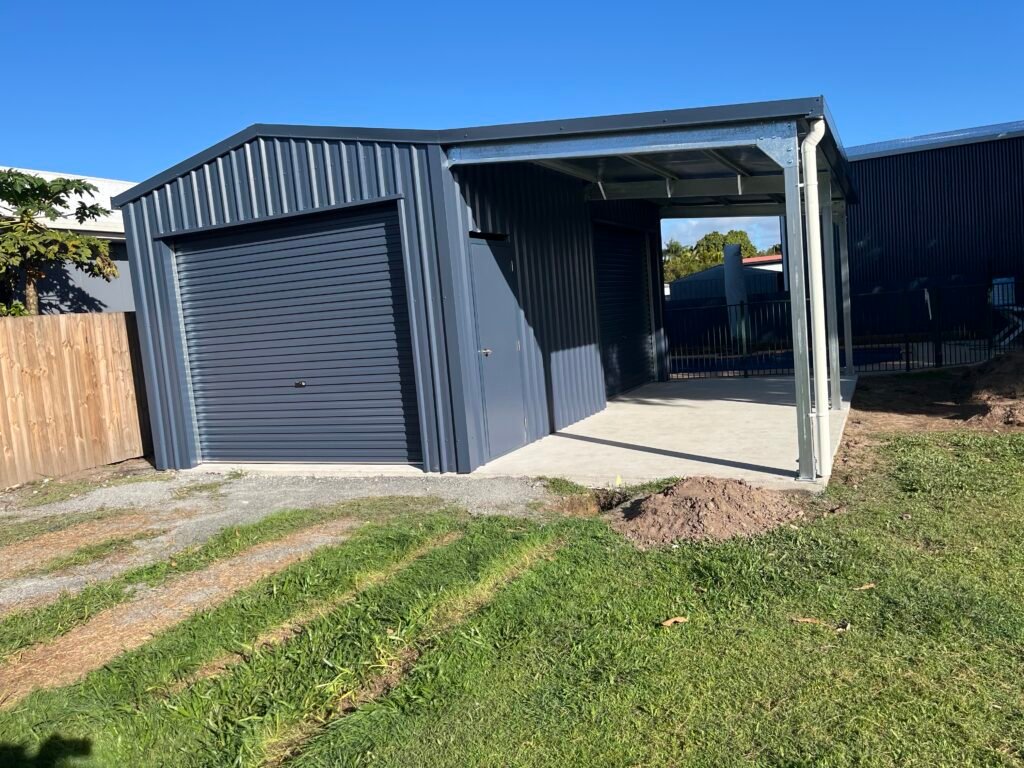
You know that feeling when your garage starts overflowing? One car sits outside, the boat ends up under a tarp, and your tools somehow migrate into every corner of the house. I’ve seen it happen more times than I can count, especially across the Whitsundays where outdoor lifestyles often mean more vehicles, trailers, caravans, and recreational gear than a standard garage can handle. That’s exactly why 4 Car Garage Shed Kits have become one of the smartest investments for Australian property owners. They don’t simply create extra parking. They give you room to work on projects, safely store valuable equipment, protect vehicles from Queensland’s harsh weather, and even increase the long-term value of your property. The biggest mistake I see people make is buying the first shed that looks big enough. Size matters, but what’s actually included in the package matters even more. Before comparing different options, it’s worth looking at pre-engineered four car garage kits that already include professionally designed structural components for Australian conditions. You can explore suitable designs here: https://alchemistsheds.com.au/four-car-garages/. Starting with a complete engineered kit usually saves both time and unexpected costs later. Why More Australians Are Choosing 4 Car Garage Shed Kits Life has changed over the past few years. Garages are no longer just somewhere to park the family sedan. Many homeowners now need space for a second vehicle, a fishing boat, a camper trailer, a weekend workshop or even a home business. That makes 4 Car Garage Shed Kits incredibly practical. Instead of squeezing everything into a cramped double garage, you create one organised space that works every day of the year. For Whitsundays residents, there’s another important advantage. Queensland weather can switch from scorching sunshine to heavy storms within hours. Keeping expensive vehicles, tools and equipment under a properly engineered steel structure provides protection that temporary shelters simply can’t match. What Should Be Included in Quality 4 Car Garage Shed Kits? Not every shed kit offers the same value. Two buildings may look almost identical online, yet one could include thousands of dollars’ worth of additional engineering and hardware. The first thing I always check is the structural steel. A quality kit should include engineered steel framing designed specifically for Australian conditions. The backbone of the whole structure is the strong columns, roof trusses and wall framing and this is not an area where you want compromises. Roofing and wall cladding deserve equal attention. Premium steel products designed for Australian weather generally last longer, resist corrosion better and require less maintenance. If your property sits close to the coast, corrosion resistance becomes even more important because salty air can accelerate wear on lower-quality materials. The hardware package also matters more than many buyers realise. Every connection relies on bolts, brackets, screws and structural fixings working together. Missing components, while seemingly inconsequential when delivered, can turn into costly delays once construction is underway. You’ll also want to include roller doors in your checklist. Some kits include premium doors with more robust locking and smoother operation, and some only have basic options. Think about how you will use the garage before you make your decision. And last but not least – the engineering documentation Drawings and structural certifications done by professionals make the approval process easier, and give you peace of mind that your investment is in line with Australian building standards. Build for Whitsundays Conditions, Not Just Today’s Budget The cheapest shed to buy rarely saves money in the long run. The Whitsundays experiences high humidity, coastal air and severe weather during cyclone season. Those environmental conditions place extra demands on every part of your garage, from roofing sheets to anchor bolts. The investment in heavier steel, corrosion-resistant coatings and engineered wind ratings may cost a little more up-front but will dramatically increase the longevity over the next decades. Before construction begins, it’s important to understand Queensland building requirements. Information about approvals and building regulations is available through the Queensland Government . Knowing these requirements before you start your project can save you costly delays. Selecting the Correct Size and Layout Flexibility is one of the major benefits of 4 Car Garage Shed Kits.. Some homeowners simply need four parking bays. Others want a combination of vehicle storage and workshop space. I’ve also worked with people who dedicate one section entirely to camping equipment, fishing gear and garden machinery. Think carefully about how your lifestyle may change over the next decade rather than only solving today’s storage problem. If you regularly tow a caravan or own larger four-wheel drives, wider bays and higher roller doors will make daily use much easier. Likewise, adding windows, insulation and roof ventilation during construction usually costs far less than retrofitting them later. A well-designed garage should feel comfortable to work in, not simply big enough to park inside. Feature  Why It Matters  Engineered steel frame  Provides structural strength and durability  Premium roofing & cladding  Better weather resistance and lower maintenance  Cyclone-rated design  Essential for North Queensland conditions  Roller doors  Secure, convenient vehicle access  Gutters & drainage  Protects foundations and manages rainwater  Engineering drawings  Simplifies approvals and construction  Features Worth Paying More For Some upgrades actually add value to your garage. Insulation keeps heat out in the Queensland summer, making the garage a more comfortable place to work on a project or store valuable equipment. Natural light through skylights or windows also helps the interior. No one wants to work in a dark shed with the lights on all day. Ventilation is another feature that is often ignored. Good airflow helps reduce condensation, improves comfort and protects stored items from excess moisture. Electrical planning deserves attention too. Even if you don’t install everything immediately, allowing for future lighting, power outlets and electric roller doors gives you far greater flexibility as your needs change. Rather than thinking about today’s budget alone, consider how the building will serve you over the next twenty or thirty years. Common Buying Mistakes You Can Easily Avoid The excitement of designing a new

Boat Maintenance Shed
Blog

Boat Maintenance Shed: What Every Boat Owner Should Include

Owning a boat in the Whitsundays comes with incredible rewards. Crystal-clear waters, island adventures, and year-round boating create unforgettable experiences. But leaving your hull out in the open beach air quickly ruins even the toughest fiberglass setups. Airborne salt, sudden storms, brutal UV rays, and heavy winds chew through your finishes over the months, proving why setting up a solid boat maintenance shed gives you a reliable shield while giving you a handy spot for weekend oil changes and storage. Mapping out your boat maintenance shed correctly keeps your gear beautifully sorted, slashes your tool hours, and locks in the raw dollar value of your watercraft through summer and winter alike. Outside of just keeping the rain off the decks, the right setup leaves plenty of room for socket sets, spare props, wash buckets, and life jackets. Because of that layout freedom, running your quick visual checks is a total breeze, and your long-term ownership bills stay beautifully low. Every little custom hook and shelf inside helps clear out spatial clutter, making it dead simple to look after your hull after a long weekend cruising the local coastline. Why a Well-Planned Boat Maintenance Shed Matters Sourcing a top-tier boat maintenance shed hands you way more wins than just basic shade. It builds a locked-up workspace where tracking faults and spinning wrenches feels ten times easier. Constant dampness, heavy sun baking, and coastal crust will slowly destroy your gelcoat, marine screens, and stainless steel rails. A sheltered structure significantly slows this natural wear. Many boat owners also discover that an organised workspace encourages regular servicing. When you have a solid roof overhead, you can stop putting off simple fixes since every single socket, filter, and grease gun sits right next to the hull, turning basic logbook care into a simple weekend habit instead of a massive chore that eats up your whole calendar. Dropping a calculated budget into a professional boat maintenance shed prints real equity straight into your real estate valuation while jacking up your daily yard utility. A properly braced frame shrugs off heavy regional wind loads effortlessly, giving your asset folder a permanent structural win. For property owners seeking a complete boat and caravan storage solution, purpose-built sheds offer flexible layouts that protect valuable recreational investments while maximising available space. Essential Features Every Boat Maintenance Shed Should Include A truly effective boat maintenance shed needs to blend storm defense, easy backing access, and common-sense workflow layouts. Tiny tweaks to your construction plan make rolling inspections miles easier while stretching the active runtime of your vessel out to the max. The following features deserve careful consideration: Feature Benefit Wide access doors Easier boat entry and exit High roof clearance Suitable for larger boats and trailers Ventilation system Reduces condensation and moisture Durable flooring Supports heavy loads and simplifies cleaning LED lighting Improves visibility during maintenance Lockable access Increases security for boats and equipment Electrical outlets Powers maintenance tools and chargers Storage cabinets Keeps equipment organised Getting your electrical illumination sorted is an absolute non-negotiable step. Flooding the floor with crisp workshop lights keeps you safe and ensures your diagnostic look-overs catch tiny cracks early, while keeping the airflow moving purges heavy dampness before it grows white mold or eats your wiring blocks. The raw strength of your frame skeleton dictates your long-range upkeep costs. Building a tough boat maintenance shed requires heavy-duty metals that can face down ocean weather shifts without flaking, and thick galvanized beams paired with premium sheeting deliver the best multi-decade performance on local coastal lots. Design Considerations for a Functional Boat Maintenance Shed Constructing a high-utility boat maintenance shed launches from a smart pre-start blueprint. Every single structural line needs to look after your layout safety and workflow speed, ensuring the walls clear your outboards, trailer hitches, and tool benches without forcing you to squeeze through tight gaps. Leaving a wide walkway around the gunwales makes soapy washdowns a breeze. Clearance up top controls your total asset utility from day one. High-cab cruisers stand tall on their rollers, especially if you leave radio masts, radar arches, or t-tops bolted down, making high-clearance openings a must to cut out accidental roof strikes. Simultaneously, a thick, level concrete slab gives your heavy dual-axle trailers a rock-solid foundation to sit on. Heavy-duty racking setups look after your ongoing organization perfectly. Hanging steel wall bays, high-ceiling racks, and lockable tool chests sweep anchor lines, wet weather gear, and oil bottles right off the ground, ensuring your floor stays completely clear of trip hazards. Sorting out your plumbing gradients matters just as much as the framing. Setting up smooth stormwater channels forces rainwater to run right away from the slab edges instead of pooling around the footings, preventing subsoil damp bugs from rotting out your structural foundation profiles. According to the Australian Building Codes Board, effective site drainage contributes to safer and longer-lasting structures. This guidance supports better planning for sheds built in coastal regions. Common Mistakes to Avoid When Building a Boat Maintenance Shed A Boat Maintenance Shed delivers lasting value only when planned correctly. Unfortunately, several common mistakes reduce its effectiveness and increase future maintenance costs. Careful planning helps avoid unnecessary expenses while improving the overall usability of the shed. Some of the most common issues include: A classic trap is skimping on your wall plug allocations during the first trade rough-in. Smart trickle chargers, commercial gurney pumps, overhead LEDs, and grinding tools all want heavy power supply paths, and looping these cables in early saves you from paying for secondary renovations later. Keeping your investment completely safe needs to sit right at the top of your layout check-boxes. Tough commercial padlocks, heavy-duty track entryways, and exterior floodlights shield your expensive outboards from wandering eyes, blending maximum security, everyday ease, and steel muscle into one bulletproof package. Conclusion Building an immaculate boat maintenance shed delivers a long list of real estate wins past basic storage. It locks in a secure, weather-tight envelope that cuts out regular chore

Commercial Shed
Blog

Commercial Shed Layout: Trucks, Forklifts & Loading Bays

Picture, your new commercial shed humming along with forklifts zipping between racks and semi-trailers rolling smoothly into bays. Nice, right? But nailing that effortless flow takes a bit of planning. In this guide, we’ll talk you through designing a commercial shed layout that works for both big trucks and busy forklifts.  Think of us swapping ideas over a coffee about your next big project. By the end, you’ll know how to sketch out a shed plan that handles heavy vehicles like a champ. Let’s dive in. Planning for Truck Access Trucks are no shrinking violets – they’re long, heavy, and need room to maneuver. As you plan your shed, give semi-trailers plenty of space. For example, an articulated semi-trailer can be nearly 19 metres long and requires roughly a 12–13 metre turning radius at low speed.  In practice, that means your access road and yard should allow at least a 20 m-wide turning area for such a truck to swing through without scraping walls or hedges. Doors are another biggie. A standard curtain-sided trailer is about 2.5 m wide and 4 m high. To load them comfortably, your shed’s roller doors should be at least 3.5–4.0 m wide and 4–4.5 m tall.  This extra width lets a truck center itself under the door, even if the driver is off-kilter. If you plan any future change in truck mix (think bigger trailers or hiab trucks), bump up those dimensions even more. Outside the shed, leave a clear apron space in front of each bay. Aim for about 5–6 m of clear space from the door to where the truck stops. This room lets a trailer align properly and gives forklifts space to enter.  Consider drive-through docks too – having room for a trailer to pull forward and exit after unloading means no awkward reversing. In short, treat heavy vehicles as VIP guests: roll out the red carpet with big openings, wide aprons and turning loops. Key Truck Access Guidelines Designing Forklift Aisles and Flow Okay, on to the forklift ballet. If trucks are the guest stars, forklifts are the busy stagehands shuffling pallets. You’ll want straight, unimpeded aisles so they don’t bump into racks (or each other). As a rule of thumb, aim for about 3.0–3.5 metres of clear aisle width for a standard counterbalanced forklift moving one-way.  That covers most forklifts (roughly 1.2–1.5 m wide plus about 0.5–0.6 m clearance on each side). If you run larger forklifts or allow two-way traffic, go wider: 3.5–4.0 m. For example, Linde Material Handling suggests wide aisles (3–4 m) let standard forklifts and pallet jacks maneuver safely, while narrower aisles (around 2.5 m) require special forklifts. Don’t forget vertical space: low ceilings can be a surprise hazard. Give at least 4 m of headroom above floor level so your mast can lift pallets high without hitting the roof or lights. If you go super-high (say insulated panels or storage racks), bump that to 5 m+.  When you sketch rack layouts, leave extra room at the ends for forklifts to turn around comfortably. I once saw a workshop where a fork became wedged in a rack because the aisle was too tight – lesson learned the hard way! Beyond raw dimensions, think traffic flow. Create a simple one-way system if possible – forklifts loop around rather than criss-cross. Mark it with arrows on the floor and reflective tape on pillars.  Separate areas for pedestrian traffic is huge (think zebra-striped walkways with bollards) – keep curious blokes or keyboard jockeys out of the forklift’s line of fire. The general idea is: your forklift aisles should feel as clear as motorways, not like a backyard driveway. Checklist: Efficient Forklift Layout For any unique needs, remember you can always go the route of custom commercial shed solutions – builders who’ll tailor your layout around your specific forklifts and trucks. They can factor in quirky stuff like on-site racking or an awkward land profile that you might overlook. Loading Bay Layout & Equipment The loading bay is the crossroads of your shed – where trucks deliver and forklifts hustle. A well-planned bay minimizes waiting and speeds up the whole operation. First, decide how many bays you need.  If your operation is busy, one bay per key dock door plus a spare is wise. Each bay should be numbered or colour-coded, with enough gap between doors (at least the width of one truck plus ~5 m) so adjacent forklifts don’t collide. Height-wise, go big. A 4–4.5 m high bay is usually safe for road trains or container height trailers. Sliding or sectional doors that open fully overhead are best; they clear tons of vertical space without impeding the drive-through. Install robust rubber bumpers on dock edges to cushion those inevitable nudges.  Ground-level docks (without pits) let forklifts drive straight in; ramped docks or remote truck platforms can also work, just plan slope and drainage carefully so trucks sit flush. Inside the bay, lighting and shelter are golden. Bright LED lights help truck drivers and forklift operators see exactly where they’re backing. An overhang (or awning) above each bay can protect goods from Queensland’s rain while they move.  Also, consider dock levellers – these hydraulic plates bridge the gap between dock floor and truck deck. They make loading faster and keep your forklifts leveled (less spillage). If you store liquids or fine materials, floor drainage channels here can catch spills and keep things clean. Loading Bay Design Tips The upshot? Treat each loading bay like a mini warehouse entrance – roomy, safe, and flood-free. With the right layout, loading and unloading trucks becomes a breeze, not a bottleneck. Safety & Regulation Considerations No matter how slick the layout, safety always comes first. In Queensland (and Australia generally), workplace health rules stress separating people and machines. For example, Safe Work Australia recommends clearly marked footpaths or safety zones to keep forklifts away from human walkways.  Inside your shed, paint bright lines on the floor to form “no-go” zones for forklifts – think of it as a virtual hedge your pedestrians shouldn’t cross. Install bollards or guardrails at office

Tradie Workshop Shed
Blog

7 Must-Have Tradie Workshop Shed Features

Ever feel like your shed is begging for a style makeover? As a tradie in the Whitsundays, your workshop should be the envy of the neighbourhood – not just a rusty tin box out the back.  Picture yourself up north in summer, sweatband on, turning wrenches or firing up a welder inside a space designed for maximum comfort, safety and efficiency.  Your workshop shed is more than storage – it’s your creative lair, your machine temple, your second home. And just like a high-end kitchen needs the right appliances, a top-notch tradie shed needs the right features. Australian summers can be a scorcher, and tropical storms are a constant threat. Whacking on a couple of fans won’t cut it – we’ll cover walls, roofs, anchors, the works.  Also, don’t forget the rules: it pays to make sure your plans tick the legal boxes, even if a small shed often skips the permit (ask a certifier or council to be sure). Now let’s dive into those game-changing features every tradie workshop shed needs. Luckily, you don’t have to sketch up plans on a napkin from scratch. There are Australian made workshop shed kits out there, built for builders and ready to assemble.  A good kit gives you a strong shell from day one, saving you loads of time and headaches. That leaves you free to focus on the fun part – planning benches, lighting and storage. Let’s break down the must-have features and upgrades that will make your shed work as hard as you do. 1. Cyclone-Rated, Heavy-Duty Construction In the Whitsundays, the word ‘cyclone’ isn’t just a beer name – it’s a design spec. Your shed’s frame and roof must stand up to wild winds and tropical downpours. I always specify sturdy steel framing and Colorbond roofing (rust-fighting in salty air).  Make sure every joint is welded to code and the structure is fully certified for high wind ratings. It might cost a bit more, but when the gusts hit 200 km/h, you’ll be glad you did. Don’t forget the feet: a rock-solid concrete slab. A smooth, level slab across the building handles heavy gear and keeps the shed square. I like to pour steel-reinforced concrete with a slight slope so water runs away from the doors. Even a tiny crack can spell trouble (we’re talking leaks and damp floors). A pro builder will finish the slab well and seal it so it lasts for decades. 2. Smart Insulation & Ventilation Even the toughest tradie can lose his cool when the shed turns into a sauna. That’s why ventilation and insulation go hand-in-hand. I install a whirlybird or ridge vent on the roof to suck out hot air, plus wall louvres for cross-flow.  Extra-large, three-sided roller doors are another Aussie classic – they let breeze in and make loading gear easy. Inside, consider insulating the roof and walls (reflective foil or foam panels): this pushes heat out and reduces condensation on cold beer cans. Don’t forget the shade. Position windows or doors to avoid the brutal afternoon sun. Even a lean-to verandah can cut glare and give you a sheltered smoko spot. Ceiling fans or space for a ducted air-con (if your budget allows) are worth planning – just wire them in your electrical plan. Bottom line: keep the airflow moving and the heat out. You’ll work faster and keep tools rust-free when temperatures stay reasonable. 3. High-Quality Lighting & Electrical Setup Imagine dropping a nut in a dark corner at midnight. Frustrating, right? A workshop without good lighting is a recipe for bruised shins and blown deadlines. I treat lighting like good styling – it changes the vibe instantly. Go for bright LED high-bay lights that flood the whole space evenly.  Ditch the flickering fluorescents; LEDs stay bright under heavy use and run cool. Over each bench I install adjustable task lights on swing arms for detail work, and I always put a couple of floodlights at the doors and corners. Power points deserve the same love. Plan separate circuits for heavy gear (welders, compressors) and bench tools or electronics. I usually run at least two big circuits with RCD safety switches – one for machines, one for general use.  Scatter outlets along each wall and maybe one on the ceiling for an electric hoist. Don’t skip extras: a dedicated circuit for a fridge or air-con, or even pre-wiring for solar panels. In short, plan as if you’ll need more power than you think – it pays off down the road. 4. Thoughtful Layout & Accessibility (Doors and Space) A workshop is only as good as its layout. Think through how you’ll use every inch. For example, I often put the main roller door on the wide end of the shed so utes and trailers drive straight in.  A second roller or a sliding door on the opposite side creates a handy drive-through: enter one end and exit the other, no reversing needed. If you need a gantry crane or hoist, pre-plan where the beams go in the roof frame. Tall ceilings give you room for large gear and vertical storage, too. Inside, keep the space open and functional. Mount pegboards or rails on the walls for tools and cables – it frees up bench space. A sturdy mezzanine or high shelf can double storage (just make sure it’s rated for the load).  I always set up a “work triangle” between the bench, a power outlet and a tool cabinet so I don’t have to wander far mid-job. And hey, if you’re planning a serious shed build, double-check local rules: Queensland’s building regulations list a small tool shed (up to ~10m²) as accepted development (no permit needed). Better safe than sorry on that. 5. Durable Flooring & Drainage Solutions Your floor takes a beating, so build it tough. A level concrete slab is the start, but upgrade it: I coat my workshop floors with a tough epoxy or polyurethane finish. It’s stain-proof and abrasion-proof – oil spills or

alchemist steel shed
Blog

How to Prevent Condensation Inside a Steel Shed?

Imagine stepping into your steel shed on a humid Whitsunday morning only to find beads of water clinging to the roof. Our subtropical climate means steel sheds can quickly “sweat” – warm, muggy air condenses on the cooler metal. It’s not just annoying to mop up; it can rust out tools and even damage the shed over time.  Fortunately, a few smart fixes can nip this problem in the bud. I’ll share Aussie-tested tips to keep your shed bone-dry using the right mix of ventilation, insulation and moisture barriers. Think of these solutions as giving your shed a breath of fresh air – and a cosy blanket – so it stays mould- and rust-free year-round. Why Do Steel Sheds Sweat? Metal is a great conductor of heat, which means a steel roof or wall can quickly drop below dew point when the night air cools. In coastal Queensland, humidity is usually high (think morning dew and tropical downpours), so warm moist air inside the shed almost always condenses on any cooler surface.  In fact, official climate data from the Bureau of Meteorology show 9 am relative humidity around 78% in the Whitsundays – that’s a lot of water in the air waiting to rain out on your shed! For that reason, condensation inside the shed leads to some serious headaches, including: Condensation isn’t just inconvenient – left unchecked it can cut years off your shed’s life. The good news is most of these problems can be avoided with some planning and regular maintenance. Ventilation: Let Your Shed Breathe A well-ventilated shed is the simplest remedy. Ventilation acts like the lungs of your shed, constantly exchanging damp stale air for fresh dry air so humidity never builds up. In practice, you want a combination of high vents to let hot air out and low vents to draw cooler air in – this natural airflow cycle keeps conditions balanced.  For example, ridge vents (running along the roof peak) let hot humid air escape upward, while wall louvers or eave vents bring cooler breeze in from below. Even a few opposite vents or an open window on a breezy day can create a cross-flow that dries the shed out. Common ventilation tools include: For coastal sheds, vents should also be weatherproof. Louvered wall vents or whirlybird vents are popular because they stop rain but let air through. A whirlybird can move a surprising amount of air on a still morning.  Even simply opening a roller-door or window occasionally helps. The key is: whenever you can, let air move. When air circulates freely, mould and rust don’t stand a chance. Insulation & Vapour Barriers Ventilation moves moisture out, but insulation keeps the metal from ever getting cold enough to cause condensation. Think of insulation as a thermal blanket for your shed. Foil-backed insulation or reflective “bubble-wrap” panels installed under the roof and walls hold the steel close to the shed’s internal air temperature. When done right, warm humid air inside never hits a cold surface, so no droplets form. For example, foil-cell insulation products (often called bubble insulation or foil blanket) attach directly under the roof sheeting. This not only reflects radiant heat out in summer but also includes a built-in vapour barrier.  In short, it reflects heat and blocks moisture from passing through. Studies and shed suppliers note that adding an insulation blanket under a coated steel roof drastically cuts condensation, because the metal stays warmer. Below is a quick comparison of common prevention methods: Method How It Works Key Benefits Ventilation Install vents (ridge, eave, turbines, wall louvers) Expels moist air and reduces humidity Reflective Insulation Foil-backed sheets under roof/walls Keeps steel warmer; acts as vapour barrier Bulk Insulation Fibreglass or foam panels in walls/ceiling Adds thermal resistance; slows temp swings Vapour Barrier Heavy-duty plastic sheet under the floor slab Stops groundwater moisture rising up Dehumidifier Electric unit that pulls moisture from the air Lowers humidity in enclosed spaces Site Drainage Properly graded base and clean gutters Prevents puddles and ground dampness Don’t forget the floor and slab area. If you have a concrete slab, a damp-proof membrane (poly sheeting) installed beneath it is a must. This plastic barrier prevents moisture in the ground from wicking up through the slab.  As one shed expert advises: “Always insist on a heavy-duty plastic moisture barrier under the concrete slab during construction.” If your slab is already down without one, at least seal the slab with a good epoxy coating or waterproof paint to cut off rising damp. Other Moisture-Control Tips Aside from vents and insulation, simple habits make a big difference. For example, wipe down or dry off any gear before storing it. Don’t stick a wet mower, trailer or muddy boots straight in – give them time to dry outside. Also, keep gutters and downpipes clean so rainwater drains well away from the shed base. Trapping water by the foundations can raise the humidity inside. Be careful with over-cooling, too. Running air conditioning or fans in a sealed shed might seem like a fix, but blowing very cold air can actually chill the metal surfaces and trigger condensation in tropical air. Use climate control with care and always have ventilation to exhaust the cool, moist air. If humidity is extremely high, a dehumidifier or desiccant packs can help, especially in smaller workshops. They can pull moisture out of the air, but remember – these are secondary solutions.  A dehumidifier is only really effective if the shed is otherwise sealed and insulated well. If your shed is uninsulated and unvented, it’s better to spend on vents and insulation first, then consider a dehumidifier for fine-tuning. Call in the Experts It might seem like a lot to juggle – vents, insulation, barriers and habits. If you’re building a new shed or doing a major upgrade, it’s wise to get a professional opinion. A Quality Steel Sheds Builder will know how to tailor the design for local conditions. They can match roof vents, wall vents and

Shed Maintenance
Blog

Annual Shed Maintenance Checklist for Queensland Owners

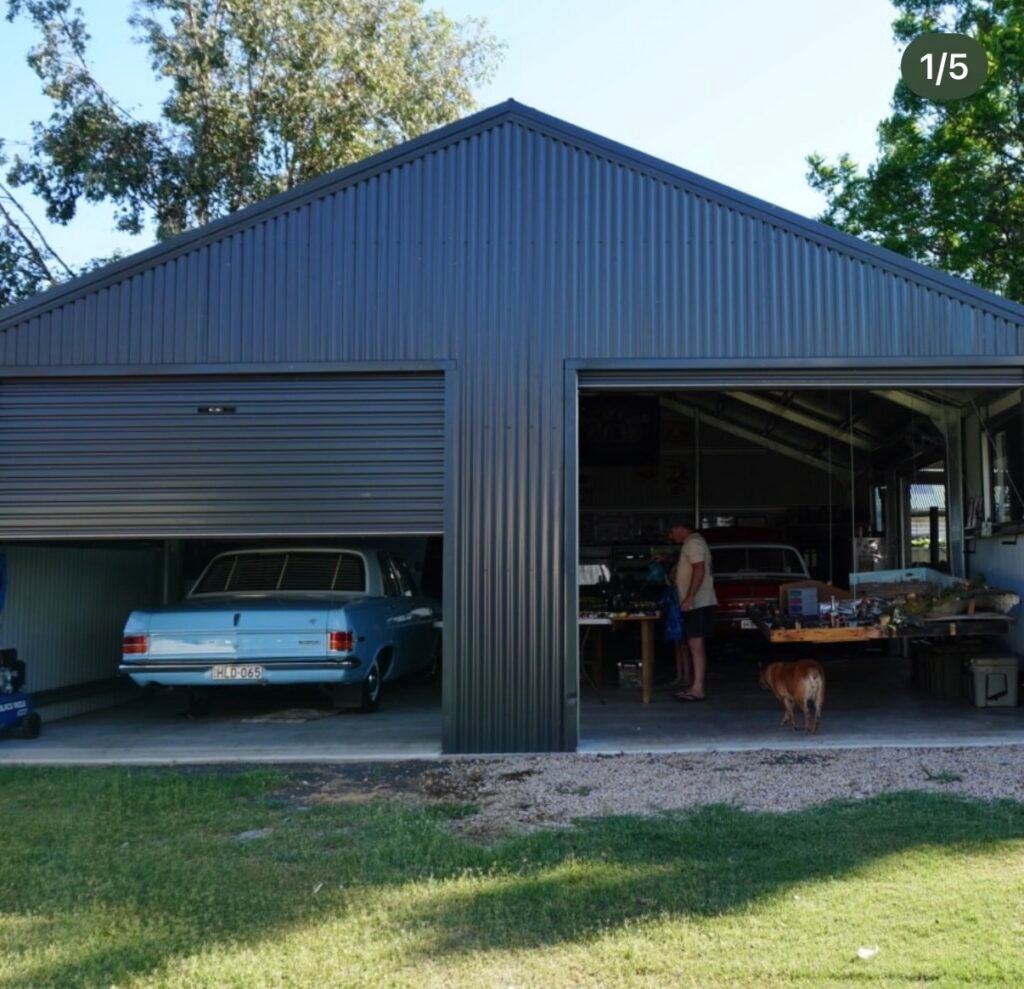
The Whitsundays sun can be relentless, and so can our tropical storms. Yet even in paradise, your backyard shed (or workshop) can quickly turn into an eyesore or worse if it’s neglected. Think of your shed as a trusty sidekick: it hauls your tools, tucks away your prized surfboard, and protects your toys from sun and rain.  Like any loyal mate, it deserves a little TLC. This annual shed maintenance checklist is your guide to keeping that metal gem in top condition year after year. You’ll avoid surprise leaks, rust, and squeaky doors – and keep your property looking sharp without breaking the bank. Maintenance isn’t just about preventing repairs – it’s about pride. A clean, sturdy shed shows you care about your home (and your stuff). Besides, if you’ve invested in something fancy – whether it’s a simple backyard barn or one of those eye-catching custom residential sheds you want it to last.  A tiny leak or a handful of rusty screws might seem small now, but in Queensland’s climate they can snowball into a big bill after the next cyclone or salt storm. So let’s dig into the checklist and save you the headache later. Why Shed Maintenance Matters Australia’s weather keeps your shed on its toes. Scorching UV, tropical humidity, and pounding rainbows of monsoonal rain can sneak up on even the toughest steel. Left unchecked, fading paint and buried moisture invite rust – and nobody wants a mini Corrosion Canyon in their backyard.  Regular upkeep means catching tiny problems while they’re small. A stray screw or blocked gutter today could turn into a bent roof panel tomorrow. Think of maintenance as insurance. A twice-yearly check after the wet season and before the heat is a smart habit. It protects your stored stuff (tools, gear, that classic Holden engine you swore you’d rebuild someday) and even upholds any warranty.  Remember, reputable manufacturers expect a bit of love in the form of cleaning and inspections – it’s all in the fine print. Plus, a well-kept shed looks sharp, matching the cared-for vibe of your home, instead of screaming “neglect!” from the backyard. Inspect Roofing and Gutters Your shed’s roof takes the full brunt of Queensland’s weather, so start at the top. Walk around (safely) with a ladder and look for damage: any lifted, dented, or missing roof panels. Pay special attention to ridges and seams where wind sneaks under the sheets. Replace or reseal any suspect panel now, before the next storm. Look at the roof fasteners too – those little screws with rubber washers. UV rays can perma-harden or crack those rubber gaskets, letting water sneak in. A quick tighten or a new screw can stop a leak in its tracks. Next, clear the gutters and downpipes. In the tropics, gutters love to catch leaves, grass, and even random bottles from a nearby tree. A clog will spill water over, so ditch the buildup a few times a year.  This is also a fire safety move: dry leaves in gutters become fuel in a bushfire season. Make sure downpipes actually send water away from the base. Add an elbow or splash block if needed so rain doesn’t pool against the slab – pooling water is rust’s best friend. Doors, Locks, and Hardware Doors get a lot of action – after all, they’re how you access your precious gear. Let’s keep them smooth. Open and shut each door, listening and feeling for any sticking or grinding.  Hinges and rollers love a good spritz of silicone or white lithium grease once or twice a year; it’s like sunscreen for metal, keeping it moving and stopping rust in tracks. Check sliding tracks and rollers (for roller doors) for debris too. A track full of grit can make your door jam as reliably as a gum leaf in a sandwich. Locks and latches need love as well. Test them so you’re not jammed out during a downpour. If they’re stiff, use a graphite or silicone lubricant – just a couple sprays, no need to flood it. Replace any bent latch or corroded lock. A cheap lock is not worth losing your tools over. While you’re at it, tighten all visible screws and bolts on doors – even a tiny wobble can jack the frame out of alignment over time. Clean, Wash and Rust Prevention A sparkling shed isn’t just about looks – it wards off trouble. Dirt, bird droppings, and salt from coastal breezes can cling to paint and hold moisture against the steel. Give your shed a proper wash at least once or twice a year.  Think of it as a carwash day for your shed: use a garden hose, a soft brush or mitt, and a gentle detergent (like a bit of car shampoo or mild soap). Start at the top and rinse downwards. Focus under eaves, around bases, and under trees – those spots catch the most grime and sap. After cleaning, walk around and inspect the paint. Any chips or flakes are like open wounds in battle, inviting rust to set in. Touch these up with rust-inhibiting primer and paint ASAP. Even a small bare spot can balloon into a hole over the wet season.  On that note, check for rust around the base where the steel meets concrete – splashback and condensation often lurk there. Use a wire brush on any tiny rusty spots, apply a bit of zinc-rich primer or rust converter, then repaint. If you live near the coast, you might need to rinse more often since salty air accelerates corrosion. Table: Common Shed Materials and Their Corrosion Resistance Material / Finish Corrosion Resistance Notes & Best Use 316 Stainless Steel Very High Marine-grade; ideal for bolts and fasteners. Hot-Dip Galvanised High Thick zinc coating; good for frames/beams. COLORBOND® Steel High Factory paint over Zincalume; made for Aussie weather. Zincalume® Steel High Zinc/aluminium alloy; resists rust well widely. Aluminium Medium Natural oxide layer; often used for gutters and trims. Powder-Coated Steel High Durable

Low-Maintenance Shed
Blog

How to Build a Low-Maintenance Shed for Busy QLD Owners

Imagine extra storage and workspace without the usual headaches. In Queensland’s sun-baked, stormy environment, a shed that practically looks after itself is a real game-changer for busy property owners. Cutting down on upkeep means more weekend barbies and less time wrestling with a paintbrush.  After all, who wants to spend their weekends sanding walls or chasing termites? I’ve built and inspected plenty of sheds and trust me a low-maintenance shed is worth every minute spent planning it right. This guide will walk you through everything you need: from planning permissions to smart design tips and material choices, so you end up with a durable, easy-care shed that fits your lifestyle. Planning and Permits Before you start, give planning rules a quick look. In Queensland, tiny garden sheds (under about 10m²) are often classed as “accepted development”, so you usually don’t need a building permit (see the Queensland Government guidelines).  However, anything larger or in special zones (like flood areas or heritage overlays) will need council approval. I always double-check local regulations or chat with my builder to make sure our shed ticks all the boxes. Most councils trigger approval if your shed exceeds roughly 10–12m² or is very tall. For instance, any shed over 3 m high or within a certain distance to your property boundary usually requires a permit.  Drawing up a quick site plan (marking shed size, location and setbacks) and running it by council or a certifier can save big headaches. Better safe than sorry – clear guidance at this stage keeps construction smooth and worry-free. It’s also smart to think ahead about future extras. Planning room now for rainwater tanks, solar wiring or security lighting means you won’t be retro-fitting things later. Adding these during the build instead of after can keep your maintenance list short down the road. Design and Construction I’m all for a DIY project, but when it comes to a sturdy shed, I won’t beat around the bush: hiring professionals can be worth it. Good shed builders can guide the process, handle tough bits like precise measurements and compliance, and generally take a load off your plate.  In fact, teaming up with reliable shed builders in QLD – who know local conditions – means your shed is done right the first time. After the frame and roof are up, there’s less midnight tinkering with wonky shelves and more time enjoying the space.  For example, an engineer-designed steel frame will sit perfectly straight and level (no wobbling DIY rafters), and a pro installer will seal every joint so rain never leaks in. Bottom line: a professional build takes a lot of guesswork out of the equation. Design for Durability A smart shed design cuts out a lot of upkeep before you even start. First, pick a level, well-drained spot – avoid soggy corners where wood rot or rust can sneak in. Give yourself breathing room: set the shed a bit away from fences or buildings so air flows around it.  A sloping roof with gutters and a downpipe channels rain off the roof – make sure the downpipe pours onto gravel or a drain, not your lawn. A solid foundation (a concrete slab or compacted gravel base) keeps moisture at bay and seals out pests.  Overhanging eaves or a canopy will shade the walls from harsh sun and rain, protecting paint and wood. Ventilation is key too – vents or whirlybirds keep the air moving and prevent mould. In short, anything that adds frills will add future work – stick to the essentials for a truly low-maintenance shed. Choosing Materials Pick materials that shrink your to-do list. Colourbond® (galvanised steel) is a local favourite – termite-proof, fire-resistant and rarely needs painting. Timber, even treated, looks warm and traditional but demands more care: pests, rot and UV can dull it over a few years unless you seal or paint it regularly.  Modern options like fiberglass or composite resin mix wood’s aesthetic with plastic’s weatherproofing – they won’t rust or rot and mostly just need an occasional rinse. The table below sums up the trade-offs: Material Advantages Disadvantages Colourbond Steel Termite/fire-resistant; no painting needed; very durable Can rust/corrode if scratched; heats up inside Treated Timber Natural appearance; strong structure Vulnerable to pests/rot; requires painting or staining Fiberglass/Resin Mold and pest-proof; very low maintenance Can fade or warp in intense sun; limited sizing Composite (Wood-Polymer) Wood-like look with weatherproof durability Higher cost; fewer custom options Think long-term. A cheaper timber shed now might cost you more later in paint and repairs compared to a slightly pricier steel build that stands the test of time. Maintenance Made Easy Even a low-maintenance shed needs a bit of love now and then. Instead of waiting for a catastrophe, schedule a quick inspection every 6–12 months. Key tasks: Many quality sheds come with long warranties for just this reason – manufacturers back up their durable materials and design. Stick these simple steps on your checklist, and you’ll barely notice the shed needs attention – exactly the point of building low-maintenance in the first place. Conclusion Building a shed that practically looks after itself is all about planning smart and choosing tough materials. A low-maintenance shed is not about cutting corners – it’s about doing the smart work upfront, so you avoid endless upkeep later.  Pick the right spot, use termite-safe steel or resin, and design gutters and vents so everything stays dry. The result? A shed that stands up to QLD’s sun, storms and termites with hardly any work on your part. Now it’s over to you. Ready to clear some space without clearing your weekends? Grab a mate and a cuppa, sketch out your ideas or chat with a pro about your next build. Share your project story in the comments – I’d love to hear how you made it low-fuss and long-lasting. Cheers to stress-free storage!  In short, investing in quality upfront pays off big time in saved weekends and stress-free storage. Can you smell the fresh-cut timber

Freestanding shed aircraft hangar
Blog

How to Decide Between an Attached and Freestanding Shed

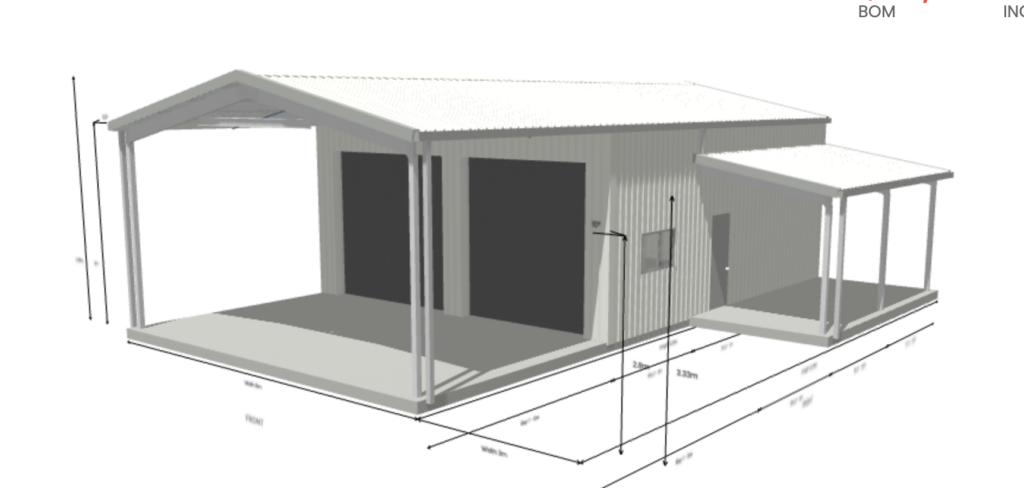
Ever dream of a perfect backyard workshop or a garden retreat? You’re not alone. A shed is a solid way to boost storage or even add a cool hangout spot to your Aussie home.  But here’s the kicker: should it hug the house (attached) or stand solo in the yard (freestanding)? I’ve wrestled with this decision myself, weighing the pros and cons. Let’s break it down so you can pick the best fit for your space and needs. Deciding on your shed really comes down to practicalities and personal style. Are you after easy access from the house or a stand-alone escape in the garden? Each choice has its own flair.  My gut feeling is that if you love being near home base, an attached shed might win you over. If you crave a separate space (think workshop or “man cave” vibes), freestanding could be the way to go. For extra inspiration, some man cave sheds buiders share great design ideas that might spark yours. Stand-Alone vs Lean-To: The Basics An attached shed (or lean-to) can integrate smoothly with your house wall, creating a seamless extension to your home. An attached shed typically bolts onto an existing wall or roof. It’s like a lean-to; one side is part of the house structure and the other supported by new posts or studs. The big upside? Usually less roofing and wall cost since one side is already your house.  It can feel like an indoor-outdoor extension of your home – super handy for moving tools or firing up the BBQ under cover. On the flip side, you must ensure proper waterproofing where it meets the house and get engineering sign-off on the join, because the load shifts through that connection. A freestanding shed sits on its own base and can be placed almost anywhere in your backyard. A freestanding shed is just that – completely separate from your home. It needs its own footings or slab on all sides. This independence gives you more placement freedom: maybe tucked into a corner, or centred as a feature. It also often means simpler construction, since it’s a standard build with walls on all four sides.  Maintenance can be easier, too – no roof leaks into the living room to worry about! The downside? You build four walls and a whole new roof, which can bump up material costs a bit. Also, a freestanding shed might feel slightly cooler in winter and hotter in summer without the insulation benefit of your home wall. Local Rules and Approvals in Queensland Before swinging the hammer, it’s crucial to tick off the legal checklist. In QLD, all sheds – whether attached or not – must meet building standards (structural integrity, fire separation, boundary setbacks, etc.).  The good news: small sheds are pretty easy to get away with. For example, if your shed is under 10 m² in area, below 2.4 m high, and away from pool fences or major structures, you generally don’t need a formal building permit. Check your local council rules because limits can vary slightly by suburb. That said, any new shed (attached or freestanding) bigger than the exempt size will need council approval. Attaching a shed to your house usually bumps it into a stricter category – it might count as a building extension. This means getting a building certifier involved to ensure everything’s up to code. You’ll need certified plans and possibly a compliance certificate. Boundary setbacks matter, too.  Queensland’s development code often requires at least 1.5m from side/rear boundaries for larger sheds (over ~9m length), though council can sometimes relax this if neighbours agree. Bottom line: it pays to confirm with your local council or a certifier early on. A quick site survey or chat with someone who “speaks council” can save a world of hassle later. In practical terms, the permits and paperwork might extend your timeline by a few months. Industry pros say you should expect around 3–4 months from concept to handover for a custom shed project.  That includes design, engineering checks, permits, and the build itself. Having a plan of attack (literally a Site Plan of your yard!) speeds things up. And remember, even if you’re a keen DIYer, a building certifier must approve your attached shed plans – safety first. Construction, Cost and Time Considerations Money talks. Generally, an attached shed can save on materials like roofing and wall cladding (since one side is your house wall). But you still need a foundation and structural supports on that attached side. In practice, both attached and freestanding sheds will need a solid slab or footings.  A correctly poured slab means a level, durable base – especially in rainy QLD. Sometimes a freestanding shed can even use a simpler gravel or pier foundation if it’s small, but many Aussies opt for concrete for longevity. Labor costs can differ: attaching to an existing structure might require more precise carpentry and waterproofing work, and possibly hiring an engineer to sign off. A freestanding shed is more of a straightforward build. If you’re handy with tools, some small kits go up quickly as DIY weekends.  For example, building a simple kit might only take a weekend if it’s tiny. But a larger build (say, a 6×6 steel shed on a slab) could run into multiple weeks. Remember to budget for extras like drainage channels, gutters, or electrical wiring if you want lights. Also, factor in finishing touches (paint, trim, maybe an extra door or window) – these small costs add up. As a rough tip, sheds often run a few hundred dollars per square metre on basic kits, but custom builds or premium finishes push that up. Since I’ve done this a few times, I can tell you it’s smart to get a few quotes.  And be mindful: if your council says it has to be built by a licensed builder (sometimes if your project value or classification demands it), their labor rates apply. But once it’s up, both attached and freestanding can

Coastal Sheds and Garages qld
Blog

How to Prevent Rust in Coastal Sheds and Garages

Imagine stepping into your seaside garage each morning as the sun pours in. You can practically smell the salt in the air and feel that warm humidity of the Whitsundays tickling your skin. It’s paradise… until you spot rust creeping along your metal door frame. Coastal living has its perks, but salt spray and tropical storms can turn your shed or garage into a rusty relic if you’re not careful. In this guide, I’ll walk you through why coastal sheds and garages rust faster, and how you yes, you can keep your metal outbuilding gleaming and bulletproof against corrosion. With the right materials, coatings, and a solid maintenance routine, you’ll keep rust at bay and your shed looking sharp for years to come. Why Coastal Sheds Rust Faster Living near the Great Barrier Reef and the Coral Sea, Whitsundays’ sheds face a constant onslaught of moisture and salt. Sea breezes carry tiny salt crystals that land on every surface, and that salt attracts moisture like a magnet.  Add in 70–80% humidity and monsoonal downpours, and you’ve got a perfect recipe for corrosion. Even tropical sun and dramatic temperature swings can stress paint and metal, causing cracks that let water in. In short, your coastal garage is basically in an endless salt bath. It’s like living in an oven set to “rust alert!” – but with planning and prep, you can outsmart those salty challenges. Choose Rust-Resistant Materials When building or upgrading a coastal outbuilding, investing in quality materials is non-negotiable. Think of it as sunscreen for your shed: apply the best stuff upfront, and you’ll thank yourself later.  The Queensland Reconstruction Authority’s building guidance for coastal homes even highlights using heavy galvanising and marine-grade stainless steel (316) for any metal connectors in seaside structures. In other words, go for metals and finishes that refuse to rust. In practice, that might look like a Colorbond roof and walls on a concrete slab, all hung with stainless screws and locks. Even a fiberglass-framed window is better than plain aluminium in salt-laden air.  Keep materials compatible too – for example, only attach stainless screws to your stainless anchors or use plastic spacers to avoid dissimilar-metal corrosion. By picking rust-proof materials from the start, you’re laying the foundation for a rust-free shed. Check out these rust-resistant shed solutions for more ideas on corrosion-proof designs. Protective Coatings and Paints Coatings are your shed’s armour. No matter how tough the metal, an extra layer of protection will hugely extend its life. Think of coatings as raincoats for steel – they keep water and oxygen (which cause rust) from ever touching the metal. A well-coated shed will shrug off decades of salt spray. Just make sure to recoat or paint any scratched bits promptly. Even a small bare spot can become a rust hotspot in coastal air. Design Tips for Coastal Builds Smart design tweaks can drastically cut down rust trouble. It’s like engineering your shed to “bleed out” salt and water rather than trap it. The goal is always to minimise water contact and maximise dry-air exposure. A well-draining, well-ventilated shed is half the battle. Maintenance Musts: Keep Salt and Rust at Bay Even the toughest build needs regular TLC. Think of it like taking your car for a wash after a muddy drive a quick rinse keeps things shiny. I recommend a seasonal (or monthly in the rainy season) maintenance routine to stay ahead of rust: In short, wash, inspect, fix. A bit of effort each few months goes a long way. That routine checkup is the trick that extends your shed’s life from a few years to a few decades. Materials Comparison It helps to visualize which materials are rust-proof champs versus cast-iron chumps. Here’s a quick guide to common shed materials and coatings in coastal conditions: Material/Finish Corrosion Resistance Notes & Best Use 316 Stainless Steel Very High Marine-grade; top choice for bolts, fasteners, small parts. Hot-Dip Galvanised High Thick zinc coat; very good for structural beams, frames. COLORBOND® Steel High Factory paint finish over Zincalume®; made for Aussie weather. Zincalume® Steel High Zinc/aluminium alloy coating; resists rust well in many climates. Aluminium Medium Naturally forms a protective oxide layer; good for gutters and trim. Powder-Coated Steel High Strong paint finish; excellent for panels and decorative pieces. Fibreglass/FRP Very High Used for doors or vents; doesn’t rust at all. Bare Mild Steel Low Unprotected steel will rust quickly; avoid in coastal zones. Each tick mark costs more up front, but pays off with peace of mind. For example, COLORBOND® cladding (painted Zincalume) is engineered in Australia to endure harsh sun and salt, so it’s a safe bet. On the other hand, an old-fashioned shed made from plain rolled steel (no coating) is practically asking to turn into a rust pit in Whitsundays. When to Call the Pros Even if you’re a DIY hero, some situations call for a rust-fighting specialist. If you spot serious rust damage – big holes, sagging panels, or structural weakness – don’t just slap paint on it. A structural engineer or certified shed builder can suggest fixes like reinforcing a weak beam or replacing a panel. Professionals also have access to high-end products: industrial-grade rust converters, heavy epoxy coatings, or even cathodic protection for concrete footings (that’s a metal anode that corrodes instead of your steel). They know how to do spray-on galvanic coatings or apply sacrificial zinc anode strips where needed. If your shed is hooked into power or storing expensive gear, a pro inspection every few years is a smart move. At the very least, an expert can certify your rust-prevention routine is on track. This isn’t just overkill – well-maintained metal buildings can come with long warranties (some premium sheds offer 20-year rust warranties on the steel!). So, paying a pro to look things over might be the best rust insurance you can buy. Conclusion Rust in a coastal environment is a battle, but it’s one you can definitely win. By choosing the right materials

Class 1A Liveable Shed
Blog

The Smart Guide to Building a Class 1A Liveable Shed

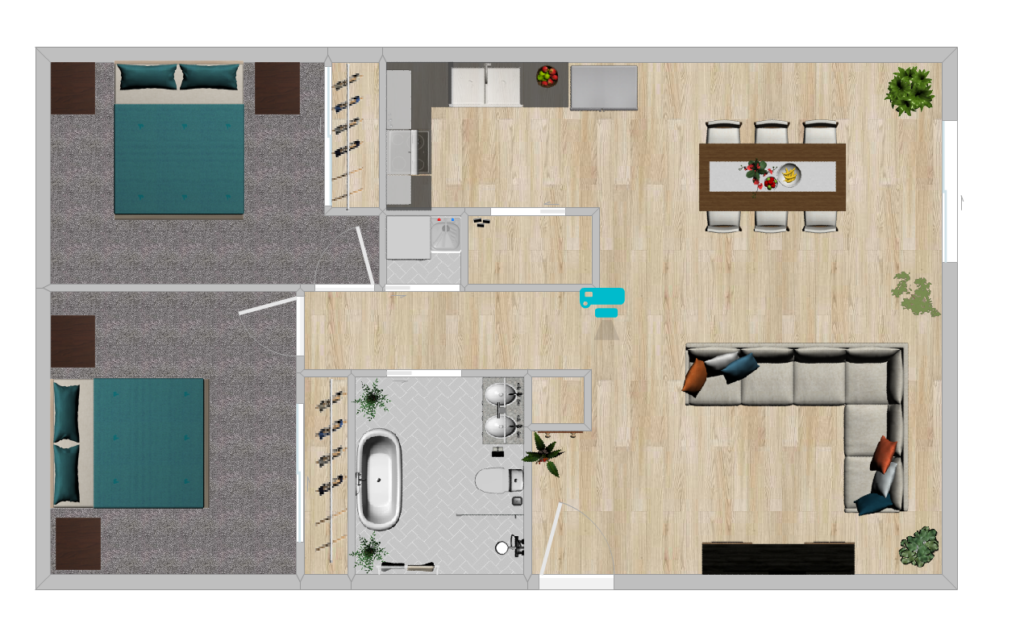
Picture this, you step out onto your breezy verandah to find a stylish steel cabin where your plain old shed used to be. That’s the charm of a Class 1A liveable shed – essentially a rugged steel home. In the Whitsundays’ tropical climate (think Airlie Beach or Bowen vibes), this concept is catching on fast.  It’s like having a tiny house or granny flat on your property that’s built tough – cyclone-rated roof, insulated walls, and everything needed for full-time living. I’m here to walk you through how to make that shed-in-your-backyard dream a reality, Aussie style and stress-free. What Is a Class 1A Liveable Shed? Before we go any further, let’s clear up the jargon. In Australia’s National Construction Code, a Class 1A building is simply a detached house or one of a group of houses (row houses, townhouses, etc.).  A liveable shed is a shed built to these same standards, so you can legally live there with all your mod‑cons (kitchen, bathroom, bedrooms). By contrast, a normal backyard shed is Class 10A, which is non-habitable – basically for storage, a workshop or garage only. Liveable sheds bridge that gap. These differences matter. A Class 10A shed might flex in the wind or trap heat like an oven, but a Class 1A shed behaves like a proper house – solid, stable, and comfortable year-round. Here’s a quick comparison: Feature Class 1A Liveable Shed Standard Shed (Class 10A) Use Full home use (kitchen, bath, etc.) Storage, workshop, garage Approval needed Full house building approval Simplified shed permit (no living) Insulation Required (7-star NatHERS target) Not required (often minimal) Energy rating Minimum 7-star (QLD law) Not applicable Structure Engineered for furniture loads, higher wind/cyclone loads Basic framing for storage only Occupancy Certificate of occupancy (legal) No living allowed (illegal to live) (Table: Comparing Class 1A liveable sheds vs standard sheds. A liveable shed is built like a house, not just a shed.) Planning and Approvals: Getting It Right from the Start Building a liveable shed means you’ll be playing by the same rules as houses. You’ll need certified plans, a building permit, and probably a compliance inspection. This isn’t a DIY weekend project – it’s a mini home build, even if it looks like a shed. First off, check your zoning and local council rules in the Whitsundays. For example, the Whitsunday Regional Council’s fact sheet is crystal clear: a Class 10A shed is legally non-habitable, so you cannot live in one without upgrading it to Class 1A with council approval. In other words, you’ll need a private building certifier or council to issue a permit, ensuring your shed meets all the Building Code requirements. Some savvy Aussie shed suppliers know this and help take the headache away. In fact, one provider offers a fully compliant liveable shed solution engineered for Queensland. That means the kit comes with site-specific plans and compliance certifications up front, so you’re not left retrofitting insulation or chasing approvals later. It’s a smart move: as soon as you put the last panel up, your shed is already rated as a legal home. In practice, here’s what to expect: Get the paperwork sorted early. Hiring a local certifier or a shed-builder who knows Whitsundays rules will pay off. It avoids nasty surprises like compliance orders or fines for “squatting” in an unapproved shed (a real risk if you skip the permit). Designing for the Tropical Queensland Climate Now to the fun part – designing the shed itself! In North Queensland’s hot, humid, sometimes cyclone-prone climate, the smartest liveable sheds use passive cooling and robust construction. Here are some top tips: At the end of the day, a liveable shed in the tropics is all about keeping cool (and dry in the wet season) without burning power. Embrace big windows with fly screens, ceiling fans, and maybe a louvred kitchen door that opens onto the yard.  Planting a few trees or climbing vines outside the north wall can also tame the sun’s heat naturally. Following these green building principles will make your shed home feel fresh and reduce long-term bills. Materials and Construction Tips When it comes to materials, Aussie liveable sheds usually start with steel frame kits (like a garage shell) that meet engineering specs. Steel is strong and termite-proof, and the manufacturers can easily tailor it to your size and style. Here are some pointers: In short, build it once – build it right. A quality Class 1A shed kit might cost more upfront than a basic shed shell, but you’ll save headaches (and money) by avoiding post-build retrofits. Plus, a well-constructed shed home adds real value to your property.  For example, some suppliers advertise kits from around $30,000 for a basic liveable studio (in steel and insulated panels) up to $80,000+ for larger multi-room setups (plumbing, cabinetry and all fixtures included). Costs vary a lot with size and specs – so get a quote early and plan carefully. Living Comfort and Style Once the walls go up, you get to play interior designer! Class 1A sheds can be surprisingly cosy and stylish. Here are some finishing touches to consider: Inside a liveable shed, you can achieve a surprisingly homey feel. Insulated walls and airy design make even compact spaces comfortable – perfect for a guest room, home office, or retirement retreat. With modern appliances and Aussie flair, your shed can be both chic and practical. Conclusion Building a Class 1A liveable shed in the Whitsundays is more than just “putting up a shed.” It’s creating an affordable, flexible home (or extra unit) engineered for our Queensland weather. By planning carefully – from council permits and cyclone-resistant frames to smart insulation and design – you end up with a durable space that doesn’t cost the earth to run. I hope this guide has shown you that it’s entirely possible to have a stylish, cosy shed-home that’s fully legal and comfortable. If you’re itching to expand your property or craft a unique retreat (be it a

Scroll to Top