Blog

Your blog category

Farm Shed
Blog

What Usually Delays a Farm Shed Project & How to Avoid It

Getting a new farm shed up and running can feel exciting – until it doesn’t. I’ve seen keen farmers in Mackay hire trucks and roll up plans, only to hit roadblocks: permits gone missing, trucks stuck in storms, or steel beams late to the party.  The secret? A bit of planning, local know-how, and a dash of common sense to stop those hold-ups before they start. Let’s jump into the real culprits behind farm shed delays in Mackay and how you can dodge them. Council Permits and Approvals First off, nearly every farm shed in Mackay needs council approval. Mackay is in a high-cyclone zone (Wind Region C), so almost all sheds (Class 10 structures) legally must have a building permit. If you start building without the right paperwork, the project will screech to a halt. Don’t risk it – check local rules first.  For example, Mackay Regional Council guidelines note nearly all sheds in our area need approval due to the cyclone risk. Tiny garden sheds under 10m² might skip approval, but anything bigger (especially full-size farm machinery sheds) definitely won’t. To avoid this trap: do your homework early. Give Mackay Regional Council a call or visit their website to find out what’s needed. Often, you’ll work better with a pro. Hiring a skilled shed builder means someone is managing paperwork and designs.  They’ll know if your plan needs extra engineering (for cyclone loads, say) or town-planning checks. If I’m honest, teaming up with the Best Farm Shed Builder in Mackay takes a lot of pressure off you – they’ve done it all before. They can fast-track your building application, avoid common pitfalls, and keep the green light on your project. Planning and Design Issues You might be itching to break ground, but slowing down a tad here pays off later. Every shed project starts with a plan. Work out exactly what you want – the right size, layout, roof style and doors. Think through how you’ll use it and what needs protecting.  Finalising details up front stops “back to the drawing board” drama later. For example, deciding on a second roller door halfway through construction can tack weeks onto the timeline. Make it easier on yourself: pick your design early and get it engineered and checked against regulations right away. Also, consider the site. Is the ground flat, or will it need digging and filling? Are there trees to clear, stumps to remove, or drainage to sort? Here’s a quick checklist to nip design delays in the bud: Think of it like packing for a road trip – you wouldn’t throw everything in the ute without checking the weather or tyre pressure first. A bit of prep and double-checking now means smoother sailing later. I always say – under-promise and over-deliver. Hammer out the details early, and by the time the build starts it’ll be plain sailing. Construction Challenges: Weather and Materials You can fine-tune every plan, but Mother Nature still has a vote. Mackay’s climate loves a monsoon – tropical downpours and even cyclones blow through here from December to April.  Bureau of Meteorology data shows that this period is when most of our rain falls. If you pour concrete right before a storm, you might end up waiting an extra week just for it to cure properly. Or a summer cyclone can mean entire crews are grounded and supplies rerouted. It’s no fun, but it happens, so be ready. To dodge the weather, think of timing. Generally, aim to schedule the slab and erection during the drier months (May to September). Keep an eye on forecasts. If a big wet is on the way, shift your schedule rather than forcing work in – otherwise you’ll be redoing the finishing touches.  Having tarps, pumps, and quick-dry materials on hand makes a big difference. It’s also smart to pad your timeline with some wiggle room for rain delays – expect that the calendar won’t be perfect and build in extra days. Then there’s the supply chain. Since the pandemic, even a small global hiccup can cause hold-ups here. Vital parts like steel frames, trusses or roofing sheets might need to be ordered weeks (or months) in advance. I’ve known farmers who grabbed a great shed kit on special only to wait ages for delivery because parts were imported.  The workaround? Order materials early and plan alternatives. Use reputable suppliers who hold local stock. Talk to your shed provider about lead times on key components – and have backup options ready. If a special colour or feature is going to take ages, it might be worth choosing a local alternative to keep the project moving. Delay Cause How to Avoid It (Quick Fix) Council/permit delays Apply for permits early; double-check local rules. Late design changes Finalise your design before starting; stick to the plan. Bad weather (rain/cyclone) Build in dry season; monitor forecasts; allow buffer days. Material shortages Order materials early; use local stocked suppliers. Scheduling conflicts Hire an experienced builder; set clear timelines with trades. Budget blowouts Set realistic budget with contingency; get firm quotes early. Contractor Coordination and Budget Getting the project through smoothly often comes down to communication. Your shed will involve many players: the concrete crew, delivery drivers, the erection team, electricians, plumbers – the list goes on. One late or missing call to a trade can stall everyone else. The trick? One coordinator. Usually that’s your main builder or project manager. They’ll book in the excavator, then the concreters, then the steel erectors in sequence. If you’re handling it yourself, make a simple timeline: slab day, plus a week to set, plus erection day, etc.  Then update everyone if something changes. And pick your people carefully – I’ve heard horror stories of fly-by-night operators who vanish mid-job. Always check references and go with a reputable local crew who understand Mackay’s conditions. Money woes can also halt progress. If you’re caught short halfway, everyone stops until you sort it. So draw up a clear

Mezzanine Floor shed in qld
Blog

Common Structural Mistakes That Shorten a Shed’s Lifespan

Building a shed is a bit like a long-term relationship: you want it to last through sunshine and storms, right? But if you make some classic blunders during planning or building, your shed’s life can be cut shockingly short. I’ve seen beautiful sheds go from sturdy to sagging fast because of simple missteps.  In this guide, we’ll tackle those mistakes head-on, mixing expert tips with a laid-back Aussie tone. By the end, you’ll know what not to do so your shed can weather Whitsundays heat, humidity and everything in between. Common mistakes include: Planning and Foundation Mistakes First things first, the ground beneath matters. Imagine pouring effort into a new shed only to have it shift or sink because of a wonky base. Foundations in low or wet spots lead to sagging floors and warped frames.  Always pick a level spot and keep the base clear of flood-prone areas. A solid concrete slab or properly compacted gravel pad keeps your shed from heaving and cracking over time. Skipping this step is one of the easiest – and costliest – mistakes to avoid. Skimping on Materials and Design Next up, cheaping out on materials or design is a fast track to a short-lived shed. Using subpar fasteners or thin steel might save a buck initially, but you’ll regret it when rust spots appear or bolts shear off in a storm. Quality is an investment: as one shed expert notes, using better materials can “enhance property value and ensure durability”.  Steel is strong, but in tropical QLD, consider extra measures – heavy galvanising or powder-coat finishes to keep rust at bay. In fact, many Aussie builders even rely on the best shed company australia for durable shed kits and expert guidance. Insert image of a sturdy concrete shed foundation here to illustrate proper groundwork. Climate and Weather Resilience Now, let’s talk weather – especially up here in the Whitsundays. Coastal Queensland isn’t just endless summer breezes; it’s salt-laced air, scorching sun and cyclones in the wet season. All of that loves to wreck a flimsy shed. The moist, salty air in the Whitsundays is famously corrosive: sheds there face “a constant onslaught of moisture and salt” and 70–80% humidity – “a perfect recipe for corrosion”.  Steel panels without heavy coatings will rust quickly. Hefty coatings or stainless fasteners are a smart call. Remember, in Queensland all sheds must meet the National Construction Code (NCC) standards for Class 10 buildings, so shortcuts can mean legal trouble, too. Ventilation and Moisture Control Lastly, don’t forget airflow and upkeep. You wouldn’t lock your wet laundry in a closet, right? The same logic applies to sheds. In humid QLD, good ventilation is vital. Storing your gear in an airtight shed traps damp air – leading to mould, rot and rusty fittings.  This sneaky foe can seriously shorten a shed’s life. As one builder bluntly warns, neglecting ventilation “can significantly reduce the shed’s lifespan”. Make sure your shed has vents or louvres to keep air moving, and consider a small solar vent or fan. Keep floors dry with good drainage or a gravel underlay. These steps protect your gear and the structure itself. Maintenance Musts Even the sturdiest build needs periodic TLC. Think of your shed like a prized ute: a quick rinse and check after a storm keeps things shiny. Rinse off salt spray, sweep out leaves and puddles, and touch up any scratched paint with rust-resistant coatings immediately.  Check and tighten screws, fasteners and seals each season. Replace any corroded brackets or torn seals pronto. Small cracks and rust spots will grow like weeds if left alone. For a little effort now, you’ll save big headaches later – it’s the upkeep that turns a good shed into a great one. Conclusion By avoiding these pitfalls – shaky foundations, skimpy materials, ignoring local climate needs, and lax maintenance – you’ll give your shed the best shot at going the distance. I’ve seen too many quality builds compromised by one missed detail, so build smart and build local. If you’re planning a new shed, don’t just aim to get it up; aim to keep it standing tall for donkey’s years. For personalised advice, chat with a qualified builder or your local council to ensure you meet regulations. Got your own tips or questions? Drop them below or talk to a pro. Good luck, and happy building! Frequently Asked Questions 1. What are the most common mistakes that shorten a shed’s lifespan? Many issues start early: choosing a poor site (low, wet or uneven ground) or skipping a proper foundation leads to movement and cracking. Other biggies are using non-weatherproof materials that rust or rot quickly, failing to anchor the shed against wind, and ignoring ventilation and drainage. In short, cut corners on preparation or materials and your shed will pay the price later. 2. How can I protect my shed from Queensland’s harsh weather? Build with the climate in mind. Use tough materials like hot-dipped galvanised or zinc-aluminium coated steel, and corrosion-resistant fasteners. Secure the shed with concrete footings or heavy-duty anchors. Include ample roof overhangs, gutters and downpipes to keep water away. Vents or louvres help manage humidity. And after every storm, give your shed a once-over to catch any emerging damage. 3. Is a concrete slab necessary for a long-lasting shed? A slab isn’t absolutely mandatory, but a level and strong base is critical. Concreting is the safest bet: it provides a stable, dry platform that resists settling. If you don’t use concrete, at least compact the soil and lay a thick gravel base with edge restraints. The goal is to keep the shed level and off damp ground, so walls don’t warp and doors don’t jam over time. 4. What maintenance can extend my shed’s life? Treat your shed like a prized possession. Wash off coastal salt and sweep out debris regularly. Reapply weatherproof paint or sealant as soon as you see scratches or rust, and replace any failing screws or brackets. Check

storage-shed
Blog

How Wind Ratings Affect Steel Shed Design in Queensland

Imagine a steel shed buffeted by a tropical storm – a cosy backyard workshop one day, an obstacle course the next if it isn’t built right. In Queensland’s wild weather, wind ratings are your shed’s secret weapon. A wind rating is basically a code (like W41 or C2) that tells you the maximum wind speed your shed can shrug off.  It’s the design’s “superpower” rating – get the rating wrong, and a fierce gust can strip off the roof, buckle the frame or even launch your shed like a kite. Engineers use these ratings (as defined in AS/NZS 1170.2 and the NCC) to make sure your new shed stands tall when the winds pick up. What Are Wind Ratings? In plain terms, a wind rating indicates how strong the wind can be before it becomes dangerous for your building. Think of it as strength training for sheds: N-class (non-cyclonic) and C-class (cyclonic) categories set the limits. For example, an N2 rating covers winds up to about 41 m/s (roughly 150 km/h) in less stormy zones, while a C2 rating handles the nastiest tropical gusts (over 250 km/h) in cyclone country.  Every new shed in Queensland must be engineered to the site’s required rating – it’s not optional. Local councils won’t approve your shed unless the plans show it can survive the local wind code. Essentially, the wind rating is the hurdle every shed must clear to be both safe and legal in Queensland. Queensland’s Wind Zones Queensland stretches from mild sub-tropics to full-on tropics, so wind regions vary widely. The southeast (Brisbane, Gold Coast, Sunshine Coast) is usually Region B (moderate winds), while northern coasts (Townsville, Cairns, etc.) fall into Region C (cyclonic winds).  In other words, a Townsville shed needs cyclone-strength design, whereas a Brisbane shed deals with high gusts but not quite full cyclones. (There’s even a new split into B1/B2 around Brisbane in the 2021 code, but for simplicity think “south = tough, north = really tough.”) If you’re building near the Fraser Coast or Rocky, you’re at the cyclone-zone frontier. Wind maps show that every Queensland shed sits in either an Intermediate (B) or Cyclonic (C) zone depending on location. These zones are set by wind surveys and the Australian Standard. Importantly, it’s not just “distance from the beach” – factors like terrain and shielding matter.  A shed on an exposed hilltop or open paddock faces harsher winds than one tucked into suburbia. (AS/NZS 1170.2 calls this “terrain category.”) Whatever your spot, a competent builder will check it. For example, hiring a qualified Custom Sheds & Garages builder means they’ll know your area’s zone and design accordingly. After all, you wouldn’t hire a banana-chopper to cut hair – likewise, you want someone who gets Queensland wind design. Designing a shed for Region C (cyclonic) versus Region B makes a world of difference. For Region B, you might use standard high-tensile steel purlins and rafters, with decent cross-bracing and normal bolt sizes. In Region C, everything beefs up: thicker main frame sections, closer-girt spacing, and additional steel straps or braces on the walls and roof.  Roof cladding is fixed with more screws, and cyclone-rated doors with windlocks are mandatory. Even roof pitch can change (flatter roofs catch more wind, so sometimes a steeper pitch or extra stiffeners are used in cyclones).  Under Queensland’s 2021 standards, builders must even include a climate change factor in calculations – basically planning for storms a bit worse than history. In short, moving from a low to high wind rating makes every element more robust. These changes don’t just cost more – they literally change the shed’s look. Cyclone-rated sheds often have narrower frames and more support struts visible on the outside. Roofs might look more aerodynamic. Every extra brace and bolt is there to handle those punishing gusts. Feature Region B (Coastal/Intermediate) Region C (Cyclonic/North QLD) Typical sites Brisbane, Gold Coast, Sunshine Coast, etc. Bundaberg, Rockhampton, Mackay, Cairns, etc. Design wind speed Moderate (often ~180–200 km/h ultimate) Extreme (often 250 km/h+ ultimate) Frame & steel Standard high-tensile steel, ~6–7m bays Extra thick steel sections, ~4–5m bays Bracing Normal cross-bracing in walls/roof Additional X-braces/straps on all bays Anchors Regular hold-down bolts and footings Deepened footings, bigger bolts and straps Doors & windows Heavy-duty where needed, basic locks Cyclone-rated roller doors with wind locks Cladding fixings Standard screw spacing Double screws/closer spacing on panels Cost, Compliance and Takeaways All this beefing-up does add cost. Cyclone-rated sheds use more steel, labor and concrete – sometimes 20–50% higher than a Region B design of the same size. But it’s an investment: a properly rated shed protects your assets, and even nearby houses (flying debris can be lethal).  Insurance companies actually require the correct wind rating or they won’t cover cyclone damage. In practice, you’ll pay upfront for a stronger design, but avoid a total write-off later. In Queensland, compliance is serious business. Your shed must come with an engineer’s certificate showing it meets the site’s wind rating. Local councils won’t issue a permit without it.  This means planning from day one: get the wind code right before ordering steel. It also means considering terrain and shielding. A rural shed (terrain Category 2 or 3) catches more wind than an urban shed (Category 1), which can bump up the rating needed for the same region. Wind ratings determine how every bolt and beam in your shed is chosen. If you skimp on it, the first big storm will bite you. But if you follow the standards and use a savvy shed builder, your workshop or garage will weather the Queensland elements just fine. Ready to build? Make sure your builder knows the wind code for your postcode and designs accordingly. A quick chat with a structural engineer or your council can avoid massive headaches later. After all, a little due diligence now means your shed will stay standing – whatever the weather throws at it. FAQs How do I know which wind rating I need for my shed? 

Mezzanine Floor shed in qld
Blog

Should You Add a Mezzanine Floor to Your Shed?

A shed usually feels spacious at first, but daily life fills it up fast. Before you know it, tools, extra gear, seasonal items, and supplies end up crammed into every free spot. Instead of extending outward, many owners around the Whitsundays, QLD, prefer a smarter approach by putting in a Mezzanine Floor. It unlocks useful overhead room without eating into your floor area. Plus, a tidy layout makes working inside safer, easier, and a lot less frustrating. Clever layouts take full advantage of high ceilings while leaving the main floor open for vehicles, machinery, or projects. The local environment, designs you plan for the future, and the general layout of this building can all combine in a number of ways when it comes to finding the most suitable design. A well-planned Mezzanine Floor can easily convert a basic setup into a highly practical workspace while adding long-term property value. The goal is finding the right blend of strength, convenience, and flexibility for whatever you end up storing down the road. Why a Mezzanine Floor Makes Sense for Modern Sheds Sheds usually run out of usable room long before they hit their physical limits. Tall roofs often leave a lot of useful space empty, which makes adding a Mezzanine Floor one of the best upgrades you can make. Rather than spending money on a bigger building, tapping into that unused height works wonders. Keeping things tidy gets a whole lot easier once you add a second level. Tools, Spare parts, and stuff to deck out your shed stay accessible while the open lower floor is dedicated to daily shed work. Your workflow stays uninterrupted while pile-ups become nonexistent. Many modern workshop shed designs already include sufficient height for future expansion. Choosing experienced custom workshop shed Builders also helps create structures that comfortably support future additions, including a well-designed Mezzanine Floor. Flexibility is another major perk here. Your storage needs rarely stay the exact same over time. A second-level platform lets your building adapt without forcing you to pay for big structural rebuilds. Whether you are storing personal gear, running a business, or working on hobbies, the space becomes much more practical. Key Benefits of Installing a Mezzanine Floor Adding a Mezzanine Floor does more than just give you extra room for boxes. It completely changes how you use every square metre of the building. A bit of good planning goes a long way toward everyday convenience and long-term value. Benefit Advantage Increased storage Creates additional usable space without enlarging the shed Better organisation Separates equipment, tools, and supplies efficiently Improved workflow Keeps ground-level activities free from clutter Cost-effective upgrade Uses existing building height instead of building an extension Property value Adds practical functionality that appeals to future buyers Additional benefits include: The choice of an upper deck custom design makes your shed easier to manage. Distinct storage areas make shed pieces less likely to go missing and make shed work easier. Important Factors Before Installing a Mezzanine Floor No two structures share the exact same height, frame, or strength. Taking a moment to plan properly ensures a Mezzanine Floor will suit your building safely and effectively. Ceiling clearance remains one of the first considerations. Comfortable movement both above and below the platform depends on sufficient vertical space. Low roof heights may reduce practicality despite available floor area. Structural strength is huge here. The support columns, crossbeams, foundations, and existing walls all need to carry the extra weight safely. Professional assessment helps confirm whether reinforcement becomes necessary before installation. Local council regulations should never be overlooked. Local building rules, engineering sign-offs, and council requirements can vary across Whitsundays, QLD. Sticking to current guidelines from the start saves you from expensive fixes down the road. What you plan to do with the space down the road should guide your choices today. Basic storage requires a very different setup than an active workshop shed. Heavy tools and equipment need much stronger framing than light household boxes. Thinking ahead ensures your Mezzanine Floor stays useful for years to come. The choice of custom design makes your shed easier to manage. The steel framing and good-quality floor boards make the shed easier to manage. How a Mezzanine Floor Improves Shed Storage Solutions Getting your space organized takes more than just slapping up a few extra shelves. Adding a Mezzanine Floor gives you a whole new level so every part of the shed serves a clear purpose. The main floor stays wide open for vehicles, big gear, and large machinery. At the same time, the top platform holds items you do not use every day without hiding them away. Dividing things up like this creates a tidier space and saves you from constantly stepping around stuff. Plenty of owners choose to pair a Mezzanine Floor with modular shelving, strong cabinets, and hanging racks. Elevating storage design combined with all the other shed choices makes daily shed upkeep and work simpler and easier. Good design balances the ease of shed work and the safety of shed storage. Cluttered piles are less likely to cause damage to stored tools and equipment, while tool and equipment storage layouts cause less shed storage upkeep. As your gear multiplies over time, having an extra level gives you room to grow without committing to a full shed extension. That extra flexibility ensures your investment keeps paying off through changing home or business needs. Design Tips for a Functional Mezzanine Floor A well-designed Mezzanine Floor does far more than store extra boxes. The right setup makes everything safer, easier to reach, and far more convenient day-to-day. Every single piece should blend smoothly with your shed layout while keeping future plans in mind. Do not cut corners when picking out your steps. The stairs need proper attention too. A solid, comfortable flight of steps keeps trip hazard risks low, while handrails and non-slip step treads make daily trips up and down much safer. Lighting matters just as much as structural support. Natural light keeps

Large Shed in Bowen
Blog

7 Mistakes to Avoid When Planning a Large Shed in Bowen

Thinking of adding a big shed to your Bowen backyard? Maybe you’re dreaming of a workshop, home gym or a spotless man cave. It sounds like a cracker idea – extra space is always handy. But hold your horses! Building a large shed isn’t just about snapping your fingers and nailing some tin. There are plenty of pitfalls that can send your project sideways.  In this guide, I’ll walk you through the top seven mistakes to avoid so your shed project is smooth sailing. We’ll cover everything from council permissions and site selection to size planning, climate factors, foundations and more. Let’s dive in! 1. Forgetting Permits and Regulations You might think, “It’s just a shed – how hard can it be?” But in Queensland, and especially in the Whitsundays region (where Bowen is), permits matter. Even if it’s “just a shed,” you could be heading for big trouble (and fines of tens of thousands) if you skip approvals.  In Aussie lingo, a shed falls under Class 10a of the Building Code – that covers all non-livable outbuildings like garages and carports. The rules are clear: any large shed over certain limits needs council approval. For example, under Queensland’s Building Regulation, a small tool shed up to 10 m² can be built without a formal permit – but only if it’s outside a tropical cyclone zone. Bowen is smack in the cyclone-prone Whitsundays, so that exemption basically doesn’t apply here. If your shed floor area exceeds about 10 m², or its sides are longer than ~5 m, or it’s taller than ~2.4 m, you’ll almost certainly need a building approval. And even if it’s smaller, there are still rules about how close to the fence it can sit and whether it blocks easements or services. Don’t assume a neighbour’s tiny toolroom is the same as your hefty workshop. I’ve seen folks get caught out by this and have to pay huge fees or even take down a half-built shed. The safe move? Check with your local council or a building certifier first. (This advice isn’t just me yarning – Queensland’s building regs spell this out). Don’t be the one who built a shed and then gets a nasty visit from the council inspector. 2. Poor Site Selection and Layout Picture this: you finish your shed, only to find it blocks the view or the driveway can’t fit your trailer. Or worse, rainwater floods the floor. Location is everything. First off, setbacks. In Bowen, you usually need to keep your shed a few metres back from fences, property lines and the front road. If you slap it up too close to the boundary, you could breach local planning rules or run into ugly neighbour disputes. Next, think about sun and wind. Bowen is tropical – summer afternoon sun can fry metal like a barbecue. If you park your shed on the western side of the block with no shade, the inside will heat up into a toaster come January. Also, Bowen gets northeasterly trade winds and cyclonic gusts. Positioning the shed so it doesn’t take the full force of the prevailing winds can spare you headaches (and maintenance) later. Don’t forget drainage and slope. The shed should ideally sit on flat, well-drained ground. A minor slope is fine (it helps water run away) but a downhill slope means rain might flood through the doorway or pool under the floor. Before you pour any concrete, clear the site of grass, weeds and topsoil – otherwise you’ll have uneven settling or even ants loving your timber frame. Always compact the soil first. Then there’s access. Make sure there’s a clear path to drive in machinery or tools. Plan extra clearance around roller doors so vehicles or mowers can approach easily. Oh – and watch out for hidden surprises underground. We’re talking power lines, buried pipes or even septic areas.  Knocking one of those out during excavation is a right mess (and a cost blow-out). Dial “1100” (Dial Before You Dig) to have underground cables and pipes marked before digging. 3. Not Planning Size and Use (Future-Proofing) One big “rookie” error is guessing how big your shed should be based on today’s needs, only to outgrow it in a year. It’s like buying thongs that fit your old toes – great at the time, but ouch soon! Think ahead. What tools or toys might you collect? Will you need to park a car or caravan inside? Might you later add a workspace or even a small bathroom? It’s always cheaper and easier to build a little extra space now than to try expanding an already-finished shed. To give you an idea, here’s a quick guide to shed sizes and common uses: Shed Size (m) Best Use Notes 3 x 3 Basic tool/garden shed Very compact, a tight fit 3 x 4 Workshop or hobby space Good for one person and tools 4 x 5 Workshop, gym or dual-use studio Room for extra gear or a car 6 x 6 Multi-purpose studio or large workshop Flexible layout, two people Custom Expansive uses (boat, business) Tailor to your exact needs For most Bowen homeowners, something like a 3×4 or 4×5 shed hits the sweet spot – it fits in the yard and gives you space for a workbench, storage cabinets, or even a car without looking like the Great Australian Shed of Oz. Also remember organisation. A common mistake is to build a big empty box without thinking about shelving, lighting or access inside. Plan ahead for wall or overhead storage, workbenches, or even where your bike or lawnmower will go. Poor layout planning can turn a great shed into a junk pile quickly. I’ve seen garages where nobody planned for a single shelf – and then it’s chaos. FAQ (Building Permits): Some folks assume that if the shed is under 10 m² they’re golden. True, Queensland generally allows “accepted development” small sheds up to 10 m². But Bowen is a cyclone area, so that exemption doesn’t apply.  In practice, any

Helicopter Hangars
Blog

Steel vs Fabric Helicopter Hangars: Which Is Better Long Term?

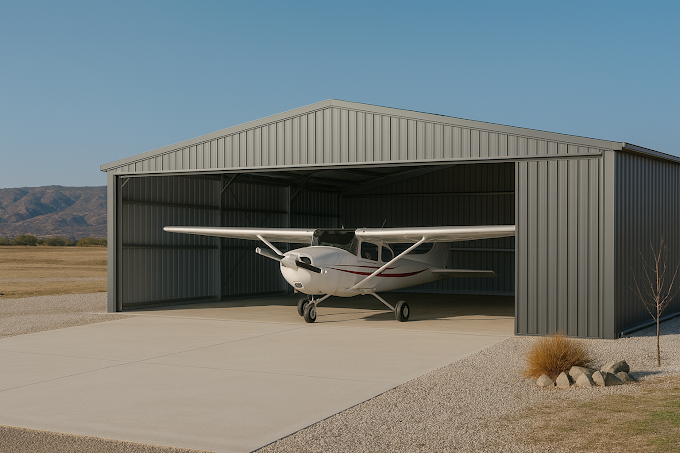
Choosing the right Helicopter Hangars can shape operational efficiency for many years. Every hangar must protect valuable aircraft from changing weather while supporting smooth daily activities. Out in the Whitsundays, QLD, the salty beach weather means you need tough buildings that do not care about hot sun, wet air, heavy downpours, or big summer storms. Because the weather is so hard on things, picking the right build parts is a big choice for the years ahead rather than just a fast buy today. Steel and cloth setups both give you good perks, but they age in very different ways. Price, strength, fix-it work, easy changes, and room to grow all play a part in what you pick. Putting your money into a smart layout keeps your monthly bills down while keeping your flying gear safe and ready to go. Building new helicopter hangars helps your local company grow bigger by giving you safe parking spots and easy work floors. Learning the good points of each build style makes picking much easier, helping you get the best use out of your money without annoying fix-it bills or sudden rebuild costs. Steel Helicopter Hangars Deliver Long-Term Strength Setting up steel helicopter hangars stays the top pick for teams who want real strength and a frame that lasts for decades. Heavy metal beams stand tall against tough Aussie weather days. Beach towns like the Whitsundays deal with thick wet air, big wind gusts, and hard rain all the time. A well-built metal frame stands steady through all these rough weather days without a worry. Metal also holds up bigger flying gear with ease. Wide open floor designs give you huge inside spaces without any annoying middle posts in the way. Because of this, rolling your gear in and out stays much safer and faster. Another great perk is how easy it is to add more room later. Extra tool bays, work sheds, and desk rooms can link right onto your current frame without tearing down the old walls. That easy growth helps your flying team expand smoothly. Money safety teams also like solid metal sheds because they are so strong and rarely break down. Even if the starting price tag sits a bit higher, owning one usually saves you money over the years since the metal stays strong and does not rot away. Fabric Helicopter Hangars Offer Fast Installation and Flexibility Soft fabric helicopter hangars have become a popular choice because they go up super fast. Light frame parts let workers put them together in way less time than big metal sheds. This makes them great for short-term flying spots or shops that need room right away. Cloth builds also mean you do not need as much deep ground work in the dirt. Because of that, your early build bills can stay a bit lower when you start. Companies that need a roof over their heads in a real hurry love this fast setup. Warm sun shines right through the top skin, making the inside nice and bright all day long. Not needing to turn on as many overhead lamps can help keep your power bills down across the months. Still, how well it holds up over time depends on the skin quality, how long the top layer lasts, and the local sun. Beach towns hit the cloth with non-stop hot UV rays, salty air, and wet mist. Running quick checks every now and then is a must to keep the roof safe. Professional planning remains critical when selecting custom aviation buildings. Working with Custom Helicopter Hangar Builders ensures each project matches operational requirements, local environmental conditions, and future business growth. Comparing Steel and Fabric Helicopter Hangars for Long-Term Value Buying a building means looking way past just the first setup bill. Every choice needs to factor in fix-it work, how long the roof will last, easy daily work, and future changes. Both steel hangars and fabric hangars give you handy perks, even if they age in totally different ways over time. Feature Steel Helicopter Hangars Fabric Helicopter Hangars Expected Lifespan Very long Moderate Weather Resistance Excellent Good Maintenance Low Moderate Construction Speed Moderate Fast Expansion Options Excellent Good Structural Strength Outstanding Moderate Long-Term Value Excellent Good Hard metal frames usually give you the best value for your cash because repair work stays super low for years and years. Meanwhile, cloth sheds suit teams who need a fast workroom today with a smaller starting price tag. The local weather plays a huge part in what you buy. Beach spots in Queensland throw rough weather at your walls that calls for tough build parts. Picking the right helicopter hangars for your daily job, your town, and your future plans gives you great value while keeping your upkeep bills low for life. Maintenance Requirements Over the Years Every single flying shed needs a little care now and then to keep the walls and the gear inside safe. But the amount of fix-it work you have to do changes a lot between the different kinds of helicopter hangars. Metal frames usually need much less work because they do not bend, stretch, or shift around in the wind. New paint coats also stop rust from starting, especially when you run quick visual checks every few months. Cloth sheds need more regular looks because the outer skin sits right out under the hot sun, wet rain, and changing winds. Even though modern skins are tougher than old ones, quick washdowns and set checkups keep them working well. Fixing tiny tears early stops big tears later. What you spend on repairs adds up to your total cost over time. A building that needs fewer fixes gives you way more bang for your buck as the years go by. That is why lots of flying crews check the repair steps before picking helicopter hangars for their long-term home. Keeping up with a simple care plan keeps things safe, steady, and ready for work every day. Weather Performance in the

4 Car Garage Shed Kits
Blog

4 Car Garage Shed Kits: What Should Be Included Before You Buy

You know that feeling when your garage starts overflowing? One car sits outside, the boat ends up under a tarp, and your tools somehow migrate into every corner of the house. I’ve seen it happen more times than I can count, especially across the Whitsundays where outdoor lifestyles often mean more vehicles, trailers, caravans, and recreational gear than a standard garage can handle. That’s exactly why 4 Car Garage Shed Kits have become one of the smartest investments for Australian property owners. They don’t simply create extra parking. They give you room to work on projects, safely store valuable equipment, protect vehicles from Queensland’s harsh weather, and even increase the long-term value of your property. The biggest mistake I see people make is buying the first shed that looks big enough. Size matters, but what’s actually included in the package matters even more. Before comparing different options, it’s worth looking at pre-engineered four car garage kits that already include professionally designed structural components for Australian conditions. Why More Australians Are Choosing 4 Car Garage Shed Kits Life has changed over the past few years. Garages are no longer just somewhere to park the family sedan. Many homeowners now need space for a second vehicle, a fishing boat, a camper trailer, a weekend workshop or even a home business. That makes 4 Car Garage Shed Kits incredibly practical. Instead of squeezing everything into a cramped double garage, you create one organised space that works every day of the year. For Whitsundays residents, there’s another important advantage. Queensland weather can switch from scorching sunshine to heavy storms within hours. Keeping expensive vehicles, tools and equipment under a properly engineered steel structure provides protection that temporary shelters simply can’t match. What Should Be Included in Quality 4 Car Garage Shed Kits? Not every shed kit offers the same value. Two buildings may look almost identical online, yet one could include thousands of dollars’ worth of additional engineering and hardware. The first thing I always check is the structural steel. A quality kit should include engineered steel framing designed specifically for Australian conditions. The backbone of the whole structure is the strong columns, roof trusses and wall framing and this is not an area where you want compromises. Roofing and wall cladding deserve equal attention. Premium steel products designed for Australian weather generally last longer, resist corrosion better and require less maintenance. If your property sits close to the coast, corrosion resistance becomes even more important because salty air can accelerate wear on lower-quality materials. The hardware package also matters more than many buyers realise. Every connection relies on bolts, brackets, screws and structural fixings working together. Missing components, while seemingly inconsequential when delivered, can turn into costly delays once construction is underway. You’ll also want to include roller doors in your checklist. Some kits include premium doors with more robust locking and smoother operation, and some only have basic options. Think about how you will use the garage before you make your decision. And last but not least – the engineering documentation Drawings and structural certifications done by professionals make the approval process easier, and give you peace of mind that your investment is in line with Australian building standards. Build for Whitsundays Conditions, Not Just Today’s Budget The cheapest shed to buy rarely saves money in the long run. The Whitsundays experiences high humidity, coastal air and severe weather during cyclone season. Those environmental conditions place extra demands on every part of your garage, from roofing sheets to anchor bolts. The investment in heavier steel, corrosion-resistant coatings and engineered wind ratings may cost a little more up-front but will dramatically increase the longevity over the next decades. Before construction begins, it’s important to understand Queensland building requirements. Information about approvals and building regulations is available through the Queensland Government . Knowing these requirements before you start your project can save you costly delays. Selecting the Correct Size and Layout Flexibility is one of the major benefits of 4 Car Garage Shed Kits.. Some homeowners simply need four parking bays. Others want a combination of vehicle storage and workshop space. I’ve also worked with people who dedicate one section entirely to camping equipment, fishing gear and garden machinery. Think carefully about how your lifestyle may change over the next decade rather than only solving today’s storage problem. If you regularly tow a caravan or own larger four-wheel drives, wider bays and higher roller doors will make daily use much easier. Likewise, adding windows, insulation and roof ventilation during construction usually costs far less than retrofitting them later. A well-designed garage should feel comfortable to work in, not simply big enough to park inside. Feature  Why It Matters  Engineered steel frame  Provides structural strength and durability  Premium roofing & cladding  Better weather resistance and lower maintenance  Cyclone-rated design  Essential for North Queensland conditions  Roller doors  Secure, convenient vehicle access  Gutters & drainage  Protects foundations and manages rainwater  Engineering drawings  Simplifies approvals and construction  Features Worth Paying More For Some upgrades actually add value to your garage. Insulation keeps heat out in the Queensland summer, making the garage a more comfortable place to work on a project or store valuable equipment. Natural light through skylights or windows also helps the interior. No one wants to work in a dark shed with the lights on all day. Ventilation is another feature that is often ignored. Good airflow helps reduce condensation, improves comfort and protects stored items from excess moisture. Electrical planning deserves attention too. Even if you don’t install everything immediately, allowing for future lighting, power outlets and electric roller doors gives you far greater flexibility as your needs change. Rather than thinking about today’s budget alone, consider how the building will serve you over the next twenty or thirty years. Common Buying Mistakes You Can Easily Avoid The excitement of designing a new garage sometimes causes buyers to overlook important details. One common mistake is focusing only on price. A cheaper kit may exclude

Boat Maintenance Shed
Blog

Boat Maintenance Shed: What Every Boat Owner Should Include

Owning a boat in the Whitsundays comes with incredible rewards. Crystal-clear waters, island adventures, and year-round boating create unforgettable experiences. But leaving your hull out in the open beach air quickly ruins even the toughest fiberglass setups. Airborne salt, sudden storms, brutal UV rays, and heavy winds chew through your finishes over the months, proving why setting up a solid boat maintenance shed gives you a reliable shield while giving you a handy spot for weekend oil changes and storage. Mapping out your boat maintenance shed correctly keeps your gear beautifully sorted, slashes your tool hours, and locks in the raw dollar value of your watercraft through summer and winter alike. Outside of just keeping the rain off the decks, the right setup leaves plenty of room for socket sets, spare props, wash buckets, and life jackets. Because of that layout freedom, running your quick visual checks is a total breeze, and your long-term ownership bills stay beautifully low. Every little custom hook and shelf inside helps clear out spatial clutter, making it dead simple to look after your hull after a long weekend cruising the local coastline. Why a Well-Planned Boat Maintenance Shed Matters Sourcing a top-tier boat maintenance shed hands you way more wins than just basic shade. It builds a locked-up workspace where tracking faults and spinning wrenches feels ten times easier. Constant dampness, heavy sun baking, and coastal crust will slowly destroy your gelcoat, marine screens, and stainless steel rails. A sheltered structure significantly slows this natural wear. Many boat owners also discover that an organised workspace encourages regular servicing. When you have a solid roof overhead, you can stop putting off simple fixes since every single socket, filter, and grease gun sits right next to the hull, turning basic logbook care into a simple weekend habit instead of a massive chore that eats up your whole calendar. Dropping a calculated budget into a professional boat maintenance shed prints real equity straight into your real estate valuation while jacking up your daily yard utility. A properly braced frame shrugs off heavy regional wind loads effortlessly, giving your asset folder a permanent structural win. For property owners seeking a complete boat and caravan storage solution, purpose-built sheds offer flexible layouts that protect valuable recreational investments while maximising available space. Essential Features Every Boat Maintenance Shed Should Include A truly effective boat maintenance shed needs to blend storm defense, easy backing access, and common-sense workflow layouts. Tiny tweaks to your construction plan make rolling inspections miles easier while stretching the active runtime of your vessel out to the max. The following features deserve careful consideration: Feature Benefit Wide access doors Easier boat entry and exit High roof clearance Suitable for larger boats and trailers Ventilation system Reduces condensation and moisture Durable flooring Supports heavy loads and simplifies cleaning LED lighting Improves visibility during maintenance Lockable access Increases security for boats and equipment Electrical outlets Powers maintenance tools and chargers Storage cabinets Keeps equipment organised Getting your electrical illumination sorted is an absolute non-negotiable step. Flooding the floor with crisp workshop lights keeps you safe and ensures your diagnostic look-overs catch tiny cracks early, while keeping the airflow moving purges heavy dampness before it grows white mold or eats your wiring blocks. The raw strength of your frame skeleton dictates your long-range upkeep costs. Building a tough boat maintenance shed requires heavy-duty metals that can face down ocean weather shifts without flaking, and thick galvanized beams paired with premium sheeting deliver the best multi-decade performance on local coastal lots. Design Considerations for a Functional Boat Maintenance Shed Constructing a high-utility boat maintenance shed launches from a smart pre-start blueprint. Every single structural line needs to look after your layout safety and workflow speed, ensuring the walls clear your outboards, trailer hitches, and tool benches without forcing you to squeeze through tight gaps. Leaving a wide walkway around the gunwales makes soapy washdowns a breeze. Clearance up top controls your total asset utility from day one. High-cab cruisers stand tall on their rollers, especially if you leave radio masts, radar arches, or t-tops bolted down, making high-clearance openings a must to cut out accidental roof strikes. Simultaneously, a thick, level concrete slab gives your heavy dual-axle trailers a rock-solid foundation to sit on. Heavy-duty racking setups look after your ongoing organization perfectly. Hanging steel wall bays, high-ceiling racks, and lockable tool chests sweep anchor lines, wet weather gear, and oil bottles right off the ground, ensuring your floor stays completely clear of trip hazards. Sorting out your plumbing gradients matters just as much as the framing. Setting up smooth stormwater channels forces rainwater to run right away from the slab edges instead of pooling around the footings, preventing subsoil damp bugs from rotting out your structural foundation profiles. According to the Australian Building Codes Board, effective site drainage contributes to safer and longer-lasting structures. This guidance supports better planning for sheds built in coastal regions. Common Mistakes to Avoid When Building a Boat Maintenance Shed A Boat Maintenance Shed delivers lasting value only when planned correctly. Unfortunately, several common mistakes reduce its effectiveness and increase future maintenance costs. Careful planning helps avoid unnecessary expenses while improving the overall usability of the shed. Some of the most common issues include: A classic trap is skimping on your wall plug allocations during the first trade rough-in. Smart trickle chargers, commercial gurney pumps, overhead LEDs, and grinding tools all want heavy power supply paths, and looping these cables in early saves you from paying for secondary renovations later. Keeping your investment completely safe needs to sit right at the top of your layout check-boxes. Tough commercial padlocks, heavy-duty track entryways, and exterior floodlights shield your expensive outboards from wandering eyes, blending maximum security, everyday ease, and steel muscle into one bulletproof package. Conclusion Building an immaculate boat maintenance shed delivers a long list of real estate wins past basic storage. It locks in a secure, weather-tight envelope that cuts out regular chore

Commercial Shed
Blog

Commercial Shed Layout: Trucks, Forklifts & Loading Bays

Picture, your new commercial shed humming along with forklifts zipping between racks and semi-trailers rolling smoothly into bays. Nice, right? But nailing that effortless flow takes a bit of planning. In this guide, we’ll talk you through designing a commercial shed layout that works for both big trucks and busy forklifts.  Think of us swapping ideas over a coffee about your next big project. By the end, you’ll know how to sketch out a shed plan that handles heavy vehicles like a champ. Let’s dive in. Planning for Truck Access Trucks are no shrinking violets – they’re long, heavy, and need room to maneuver. As you plan your shed, give semi-trailers plenty of space. For example, an articulated semi-trailer can be nearly 19 metres long and requires roughly a 12–13 metre turning radius at low speed.  In practice, that means your access road and yard should allow at least a 20 m-wide turning area for such a truck to swing through without scraping walls or hedges. Doors are another biggie. A standard curtain-sided trailer is about 2.5 m wide and 4 m high. To load them comfortably, your shed’s roller doors should be at least 3.5–4.0 m wide and 4–4.5 m tall.  This extra width lets a truck center itself under the door, even if the driver is off-kilter. If you plan any future change in truck mix (think bigger trailers or hiab trucks), bump up those dimensions even more. Outside the shed, leave a clear apron space in front of each bay. Aim for about 5–6 m of clear space from the door to where the truck stops. This room lets a trailer align properly and gives forklifts space to enter.  Consider drive-through docks too – having room for a trailer to pull forward and exit after unloading means no awkward reversing. In short, treat heavy vehicles as VIP guests: roll out the red carpet with big openings, wide aprons and turning loops. Key Truck Access Guidelines Designing Forklift Aisles and Flow Okay, on to the forklift ballet. If trucks are the guest stars, forklifts are the busy stagehands shuffling pallets. You’ll want straight, unimpeded aisles so they don’t bump into racks (or each other). As a rule of thumb, aim for about 3.0–3.5 metres of clear aisle width for a standard counterbalanced forklift moving one-way.  That covers most forklifts (roughly 1.2–1.5 m wide plus about 0.5–0.6 m clearance on each side). If you run larger forklifts or allow two-way traffic, go wider: 3.5–4.0 m. For example, Linde Material Handling suggests wide aisles (3–4 m) let standard forklifts and pallet jacks maneuver safely, while narrower aisles (around 2.5 m) require special forklifts. Don’t forget vertical space: low ceilings can be a surprise hazard. Give at least 4 m of headroom above floor level so your mast can lift pallets high without hitting the roof or lights. If you go super-high (say insulated panels or storage racks), bump that to 5 m+.  When you sketch rack layouts, leave extra room at the ends for forklifts to turn around comfortably. I once saw a workshop where a fork became wedged in a rack because the aisle was too tight – lesson learned the hard way! Beyond raw dimensions, think traffic flow. Create a simple one-way system if possible – forklifts loop around rather than criss-cross. Mark it with arrows on the floor and reflective tape on pillars.  Separate areas for pedestrian traffic is huge (think zebra-striped walkways with bollards) – keep curious blokes or keyboard jockeys out of the forklift’s line of fire. The general idea is: your forklift aisles should feel as clear as motorways, not like a backyard driveway. Checklist: Efficient Forklift Layout For any unique needs, remember you can always go the route of custom commercial shed solutions – builders who’ll tailor your layout around your specific forklifts and trucks. They can factor in quirky stuff like on-site racking or an awkward land profile that you might overlook. Loading Bay Layout & Equipment The loading bay is the crossroads of your shed – where trucks deliver and forklifts hustle. A well-planned bay minimizes waiting and speeds up the whole operation. First, decide how many bays you need.  If your operation is busy, one bay per key dock door plus a spare is wise. Each bay should be numbered or colour-coded, with enough gap between doors (at least the width of one truck plus ~5 m) so adjacent forklifts don’t collide. Height-wise, go big. A 4–4.5 m high bay is usually safe for road trains or container height trailers. Sliding or sectional doors that open fully overhead are best; they clear tons of vertical space without impeding the drive-through. Install robust rubber bumpers on dock edges to cushion those inevitable nudges.  Ground-level docks (without pits) let forklifts drive straight in; ramped docks or remote truck platforms can also work, just plan slope and drainage carefully so trucks sit flush. Inside the bay, lighting and shelter are golden. Bright LED lights help truck drivers and forklift operators see exactly where they’re backing. An overhang (or awning) above each bay can protect goods from Queensland’s rain while they move.  Also, consider dock levellers – these hydraulic plates bridge the gap between dock floor and truck deck. They make loading faster and keep your forklifts leveled (less spillage). If you store liquids or fine materials, floor drainage channels here can catch spills and keep things clean. Loading Bay Design Tips The upshot? Treat each loading bay like a mini warehouse entrance – roomy, safe, and flood-free. With the right layout, loading and unloading trucks becomes a breeze, not a bottleneck. Safety & Regulation Considerations No matter how slick the layout, safety always comes first. In Queensland (and Australia generally), workplace health rules stress separating people and machines. For example, Safe Work Australia recommends clearly marked footpaths or safety zones to keep forklifts away from human walkways.  Inside your shed, paint bright lines on the floor to form “no-go” zones for forklifts – think of it as a virtual hedge your pedestrians shouldn’t cross. Install bollards or guardrails at office

Tradie Workshop Shed
Blog

7 Must-Have Tradie Workshop Shed Features

Ever feel like your shed is begging for a style makeover? As a tradie in the Whitsundays, your workshop should be the envy of the neighbourhood – not just a rusty tin box out the back.  Picture yourself up north in summer, sweatband on, turning wrenches or firing up a welder inside a space designed for maximum comfort, safety and efficiency.  Your workshop shed is more than storage – it’s your creative lair, your machine temple, your second home. And just like a high-end kitchen needs the right appliances, a top-notch tradie shed needs the right features. Australian summers can be a scorcher, and tropical storms are a constant threat. Whacking on a couple of fans won’t cut it – we’ll cover walls, roofs, anchors, the works.  Also, don’t forget the rules: it pays to make sure your plans tick the legal boxes, even if a small shed often skips the permit (ask a certifier or council to be sure). Now let’s dive into those game-changing features every tradie workshop shed needs. Luckily, you don’t have to sketch up plans on a napkin from scratch. There are Australian made workshop shed kits out there, built for builders and ready to assemble.  A good kit gives you a strong shell from day one, saving you loads of time and headaches. That leaves you free to focus on the fun part – planning benches, lighting and storage. Let’s break down the must-have features and upgrades that will make your shed work as hard as you do. 1. Cyclone-Rated, Heavy-Duty Construction In the Whitsundays, the word ‘cyclone’ isn’t just a beer name – it’s a design spec. Your shed’s frame and roof must stand up to wild winds and tropical downpours. I always specify sturdy steel framing and Colorbond roofing (rust-fighting in salty air).  Make sure every joint is welded to code and the structure is fully certified for high wind ratings. It might cost a bit more, but when the gusts hit 200 km/h, you’ll be glad you did. Don’t forget the feet: a rock-solid concrete slab. A smooth, level slab across the building handles heavy gear and keeps the shed square. I like to pour steel-reinforced concrete with a slight slope so water runs away from the doors. Even a tiny crack can spell trouble (we’re talking leaks and damp floors). A pro builder will finish the slab well and seal it so it lasts for decades. 2. Smart Insulation & Ventilation Even the toughest tradie can lose his cool when the shed turns into a sauna. That’s why ventilation and insulation go hand-in-hand. I install a whirlybird or ridge vent on the roof to suck out hot air, plus wall louvres for cross-flow.  Extra-large, three-sided roller doors are another Aussie classic – they let breeze in and make loading gear easy. Inside, consider insulating the roof and walls (reflective foil or foam panels): this pushes heat out and reduces condensation on cold beer cans. Don’t forget the shade. Position windows or doors to avoid the brutal afternoon sun. Even a lean-to verandah can cut glare and give you a sheltered smoko spot. Ceiling fans or space for a ducted air-con (if your budget allows) are worth planning – just wire them in your electrical plan. Bottom line: keep the airflow moving and the heat out. You’ll work faster and keep tools rust-free when temperatures stay reasonable. 3. High-Quality Lighting & Electrical Setup Imagine dropping a nut in a dark corner at midnight. Frustrating, right? A workshop without good lighting is a recipe for bruised shins and blown deadlines. I treat lighting like good styling – it changes the vibe instantly. Go for bright LED high-bay lights that flood the whole space evenly.  Ditch the flickering fluorescents; LEDs stay bright under heavy use and run cool. Over each bench I install adjustable task lights on swing arms for detail work, and I always put a couple of floodlights at the doors and corners. Power points deserve the same love. Plan separate circuits for heavy gear (welders, compressors) and bench tools or electronics. I usually run at least two big circuits with RCD safety switches – one for machines, one for general use.  Scatter outlets along each wall and maybe one on the ceiling for an electric hoist. Don’t skip extras: a dedicated circuit for a fridge or air-con, or even pre-wiring for solar panels. In short, plan as if you’ll need more power than you think – it pays off down the road. 4. Thoughtful Layout & Accessibility (Doors and Space) A workshop is only as good as its layout. Think through how you’ll use every inch. For example, I often put the main roller door on the wide end of the shed so utes and trailers drive straight in.  A second roller or a sliding door on the opposite side creates a handy drive-through: enter one end and exit the other, no reversing needed. If you need a gantry crane or hoist, pre-plan where the beams go in the roof frame. Tall ceilings give you room for large gear and vertical storage, too. Inside, keep the space open and functional. Mount pegboards or rails on the walls for tools and cables – it frees up bench space. A sturdy mezzanine or high shelf can double storage (just make sure it’s rated for the load).  I always set up a “work triangle” between the bench, a power outlet and a tool cabinet so I don’t have to wander far mid-job. And hey, if you’re planning a serious shed build, double-check local rules: Queensland’s building regulations list a small tool shed (up to ~10m²) as accepted development (no permit needed). Better safe than sorry on that. 5. Durable Flooring & Drainage Solutions Your floor takes a beating, so build it tough. A level concrete slab is the start, but upgrade it: I coat my workshop floors with a tough epoxy or polyurethane finish. It’s stain-proof and abrasion-proof – oil spills or

Scroll to Top