Blog

Your blog category

Blog

Studio Shed Bowen: Costs, Council Tips & Practical Design Ideas

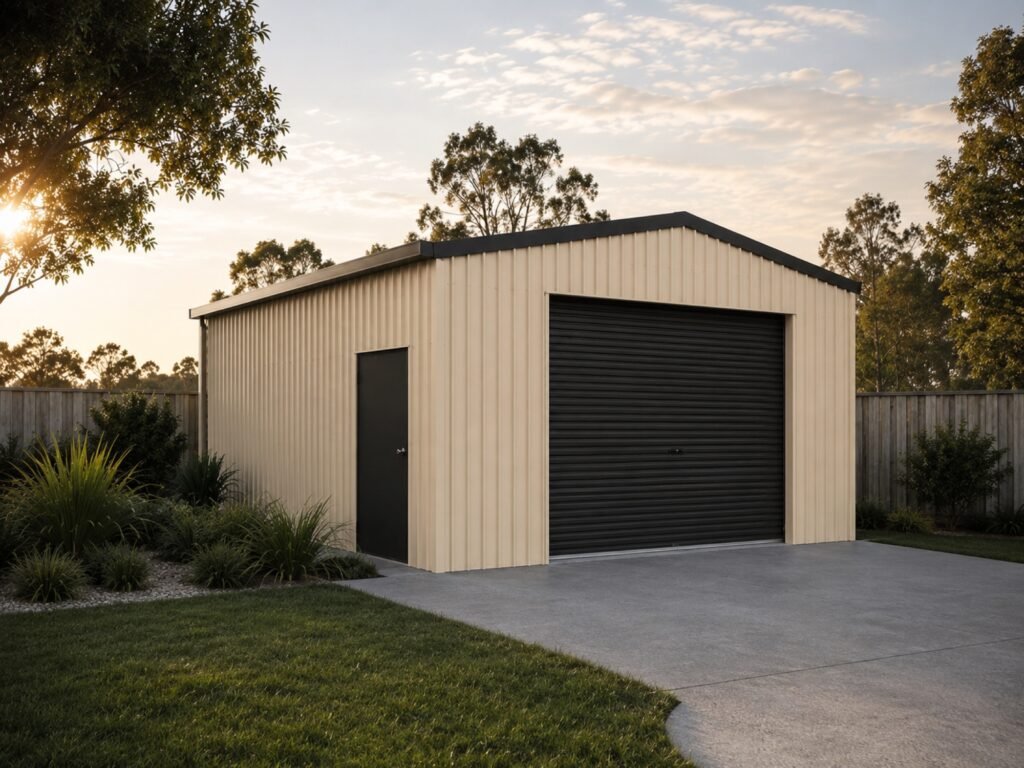
A Studio Shed in Bowen sounds simple at first. A neat little space in the backyard. A quiet room away from the main house. A place where you can work, create, store gear, train, study, or finally drink a coffee without hearing the washing machine perform its daily drum solo. But then reality walks in wearing steel-capped boots. How much will it cost? Do you need council approval? What size works best? Will it survive the Bowen heat, storms, salt air, and the occasional “I’ll just add one more feature” moment? That’s where smart planning matters. If you want help from a Trusted Studio Shed Builder in Bowen, you’ll want a shed that looks good, works hard, and suits the way you actually live — not just a pretty box with a door. A well-designed Studio Shed can become one of the most useful spaces on your property. Think home office, art studio, teen retreat, music room, hobby zone, storage-meets-workshop, or even a flexible guest-style space depending on approvals and intended use. So, let’s walk through the costs, council tips, design ideas, and practical details you should know before you build. Why Studio Sheds Are Becoming Popular in Bowen Bowen has that classic North Queensland lifestyle: sunshine, space, coastal air, and a strong love for practical outdoor living. People here don’t just want buildings. They want useful spaces that can handle heat, wind, rain, and real life. A Studio Shed fits that lifestyle beautifully. You might use it as: The best part? You can design it around your block, your budget, and your daily routine. A backyard studio also makes sense for young professionals. Remote work changed the way people use their homes. The kitchen table had its heroic moment, but let’s be honest — it was never built for Zoom calls, invoices, laptop stands, and half-eaten toast. Studio Shed Costs in Bowen: What Should You Budget? The cost of a Studio Shed in Bowen depends on size, materials, site access, engineering, insulation, flooring, electrical work, and finishing level. A basic shed-style studio costs much less than a fully lined, insulated, powered, and polished workspace. I always tell people to decide one thing early: Do you want a simple functional space, or do you want a comfortable room you’ll use daily? Here’s a practical cost guide. Studio Shed Type Common Use Estimated Cost Range Best For Basic small studio shed Storage, hobby space, light use $8,000–$18,000+ Budget-friendly backyard setup Mid-range studio shed Office, craft room, workshop $18,000–$35,000+ Regular weekly use Insulated premium studio Work-from-home office, creative space $35,000–$60,000+ Daily comfort and better finish Custom large studio Multi-use room, gym, business space $60,000+ Bigger blocks and tailored layouts These figures can move up or down depending on your site. A flat, easy-access block usually keeps costs friendlier. A tricky site with drainage issues, tight access, or extra concrete work can add more to the final quote. The main cost drivers include: In Bowen, I’d never treat weather as an afterthought. Heat, humidity, cyclonic wind considerations, and coastal exposure all matter. A cheap shed that turns into an oven by 10 am won’t feel like a studio. It’ll feel like a punishment with windows. Council Tips for Building a Studio Shed in Bowen Before you order materials or sketch your dream layout on a napkin, check the approval side. Bowen sits within the Whitsunday Regional Council area, so you should understand local building and planning requirements before you start. For general building guidance, you can review the Whitsunday Regional Council’s official Building, Plumbing and Compliance information. A Studio Shed may fall under different rules depending on how you plan to use it. A simple storage shed can differ from a lined studio with plumbing, power, or regular occupancy. Use matters. Size matters. Location on your block matters too. Before building, check: My simple advice: speak with a shed builder, certifier, or council contact early. You’ll save time, avoid expensive rework, and keep your project cleaner from day one. Choosing the Right Size for Your Studio Shed Size can make or break your studio. Too small, and you’ll feel like you’re working inside a stylish cupboard. Too large, and you may spend more than you need. Here’s a simple guide. Studio Shed Size Best Use Practical Notes 3m x 3m Small office, reading room, hobby nook Compact and affordable 3m x 4m Office plus storage Good balance for one person 4m x 5m Creative studio, gym, workshop More room for furniture and movement 6m x 6m Multi-use studio Great for flexible long-term use Custom size Business, large hobby, mixed use Best for specific block layouts For most Bowen homeowners, a 3m x 4m or 4m x 5m Studio Shed offers a sweet spot. You get enough space for a desk, shelving, storage, and movement without dominating the backyard. Before choosing a size, ask yourself: A tape measure will tell you the size. Your lifestyle will tell you whether that size actually works. Practical Design Ideas for a Studio Shed in Bowen A good Studio Shed should feel intentional. It should not look like someone dropped a metal box behind the house and hoped for the best. Start with the purpose. A home office needs quiet, cooling, good lighting, and power points. A creative studio needs airflow, storage, washable surfaces, and natural light. A gym needs ventilation, strong flooring, and enough clearance to move without elbowing a wall. 1. Go Big on Natural Light Windows and glass doors can transform the whole mood. Morning light makes a studio feel fresh and open. But in Bowen, you need balance. Too much direct afternoon sun can turn your peaceful workspace into a toaster. Use: 2. Plan Airflow Like a Local Bowen heat doesn’t politely knock. It enters, sits down, and makes itself comfortable. Good ventilation helps your Studio Shed stay usable. Position windows to catch breezes. Add roof ventilation where suitable. Consider insulation in the roof and walls. If you plan to use the studio

Blog

Farm Sheds Bowen: Cost Factors Every Farmer Should Know

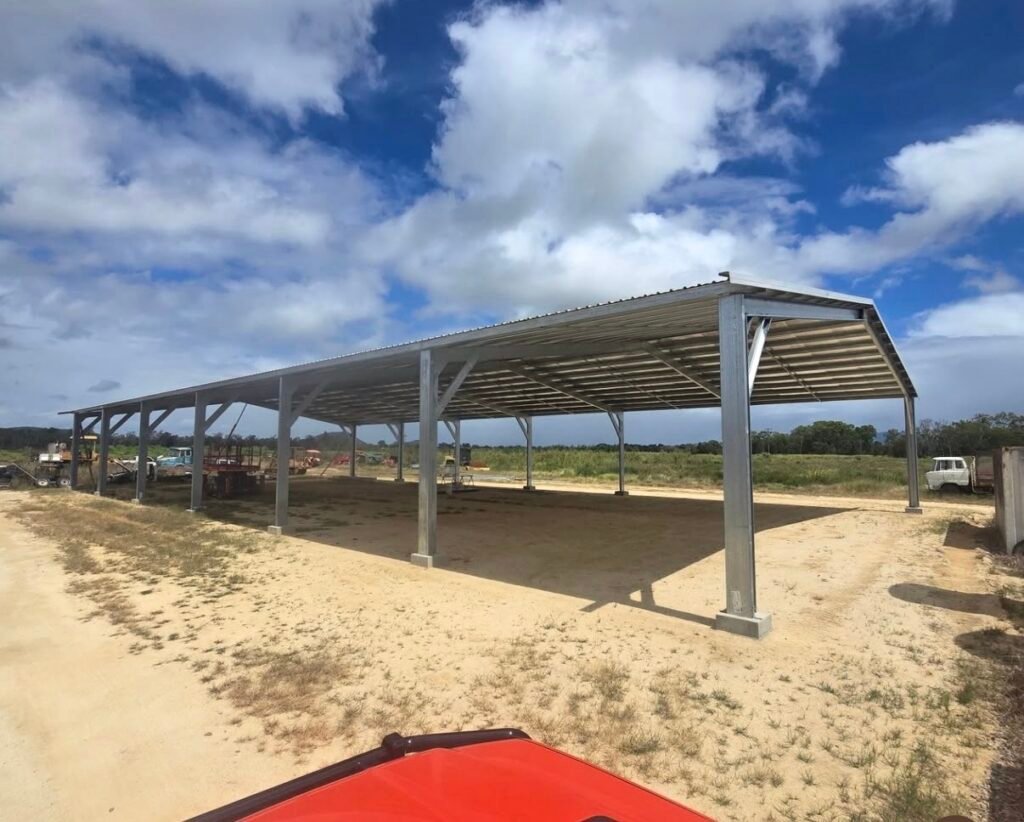
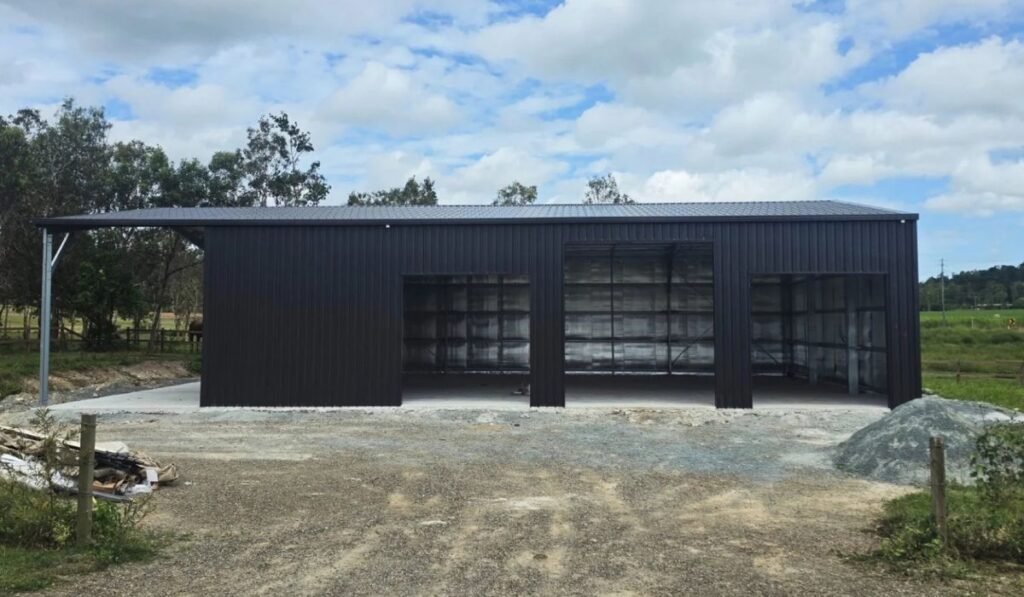
Bowen farming does not run on guesswork. You plan around weather, soil, machinery, labour, harvest windows and those lovely “surprise” repair bills that arrive like an uninvited cousin at Christmas. So when you’re pricing Farm Sheds, you need more than a rough number scribbled on the back of a fuel receipt. A shed is not just a roof over gear. It can protect tractors, fertiliser, tools, hay, irrigation parts, packing equipment, chemicals, vehicles and half the things that keep your farm moving. Get it right, and it becomes one of the hardest-working assets on your property. Get it wrong, and you may end up with a shed that looks good on paper but fights you every day in real life. If you’re planning Farm Sheds for a rural property in Bowen, working with a Trusted Farm Sheds Builder in Bowen can help you make smarter choices around size, layout, materials, access and long-term value before costs blow out. Bowen has its own rhythm. Hot days, coastal air, storms, wind, humidity and serious agricultural activity all shape what farmers need from a shed. A cheap structure may look tempting at first, but on a working farm, “cheap” can become expensive very quickly. Let’s walk through the main cost factors so you can plan with your eyes wide open. 1. Shed Size: Bigger Is Not Always Better, But Too Small Hurts Size is usually the first thing farmers think about when pricing Farm Sheds. Fair enough. More length, width and height mean more steel, more labour, more concrete and more time. But here’s the trap: many farmers price a shed for what they own today, not what they’ll need tomorrow. You may only need space for one tractor now. But what about a second ute, a spray rig, extra implements, bulk fertiliser storage or a larger harvester down the track? Farming has a funny way of filling empty space. A shed that looked huge on day one can feel like a shoebox by year three. Before you choose a size, ask yourself: A larger shed costs more upfront, but extending later can cost more than building properly the first time. I like to think of shed sizing like buying work boots. Too small, and you feel the pain every day. 2. Shed Height and Span: The Hidden Cost Movers Height matters more than many people expect. Tall machinery, tipper trailers, headers, forklifts and storage racks need proper clearance. If the roof sits too low, you’ll spend years ducking, squeezing and swearing under your breath. Wider spans also affect cost. A clear-span shed gives you open internal space without centre columns. That’s brilliant for moving machinery, loading vehicles and setting up flexible storage. But wider spans usually need stronger structural framing, which increases the price. Here’s a simple guide: Shed Feature Why It Matters Cost Impact Extra height Allows larger machinery and better airflow Medium to high Wider span Creates open space without internal columns Medium to high Larger doors Improves access for tractors and trucks Medium Mezzanine areas Adds storage or workspace Medium to high Open bays Useful for quick access and ventilation Low to medium When planning Farm Sheds, do not only think in square metres. Think in movement. Can you drive in, turn, park, load, unload and get out without performing a three-point turn ballet in a dusty paddock? 3. Council, Building Rules and Compliance Costs Approvals can affect timing and budget, especially in regional Queensland. Depending on your shed’s size, use, location and classification, you may need to consider building approval, planning requirements, engineering and siting rules. The Queensland Government provides guidance on farm buildings and vehicle storage farm sheds, including how certain farm building rules work under the Queensland Development Code. This step matters because compliance is not just paperwork. It affects safety, insurance, resale value and long-term peace of mind. Nobody wants to build a shed, then discover it sits too close to a boundary, misses a required standard or creates issues when it’s time to insure the property. In Bowen and the wider Whitsunday region, farmers should also consider local conditions such as wind exposure, access roads, drainage, flood-prone areas and land use. A good shed plan respects the property, not just the price list. 4. Cyclone and Wind Rating: Bowen Weather Does Not Play Soft Bowen sits in North Queensland, and that means wind rating is not a casual detail. It can strongly affect the cost of Farm Sheds. A shed in a sheltered inland area may need different engineering compared to a shed exposed to coastal winds or open rural land. Stronger frames, bracing, fixings, footings and cladding systems may increase the upfront cost. But they also help protect your investment when wild weather rolls through. Think of it this way: a farm shed should not behave like a giant tin kite when a storm hits. Wind-rated design may influence: Yes, stronger design may cost more. But in Bowen, cutting corners on wind resistance is like wearing thongs to a cattle yard. Brave? Maybe. Smart? Not really. 5. Materials: Steel Quality, Cladding and Corrosion Protection Material choice has a major impact on cost. Most modern Farm Sheds use steel framing and metal cladding because they offer strength, durability and relatively low maintenance. But not all steel is equal. In a coastal or humid environment, corrosion protection matters. Bowen’s climate can be tough on low-quality materials. If you store chemicals, fertiliser or machinery with residue, internal conditions can also speed up wear. Common material cost factors include: Material Choice Benefit Cost Consideration Galvanised steel Strong corrosion resistance Usually costs more than basic steel Quality roof sheeting Better durability and weather protection Medium cost impact Insulation Reduces heat and condensation Adds upfront cost Skylight panels Improves natural light Low to medium cost Vermin-proofing Protects stored goods and equipment Low to medium cost Gutters and downpipes Helps manage water flow Low to medium cost If you store high-value machinery, chemicals, feed or produce, better materials are

Blog

Residential Sheds Mackay: Designs, Costs & Planning Guide

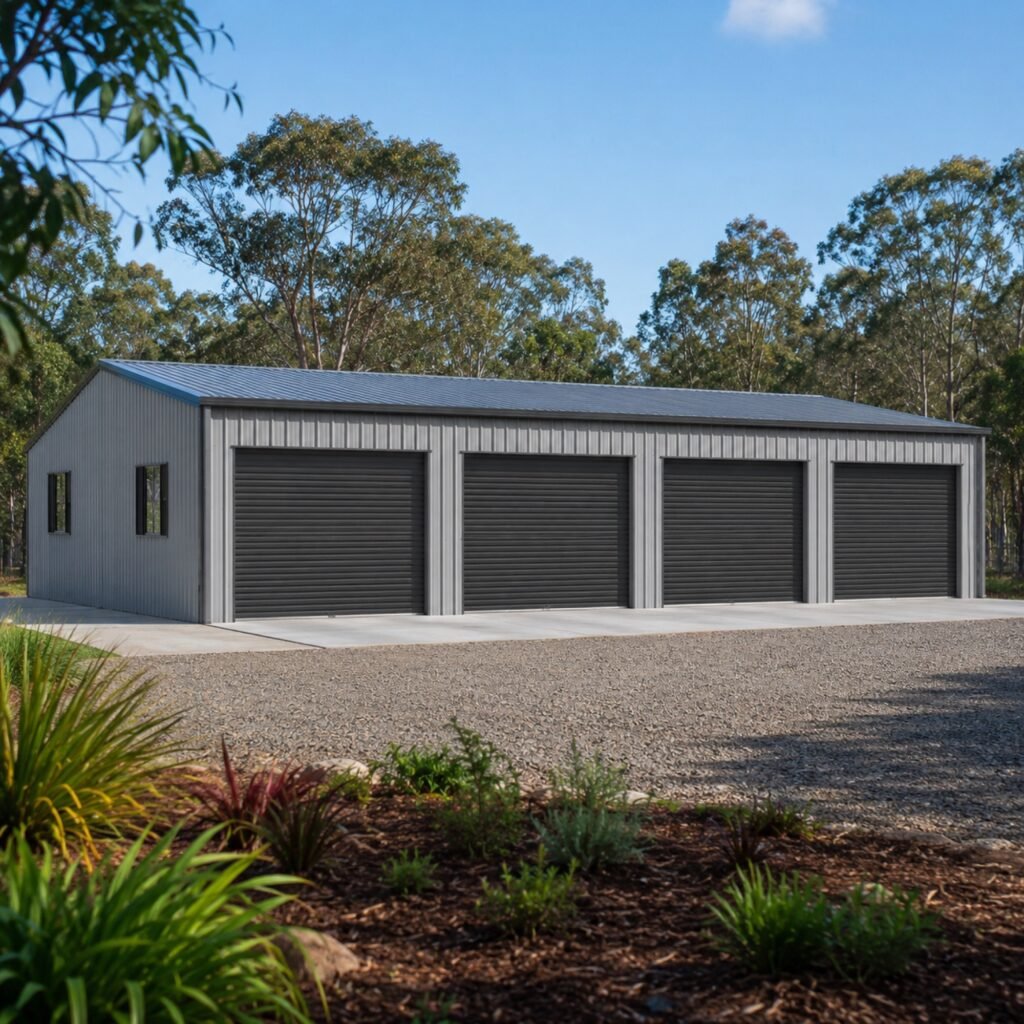
A good shed is never just a shed. In Mackay, it can be the quiet hero of your backyard — a place for tools, camping gear, bikes, garden gear, weekend projects, fishing rods, and that one mystery box you swear you’ll sort out “next Sunday”. With Mackay’s warm weather, coastal air, summer storms, and outdoor lifestyle, Residential Sheds need more thought than simply picking a size and colour. You want something that looks sharp, works hard, handles local conditions, and doesn’t turn your backyard into a metal sauna with a roller door. If you’re planning a backyard upgrade, working with a Trusted Residential Sheds Builder in Mackay can help you choose the right shed design, layout, materials, and approval pathway without turning the whole process into a guessing game. Why Residential Sheds Are So Popular in Mackay Mackay homes often come with one big advantage: outdoor space. Whether you live near the coast, on a suburban block, or a larger property outside town, that extra space can become a very useful asset. A residential shed gives you room to breathe. It clears the garage, protects your gear, and creates a dedicated area for the things that make life easier. You might use your shed for: And let’s be honest, once you own a shed, you suddenly find 47 new things that “definitely need to go in there”. Planning Residential Sheds in Mackay: Start With Purpose Before you look at colours, rooflines, or roller doors, start with one simple question: What do you actually want the shed to do? This sounds basic, but it saves you from building a shed that looks great and fails at its main job. A garden shed needs a different layout from a workshop. A boat storage shed needs different clearance from a small tool shed. A weekend hobby space needs better lighting, airflow, and access. Here’s a simple planning table to help you narrow it down: Shed Purpose Best Design Features Things to Consider Garden storage Small footprint, single door, shelving Easy backyard access Workshop Wider span, windows, power points, ventilation Noise, lighting, bench space Vehicle storage Roller door, concrete slab, high clearance Driveway access and turning space Boat or trailer storage Long bay, wide opening, strong slab Height, length, drainage Hobby shed Insulation, natural light, airflow Comfort during hot weather Multi-use shed Divided zones, shelving, workbench Future storage needs A shed should fit your lifestyle now, but it should also leave room for what comes next. Because today it’s a mower and a toolbox. Tomorrow it might be a kayak, a ride-on mower, or a full-blown weekend project station. Mackay Shed Approvals and Local Planning Rules This is where the practical side steps in wearing steel-capped boots. In Mackay, residential sheds often fall under Class 10a structures, which generally means non-habitable buildings such as sheds, garages, and carports. Depending on size, location, site cover, setbacks, overlays, and the way you plan to use the structure, you may need building approval before construction starts. For local guidance, check Mackay Regional Council’s page on when a building permit is required. This part matters because approval issues can delay your project, add costs, or force changes after you’ve already fallen in love with a design. Nobody wants to redesign a shed after mentally placing the workbench, beer fridge, and fishing rod rack. Before building, check: If you’re unsure, speak with a local shed builder, certifier, or council before you commit. It’s much easier to adjust a plan on paper than on a concrete slab. Best Residential Shed Designs for Mackay Homes The best shed design depends on your block, your budget, and how much stuff you plan to store. And yes, “stuff” is a technical term when you own a garage full of things you might need one day. 1. Classic Gable Roof Sheds A gable roof shed gives you that traditional pitched-roof look. It works well for many Mackay homes because it sheds rain effectively and offers good internal height. Best for:Workshops, vehicle storage, general backyard sheds, and larger residential storage. 2. Skillion Roof Sheds A skillion roof has one clean sloping roofline. It looks modern, sharp, and a little bit architectural without trying too hard. Best for:Young professional homeowners who want a shed that feels more designed than dumped in the backyard. 3. Garage-Style Residential Sheds These sheds suit homeowners who want secure vehicle, trailer, or equipment storage. Add a roller door, personal access door, and concrete slab, and you’ve got a practical backyard powerhouse. Best for:Cars, motorbikes, trailers, boats, and larger equipment. 4. Workshop Sheds A workshop shed needs more than four walls and a roof. You’ll want bench space, power access, lighting, ventilation, and smart storage. Best for:DIY projects, tools, woodworking, mechanical work, and weekend tinkering. 5. Custom Multi-Bay Sheds A multi-bay design gives you flexibility. One bay might store tools, another protects a vehicle, and another becomes a workshop. Best for:Growing families, larger blocks, and anyone who knows their storage needs will keep changing. Residential Shed Costs in Mackay: What Affects the Price? Shed costs vary because every site and design is different. A small garden shed costs much less than a large custom shed with slab, roller doors, insulation, windows, power, and extra engineering. Here are the biggest cost factors: Cost Factor How It Impacts Price Shed size Bigger sheds need more steel, labour, and slab work Roof style Complex rooflines can increase cost Wind rating Mackay conditions may require stronger engineering Concrete slab Thickness, site prep, and access affect pricing Doors and windows Roller doors, PA doors, and windows add cost Insulation Improves comfort but increases upfront spend Site conditions Sloping, tight, or difficult sites may cost more Approvals Certification and council-related steps may apply Extras Gutters, downpipes, skylights, ventilation, and shelving add value As a rough guide, smaller residential sheds may start from a modest budget, while larger custom sheds with concrete slabs and upgrades can move into a much higher price range. The smartest move is to

Blog

Aircraft Hangars Mackay: Size, Cost, Designs & Planning Guide

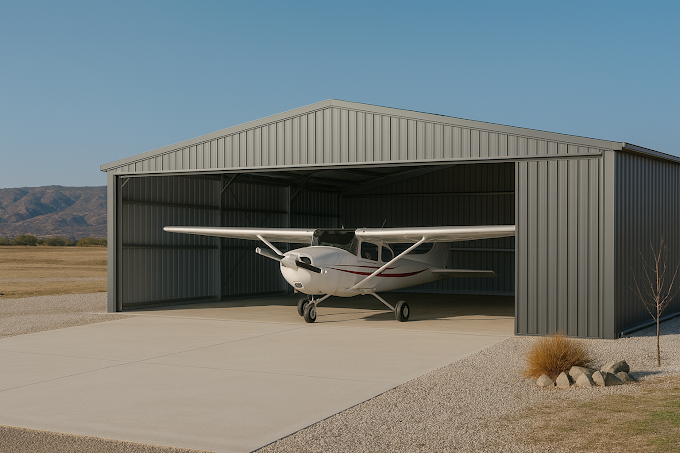
In Mackay, the weather can turn from postcard-perfect to “grab the tie-downs” faster than you can finish a servo coffee. Sun, salt air, humidity, storms, and the odd savage wind gust all have a say in how you protect your aircraft. That’s why Aircraft Hangars matter so much here. They don’t just store planes. They protect serious investments, support smoother operations, and give owners a proper base for maintenance, gear, tools, and future growth. If you own a private aircraft, run an aviation business, manage rural land, or need storage near Mackay’s aviation routes, the right hangar can save you money, stress, and a few colourful words during storm season. A smart hangar works like a tailored suit: it fits properly, performs well, and doesn’t make you regret your decisions every time you use it. For larger steel structures, farm storage, and aviation-style shed builds, it also helps to work with a Trusted Aircraft Hangars Builder in Mackay who understands local conditions, practical access, span requirements, and durable shed construction. Why Aircraft Hangars Matter in Mackay Mackay sits in a beautiful but demanding part of Queensland. You get tropical heat, heavy rain, coastal moisture, and storm activity. That combination can punish aircraft finishes, avionics, tyres, fuel systems, tools, and ground support gear. A good hangar helps you: I like to think of Aircraft Hangars as more than oversized garages. A well-designed hangar becomes a working space, a storage solution, a weather shield, and sometimes even the best-looking building on the property. Not bad for something that also keeps birds from treating your wing like a penthouse balcony. Choosing the Right Aircraft Hangar Size Size comes first because everything else follows it: cost, door type, slab design, access, layout, engineering, and approval needs. Go too small, and you’ll hate every tight turn. Go too large without a plan, and you’ll pay for empty air. The best size depends on your aircraft type, wingspan, tail height, number of aircraft, and how you want to use the space. You should also allow room for movement, not just parking. A hangar that technically fits your aircraft can still feel like trying to park a LandCruiser in a linen cupboard. Common Aircraft Hangar Size Guide Aircraft Type Approx. Hangar Width Approx. Depth Approx. Height Best For Light sport aircraft 10m–12m 10m–12m 3.5m–4.5m Private hobby flying Single-engine aircraft 12m–15m 12m–15m 4m–5m Cessna, Piper-style aircraft Twin-engine aircraft 15m–20m 15m–18m 5m–6m Larger private aircraft Helicopter storage 12m–18m 12m–18m 4m–6m Rotary aircraft and service access Commercial aviation storage 20m+ 20m+ 6m+ Multiple aircraft, workshops, operations For Mackay aircraft owners, I’d always allow extra room for benches, fuel-safe storage areas, spare parts, towing gear, and comfortable walkways. Nobody ever says, “I wish I made my hangar more cramped.” Nobody sensible, anyway. Planning, Permits and Local Approval Considerations Before you order steel, pour concrete, or start dreaming about polished floors and a coffee machine in the corner, check the planning rules. Hangars can involve building approval, site setbacks, stormwater planning, access requirements, fire safety, and zoning considerations. For Mackay projects, start with the official Mackay Regional Council planning and development information. It gives you a practical starting point for local building and development requirements. You may need to consider: If your aircraft hangar sits on rural land, private property, commercial land, or near an airfield, the approval path can change. So, speak with a qualified certifier, local council, or experienced shed builder early. That one call can save weeks of back-and-forth later. Aircraft Hangar Design Options That Actually Work Design makes or breaks the daily experience. A hangar should let you move easily, open doors smoothly, store gear safely, and work comfortably. 1. Open-Span Steel Hangars Open-span steel designs suit Aircraft Hangars because they reduce internal columns and give you clean movement around the aircraft. This matters when you tow, inspect, wash, or service your plane. Steel also suits Mackay’s climate when you choose the right coatings, fasteners, gutters, and roof pitch. It gives the structure strength without turning the inside into an obstacle course. 2. Gable Roof Hangars Gable roofs suit many aviation sheds because they shed water well and create a classic, clean look. They can also support good airflow, which helps in humid regions. 3. Skillion Roof Hangars Skillion designs look modern and sharp. They work well when you want a contemporary aviation shed, especially on properties that already have modern industrial or rural buildings. 4. Cantilevered Door Hangars Door choice deserves serious attention. A wide aircraft hangar door needs strength, clearance, and smooth operation. Sliding doors, bi-fold doors, hydraulic doors, and roller doors each suit different budgets and aircraft types. A poor door choice turns every flight day into a wrestling match. And frankly, your aircraft should create the adrenaline, not the door. What Impacts Aircraft Hangar Cost in Mackay? Costs vary because every project has different ground conditions, spans, finishes, doors, slab needs, and compliance requirements. Still, you can understand the big cost drivers before you request quotes. Main Cost Factors Cost Factor Why It Matters Hangar size Larger spans need more steel, stronger framing, and more labour Door system Aircraft doors often cost more than standard shed openings Engineering Mackay conditions may require stronger wind-rated design Concrete slab Aircraft loads and towing movement need suitable slab planning Site access Remote or tight sites can increase delivery and installation costs Insulation Helps control heat, condensation, and comfort Electrical fit-out Lighting, power points, fans, and security add cost Stormwater management Gutters, downpipes, and drainage must suit local rainfall As a broad planning mindset, don’t only budget for the shell. Think about the full working space. Slab, doors, drainage, ventilation, access, lighting, and future upgrades all matter. Cheap can become expensive if you need to fix layout problems later. Smart Layout Ideas for Aircraft Hangars A clean hangar layout feels effortless. You walk in, move around the aircraft, grab tools, check parts, and get things done without stepping over extension cords like you’re in a low-budget action

Blog

Timber vs Steel Machinery Sheds: Pros, Cons & Costs

Picking the right setup for Machinery Sheds can definitely feel like a bit much. You’ve got to weigh up the weather, your budget, and how long the thing will actually last. Most people end up choosing between timber and steel these days. Both have their own pros and cons, so you really need to compare them properly before you put your money down. In places like the Whitsundays, you can’t ignore the weather. Between the big winds, the humidity, and the salt air, your materials have to be tough. Timber looks great and gives you a lot of flexibility in how you design the space. Steel delivers strength and long-term durability. Both materials do different jobs depending on what they’re used for and where they’re located. Because of that, the right choice depends on key priorities, as highlighted by Australia’s Trusted Machinery Sheds Builder. This blog guide explores key differences to help professionals make informed decisions. We take a look at everything, from the initial price tag to the upkeep. The whole point is to figure out what really works best for building efficient, tough Machinery Sheds. Timber Machinery Sheds: Natural Appeal with Practical Limits Timber Machinery Sheds have that classic look that fits right in with the countryside. Plenty of people pick timber simply because it has that warm and natural feel to it. Also, timber is just easier to handle, which lets you get creative with custom layouts or weird dimensions. It’s perfect if you’re after a specific look or a unique shape for your build. But the downside is that timber needs constant looking after. Dampness, bugs, and the weather will eat away at the structure over time, so you’re stuck doing regular treatments and checks. As a result, long-term costs may increase despite lower upfront expenses. Additionally, timber structures perform well in moderate climates. Still, if you’re in a humid spot, the wood is going to rot a lot faster. You can try to fight it with good sealing and fans, but let’s be real, timber is always going to be a bigger project than steel as the years go by. Steel Machinery Sheds: Strength Built for Harsh Conditions Steel Machinery Sheds stand out for durability and structural strength. These sheds handle extreme weather conditions with ease. Strong winds, heavy rain, and coastal exposure cause minimal impact on steel structures. Consequently, steel becomes the preferred choice in demanding environments. Steel is the opposite; it doesn’t care about pests or rot. You won’t be spending nearly as much time or money on maintenance, which helps keep your long-term costs down. Even if it costs a bit more upfront, the fact that it lasts so much longer makes up for the price. Modern steel designs also allow quick installation. Prefabricated components streamline construction processes. Therefore, project timelines improve significantly. Also, steel is the perfect match for the high-end equipment you’d see with a directional drilling company or a major infrastructure team. Cost Comparison: Timber vs Steel Machinery Sheds Cost plays a decisive role in selecting Machinery Sheds. Both materials differ in upfront pricing and long-term value. Factor Timber Sheds Steel Sheds Initial Cost Lower Higher Maintenance Cost High over time Low Lifespan Moderate Long-lasting Installation Speed Moderate Long-lasting Weather Resistance Moderate Long-lasting Timber appears cost-effective initially. Those maintenance bills for timber really start to add up. Steel, however, usually gives you better value when you look at the big picture. That’s why you’ve got to look at the total cost over the years before you decide. Performance in Real-World Applications Machinery Sheds have to be able to take a beating. Between storing heavy gear and dealing with the elements, you need a build that’s actually tough. Steel is usually the winner when it comes to industrial-scale work. They support heavy loads and resist structural deformation. Timber sheds suit lighter applications. Timber frames are fine for storing smaller tools or light gear. But if you’re parking heavy machinery inside, a wooden structure might start to feel the strain after a while. Jobs that involve vacuum excavation contractors usually need a storage solution that can take a beating. Steel sheds are great for keeping sensitive gear safe from the weather. In the same way, vacuum excavation services really gain from steel being so strong and low-maintenance. Everyone is chasing better efficiency these days, which is why pros are moving toward materials that last. Steel just hits those marks a lot better than the alternatives. Design Flexibility and Customisation Options Design flexibility influences the functionality of Machinery Sheds. Timber offers greater adaptability in custom designs. Unique shapes, extensions, and aesthetic features become easier to achieve with wood. This advantage appeals to projects prioritizing visual appeal. Steel, however, supports large open spans without internal columns. This feature maximizes usable space. Industrial operations benefit from unobstructed layouts. Equipment movement becomes smoother and safer. Environmental Impact and Sustainability Considerations Being green is a big deal in building now. If the timber is sourced right, it’s a great renewable option that stores carbon. But you have to remember that the chemicals used to stop it from rotting can sometimes cancel out those eco-benefits. Steel, although energy-intensive during production, remains highly recyclable. Many steel structures use recycled materials. This factor improves sustainability over time. Additionally, a longer lifespan reduces resource consumption. Balancing environmental impact requires careful material sourcing. You can go green with either option. Your choice should just be based on which one performs better for the environment over the long haul. Maintenance Requirements and Longevity Maintenance directly affects the lifespan of Machinery Sheds. Timber requires regular sealing, painting, and pest control. Neglecting maintenance leads to structural issues. Therefore, an ongoing effort becomes necessary. Steel demands minimal upkeep. Occasional inspections and cleaning maintain structural integrity. Putting on protective coatings makes steel even tougher. This means a steel building can easily last for decades without you having to do much at all. Professionals prefer solutions that reduce downtime. Lower maintenance translates into operational efficiency. Steel

Blog

Man Cave Renovation Costs Explained: Materials, Labor and More

Walk into a great man cave and you feel it instantly: warm lighting, the right sound, a cold drink within arm’s reach, and a space that says “weekend starts now.” In the Whitsundays, you can keep a Man Cave renovation pretty affordable if you start with a clean spare room and stick to cosmetic work (paint, flooring, lighting, extra power points). The second you try to tame a hot shed, add plumbing, or move anything structural, your costs jump—fast.  If you want shed-style ideas before you price anything, I’d start here: Australia’s Trusted Man Cave Shed Builder (it helps you visualise layouts and avoid the “I forgot space for the fridge” moment). I group most Man Cave Renovation projects into these brackets, based on real-world component costs (plasterboard, painting, flooring, electrical, and cooling) and how much work your starting space needs.  Scope What you’re paying for Ballpark budget (AUD) Style refresh (existing room) Paint, flooring, lighting tweak, a few extra power points $4k–$15k Proper conversion (garage/shed/rumpus) Insulation + lining, flooring, more power, split-system air con $15k–$45k Premium fit-out Sound treatment, custom joinery/bar, high-end AV wall, smart lighting $45k–$120k+ If you want a trend-forward space without blowing the budget, I usually spend on three vibe-makers: a moody “scene” lighting plan, one hero texture (timber slats, matte black metal, or even a coastal cane detail), and an AV wall that hides cables like a magician. Then I keep the rest simple and durable—because a man cave should feel effortless, not precious. What actually drives the price When you ask me “How much will my Man Cave Renovation cost?”, I always ask one thing back: what are you starting with—an air‑conditioned room, or a storage space that sweats and bakes? These factors move the needle the most: Approvals and rules in Queensland so you don’t get stung later Most people don’t blow a Man Cave Renovation with bad styling—they blow it with missing approvals or dodgy (read: illegal) workmanship. In Queensland, the state building regulator Queensland Building and Construction Commission says you’re responsible for making sure the right building approvals sit in place before work starts—even if you hire a builder.  Because you’re building in the Whitsundays area, I also lean on Whitsunday Regional Council guidance as my starting point: local building and development rules.  I see homeowners most often need a certifier’s advice when they: If you decide to go the owner‑builder route for bigger work, you also need permits/approvals before you start, and penalties can apply if you skip that step.  Materials costs explained I’ll give you the numbers that matter most, using current cost guides across Australia—then you can plug your room size into them and price your Man Cave Renovation with less guesswork. Lining a garage or shed: Plasterboard supply and install often sits around $15–$20 per m² for standard plasterboard work.  Insulation: Materials-only insulation batts often come in around $4.50–$6 per m², while installed prices vary by access and type.  Flooring quick picks: Vinyl planks can start around $16 per m² (materials), while higher quality planks with an acoustic layer often land around $45–$65+ per m². Epoxy flooring often runs about $30–$35 per m², and it can rise to $80–$100 per m² with prep and decorative finishes. Carpet installation (when you supply carpet) commonly lands around $55–$75 per m².  Electrical & lighting: Electricians often charge $80–$100/hr plus a $80–$130 service fee, depending on job and location.  Cooling: Supply-and-install guides commonly put a basic split system in the low thousands, and ducted systems much higher (often $8k–$15k).  Labour costs and how tradie pricing really works You don’t pay one big “labour cost.” You pay for a chain of visits: prep → set-up → install → finishing → tidy-up. That’s why a small scope change can trigger a whole extra call-out, which can sting a Man Cave Renovation budget. Here are typical ballparks from current cost guides: Trade Typical pricing (AUD) Electrician $80–$100/hr + $80–$130 service fee  Plumber $80–$200/hr + $60–$250 call-out  Carpenter $40–$120/hr  Handyman $55–$85/hr  If you want a simple way to sanity-check quotes, I use a rough split: materials, then labour, then fees/permits. One common guide breaks it into 50% materials, 35% labour, 15% fees/permits on bigger projects.  The hidden costs that blow budgets I’ve watched great Man Cave Renovation plans fall over because someone forgot the boring stuff. Add a contingency: A rule-of-thumb from an Australian state building regulator suggests you plan 10–20% for unforeseen costs.  Plan for moisture control: Government health guidance links mould growth to damp, dull, poorly ventilated areas, so I treat ventilation and moisture control as “core build items,” not optional extras.  Respect wet-area rules: If you add a bathroom or sink, the building code sets wet-area waterproofing requirements, and the state regulator keeps flagging the need for compliant, correctly installed waterproofing.  Conclusion A Man Cave Renovation in the Whitsundays can cost a few grand or it can cost “new car money.” You decide the range by picking your scope (refresh vs conversion vs premium), budgeting for cooling and power early, and leaving room for surprises.  This weekend, measure your space, list your must-haves, then grab three itemised quotes from licensed local tradies. I’d compare inclusions, exclusions, and variation rules before I pick the cheapest number—because clarity saves you more than any “discount,” and it keeps your Man Cave Renovation on track.  Frequently asked questions How much does it cost to convert a garage into a man cave in Australia?Most garage conversions land in the $15k–$45k bracket when you pay for lining, insulation, flooring, electrical upgrades, and a split system—then your choices (sound, bar, finishes) push it up or down.  What’s the cheapest flooring that still looks good?Epoxy can look sharp over a slab at around $30–$35 per m² for straightforward systems. Vinyl planks start cheap and still look modern, especially when you pick a thicker plank with acoustic backing.  Do I really need air conditioning?If the space sits in a shed or garage and you plan to use it year-round, I’d

Blog

Shed Kits vs Custom Sheds: Which Is Best for Your Aussie Backyard?

Imagine standing in your backyard on a sunny afternoon, musing over where to stow your tools or set up that dream home gym. Suddenly the question hits you: should you grab a ready-made shed kit or go fully custom? It’s a classic Aussie dilemma. Both options can give you a solid, weatherproof space, but the experience and outcome can be quite different.  I’ve chatted with mates who swore by the bang-for-buck of a ready-to-assemble shed kit, and others who wouldn’t touch anything less than a tailor-made build. In this guide, we’ll weigh up Shed Kits vs. Custom Sheds down under – breaking down cost, time, durability, style and more, so you can pick the right fit for your project. After all, whether it’s a DIY project to keep you busy on weekends or a hired professional job, there’s more to the story than meets the eye. For starters, a shed kit is basically a prefabricated package – pre-cut panels, walls, roof and all – delivered to your door with instructions. You (or a contractor you hire) put it together on site.  A custom shed, by contrast, is designed and built on location from scratch or from plans, so it can match any quirky shape or style you like. Both approaches have their merits. For example, you might browse options from Australia’s Trusted Shed Kits Supplier to see how convenient a kit can be, or consult a local builder about a fully bespoke shed. Let’s dive into the pros and cons of each. Understanding Shed Kits and Custom Builds Shed Kit (Prefab) – Think of this like Ikea furniture for your backyard. The supplier gives you metal or timber components cut to size: walls, roof sheets, doors, hardware and a set of plans. These kits often come in common sizes and Colorbond® colours, so you can pick a standard design and modify it slightly (like adding a window or roller door).  The advantage? Everything is prepared ahead of time for relatively quick assembly, and the cost usually only covers materials and delivery. You do need to prepare the site – leveled ground or a concrete slab – and have some basic tools or hire a tradesperson to help. Custom Shed – This route is like hiring a kitchen cabinet maker for your storage space. You (or your designer/builder) work out the exact dimensions, materials and style from scratch. The builder arranges foundations, sources all materials (maybe timber framing or heavy-duty steel, glass windows, custom trim – whatever you want) and constructs the shed at your property. It’s more work upfront (design, permits, excavation, etc.), but you end up with a truly one-of-a-kind structure. For example, if you want a funky shed that doubles as a backyard studio or matches an old Queenslander house, a custom build can make that happen. Both approaches fall under the Building Code of Australia as Class 10a buildings (non-habitable structures like garages, garden sheds and carports). That means even kits have to meet code for structural strength and safety. In fact, local regulations often say you can install very small kits – say under 10–36 m² – without a full permit as long as they comply with code and setback rules.  For instance, a Queensland council notes that a simple shed (under 10 m², single-storey) can go ahead with minimal fuss. Likewise, Tasmanian guidelines allow prefab sheds up to 36 m² to be erected without a permit (just notify the council afterwards). So before you start, always check your local council’s rules – it might save you time and paperwork. Cost and Budget: Counting the Dollars One of the first questions is usually “How much will this set me back?”. In general, a shed kit saves on labour cost but offers less scope for going wild with design; a custom build lets you splurge on features but means hiring trades, so it’s pricier. Here are some key points: Here’s a quick comparison table to illustrate: Factor Shed Kit (DIY / Kit Package) Custom Build (Fully Contracted) Upfront Cost Lower (materials-only price) Higher (materials + trades labour) Total Timeline About 1–3 days of building effort 1–2 days onsite + prep time Skills Needed Basic DIY abilities No DIY needed (builders do it all) Permit Paperwork You handle approvals and forms Builder handles approvals for you Customization Limited by kit designs Fully bespoke options Maintenance Typically minimal (e.g. steel kits) Depends on materials chosen Each project and supplier will vary, of course. But generally, kits win on price and speed; custom wins on precision and personalization. For example, if you shop around, many Aussie kit suppliers list competitive package deals (and sometimes free delivery), whereas custom quotes will account for actual construction hours. Time and Effort: Building It Yourself vs Hiring a Pro Another big difference is who does the work and how long it takes. If you like weekend projects and have some DIY skill, a kit can be a fun challenge (and cheaper). If you’re short on time or building nerves, hiring a professional might be better. Let’s break it down: In short, if you have a full calendar or want a hands-off experience, project-management is appealing. If you crave a weekend challenge and savings, DIY is rewarding. Either way, assembly times are similar – the real difference is who’s holding the drill. Durability & Quality: How Long Will It Last? No one wants a shed that falls apart after a season of storms. Quality and durability often come down to the materials and build method. Overall, a well-chosen steel shed kit can be just as tough as a custom-built one, especially if it’s made with 100% Australian steel and assembled correctly. Just keep an eye out for warranties: many Aussie kits come with 20+ year color finish or rust-through warranties. In practice, a basic steel kit done right will easily last 15–20 years or more, while a custom timber shed (if well-maintained) can also run a long race. Design & Customization: Creating Your Ideal Space This is

Blog

How a Shed Builder Sunshine Coast Can Transform Your Backyard

Imagine sipping your flat white on a sunny arvo morning, strolling out of the back door and being greeted by your very own stylish garden shed or “she-shed” nestled in lush coastal greenery. That’s the magic a good Shed Builder Sunshine Coast can bring to your outdoor space.  Far from being a simple storage closet, a custom shed can become a multifunctional oasis – a home office with ocean views, a cozy mini-studio, or a top-of-the-line man cave for the weekend. In this guide, I’ll walk you through everything you need to know to turn a spare corner of your yard into something special.  We’ll chat about killer design ideas, Aussie-friendly materials, permit needs, costs, and even share some cheeky insights. Stick around – your backyard is about to get a serious glow-up. Unlock the Potential: More Than Just Storage Ask any Sunshine Coast local: a quality shed offers way more bang for your buck than another patch of grass. It’s sunny coast living 101 – we love our outdoor spaces. A well-built shed can extend your living area outdoors, giving you a brand-new spot to host barbies, stash surfboards, or create that “she shed” for quiet hobby time.  In fact, a shed can work as a pool house, guest room, yoga studio or even a home gym. The options are endless – it’s basically free real estate! Imagine stepping into a crisp, white designer shed surrounded by tropical palms and flowering vines. With a bit of style, a new shed can look like it belongs in a magazine. For example, attaching planter boxes, a neat grey deck, and matching paint can make it the centerpiece of your garden.  A Sunshine Coast shed builder will help you pick a look that fits your home’s style – from a rustic Hampton’s vibe to a sleek modern studio. They’ll use materials and colours (think Colorbond or treated timber) that stand up to coastal sun and salt air. With the right builder, that plain old backyard just became a cool retreat. You get to work closely (even one-on-one with me, your shed aficionado!) to brainstorm what you need.  Need more storage for tools and surfboards? We’ll sketch out extra wide doors and high ceilings. Want a comfy lounge in your yard? We’ll add windows, insulation and an awning for breezes.  The point is: a local pro understands our climate and lifestyle. They’ll guide you on every detail – from a solid concrete foundation to finishes that endure the elements. Designing Your Dream Shed: Creative Ideas Let’s talk inspo. A modern shed can be anything you dream of. Gone are the days of boring metal boxes. Today’s trends lean into mini-homes and outdoor living. For a coastal vibe, many Sunshine Coast families choose beach-style shacks with weathered timber or bright trims. Others go clean and minimalist with neutral Colorbond walls and big windows to soak in the garden view. One big trend is the She Shed. It’s like a “man cave” for the women in the house – a private retreat for crafts, yoga or just solitude with a cuppa. You could deck it out in pastels, shiplap walls and comfy cushions, and tailor it to your hobby (sewing machine, easel, or a quiet reading nook).  Sunshine Coast locals even order ready-made kit sheds for this: if you want a hassle-free build, check out a Trusted Shed Kits Supplier in Sunshine Coast for high-quality, pack-and-play studios. These kits come with all the panels and fixings pre-cut, so you can literally bolt together your dream hideaway in a weekend (with a mate or two helping, of course). For the gents, or just extra storage, think man caves, workshops or garages. Picture a garage-style door that folds up when you’re revving a vintage motorbike or showcasing surfboards.  Inside, add a mini fridge and tool bench. Big kids (adults, you know who you are!) often turn sheds into home gyms or entertainment hubs. Why not run a few speakers and cordon off a little alcove for the barbie or dartboard? The beauty of hiring a shed builder is they can include these extras from the get-go – insulation for year-round comfort, electrical wiring for lighting and power, or even plumbing if you fancy a sink or loo. Here are some punchy ideas to spark your creativity: If you’re revamping an old, tired shed, the difference can be night-and-day. For instance, take this forgotten jungle of a shed: By clearing it out, sanding the moss off, and painting, a builder could transform it into a lush potting lounge or a herb-garden studio. Imagine adding wooden trellis, a fresh coat of surfmist grey, and voila – it’s no longer an eyesore but a charming cottage corner.  Skilled builders can salvage these old structures or build brand-new ones that fit seamlessly into your landscaping. They’ll scope out the best location (like shading afternoon sun or preserving a view), handle leveling ground, and tie it all together so it feels like part of the family. Materials & Craftsmanship: Built for the Coast Not all sheds are created equal. A professional shed builder will know which materials survive our unique Sunshine Coast climate. Think sweaty summers, occasional big storms, and salty air near the beaches. Colorbond steel is the go-to metal cladding here – it’s Aussie-made to resist rust, corrosion and termites.  In fact, Colorbond has layers of protection so it won’t warp or peel, even under 30°C sun and 100% humidity. Plus it comes in smash-proof, fade-resistant colours (Surfmist, Woodland Grey, you name it) that can match your house or pop in contrast. Pros of Colorbond:  – Tough against rain, sun, cyclonic winds and even bushfire sparks.  – Low-maintenance (no repainting).  – Great colours and modern look. On the other hand, some homeowners prefer the timber look or eco-options. Here’s a quick table of common materials and their pros/cons to help you understand: Material Pros Cons Colorbond Steel Extremely durable, fire- and termite-resistant; low maintenance; many colours Can get hot

Blog

She Shed Kits Explained: Costs, Sizes, Materials & Setup

Ever dream of escaping to your peaceful hideaway in your own backyard? You’re not alone: a she shed (your private outdoor retreat) might be exactly what you’re craving. Picture a bright, airy space of your own – maybe a cosy studio, home office or creative nook – set just steps from the family hub but all yours.  I can almost smell the coffee as you relax in your little slice of paradise, knowing it’s built tough enough for Whitsundays weather. In this guide, I’ll show you how she shed kits come together, from sizes and materials to costs and setup, so you can start planning your dream space today. She sheds can be tailored to any passion or lifestyle. Think of a she shed as your multi-purpose backyard studio. Common uses include:  – Home office or study space– Art, craft or creative studio– Yoga, meditation or wellness retreat– Reading nook or chill-out lounge– Guest room for visitors– Garden retreat or greenhouse space– Workshop or hobby room These little buildings let you escape the daily grind. One day it can be your painting studio, the next a private yoga spot – you name it. The great thing is, you can tailor your shed exactly to your needs. Pick the size (from a tiny 3×3 m up to a multi-room layout), roof style (skillion or gable), doors (sliding, roller or glass) and windows to fit your vision.  Insulation, power points and colour choices turn it into a comfy year-round hangout. Many locals talk to a Trusted She Shed Kits Supplier in Whitsundays to nail the details (like cyclone-proof engineering) and make sure the design ticks all the right boxes. She Shed Sizes & Styles She sheds come in all shapes and sizes to fit your yard and needs. A compact 3×3 m kit (about 9 m²) might hold just a desk and shelf, while a 6×6 m one (36 m²) feels like a mini studio with room to spare. You can string multiple bays together or add lean-tos for extra space.  In practice, small sheds are great for a hobby room or single office, medium sheds (like 4×4 m) can serve as a lounge + work area, and larger sheds (6×4 m or more) can include a lounge corner, storage, and even a guest bed. Here’s a quick look at typical kit sizes and uses: Shed Kit Size (W × D) Area (m²) Typical Use 3 m × 3 m 9 m² Small home office or hobby room 4 m × 4 m 16 m² Art studio or spacious workspace 6 m × 4 m 24 m² Office plus lounge area 6 m × 6 m 36 m² Large workshop, guest room, etc. Larger than this? No worries – most kit suppliers do custom lengths, widths and even multi-room layouts. Just remember: bigger means more space and more cost, so choose the size that matches how you’ll actually use it. Materials & Durability Modern she sheds are mainly made of steel – think Colorbond or Zincalume – which is built for Aussie conditions. I recommend Colorbond coated steel (walls and roof) because its factory-painted surface fights rust (perfect for the salty Whitsundays air).  Zincalume is also tough (it’s zinc-aluminium coated steel) and cheaper if you want a simple, unpainted look. Either way, look for higher-gauge (thicker) steel if you’re right on the coast, since thicker steel resists corrosion longer. To deal with heat and humidity, ventilation and insulation are key. Install ridge vents, whirlybird roof vents or louvres, plus windows on opposite walls so you get a cool cross-breeze. Add reflective foil insulation under the roof – it will seriously cut down the heat radiating in (and quieten the rain). A couple of quick tips:  – Colorbond Steel: A fantastic choice for walls/roof in North Queensland. It comes in many colours and handles sun and salt spray.– Ventilation: Plan whirlybirds or ridge vents + wall vents/large windows. Good airflow stops your shed turning into a sauna on hot days.– Insulation: A foil barrier under the roof sheets keeps things cool and dampens rain noise. Lining the walls adds comfort too.– Corrosion Care: Seal any cut edges or drill holes with the supplied touch-up paint (it prevents rust). Every few months give it a spray-down to rinse off any salt spray. For the floor, a concrete slab is ideal. Aim for at least 100–150 mm thick with steel mesh reinforcement. Pour it level and put a slight slope away from the doors so water runs off (and consider a drain near the door if your yard floods).  A sealed concrete floor won’t rot or warp, so it stays looking sharp and level over decades. (It’s also a breeze to sweep clean or roll out flooring if you like.) This solid base plus the right materials and airflow will make your she shed survive both the wettest summer and the fiercest storm. An inviting backyard studio can feel like a personal oasis – a smart mix of practicality and beauty. She Shed Costs & Budgeting So, what’s a she shed kit going to set you back? It really depends on size, materials and extras. In general, small steel kits (say 3×3 m) might start around a couple of thousand dollars. A mid-size kit (4×4 m to 6×4 m) typically runs several thousand more once you add in all the upgrades.  Each feature adds cost – for example, sliding glass doors, double-glazed windows or premium Colorbond will bump up the price. Insulation, electrical wiring and any plasterboard fit-out are usually extra too. If you’re handy and build it yourself, you save a ton on labour. Many people DIY-assemble the kit (just grab some mates, the drill and a ladder). That said, fully finishing a she shed (insulation, cupboards, wiring) can push a mid-range project into the low five-figure bracket once all is said and done.  Hiring a builder for the slab or the entire assembly will raise the price further, but guarantees a professional result – useful in cyclone country. One important rule in Queensland: if your whole project (kit plus any hired trades) costs $11,000 or

Blog

Sports Sheds Guide: Planning, Materials & Costs

Imagine a hot summer’s day in the Whitsundays – the sun blazing, the humidity high, and a community sporting event about to kick off. You want players and spectators alike to be safe and comfortable. Enter the sports shed: a covered court or shelter that turns rain or scorching sun into a minor hiccup.  In this guide, I’ll walk you through everything you need to know about planning, materials and costs for sports sheds – especially for sunny North Queensland. Whether you’re with a local footy club, a school, or a council planner, you’ll get the lowdown in Aussie style. Why Build a Sports Shed? Sports clubs, schools and communities build sports sheds for one big reason: to protect people and gear so games can go on, rain or shine. Think covered basketball courts, netball courts with shade, or secure storage for equipment.  In a place like the Whitsundays, with our tropical downpours and intense sun, an open-air football match can turn miserable real quick. A well-planned sports shed solves that. It can also be a meeting hub for local events or a weather-proof training area – all while boosting local pride. Sports sheds let life, and sport, go on uninterrupted. Planning: Approvals and Site Prep Let’s dive into the nitty-gritty of planning. First up: Approvals. In Queensland, a shed is usually a “Class 10a” (non-habitable) structure – think garage or carport. Small garden sheds under 10 m² (about 3×3 m) and low height (under 2.4 m) can sometimes be built without approval.  But a sports shed is typically much bigger – we’re talking dozens of square metres – so you’ll definitely need a building approval and possibly a planning approval from Whitsunday Regional Council. Don’t gamble here: check in with council or a private certifier early on. Because the Whitsundays is in Cyclone Region C, your shed must be engineered for cyclonic winds. You’ll pick a spot with good drainage and access, and then lock down your shed’s wind rating. I always confirm the exact wind class (C1–C4) for the site, because two nearby blocks can actually have different requirements. This drives what steel frame, bracing and anchors we use (and trust me, the right anchors are the unsung heroes of storm protection). Next, think about site preparation. Your pad needs to be flat, well-drained, and strong enough for a concrete slab. Budget around $3,000–$4,500 for a small slab, $4,500–$7,500 for mid-size, and $7,500–$15,000+ for larger areas. Prices jump if you need digging, filling or extra anchors. The slab and anchors basically lock your shed to the ground – crucial in a gale. Now, before you order anything, dot the i’s on approvals. Your private certifier will review the design, engineering and site plan to ensure setbacks and local rules are met. Even if a DIY permit-exemption sounds tempting, double-check Queensland’s rules. It might say small sheds <10 m² can skip approval, but our sports structures are far bigger, so we play by a different rulebook. Materials: What to Build With With approvals sorted, we pick materials. Australian steel is king here. The frame and cladding are usually made of Colorbond® steel, which is strong, rust-resistant, and comes in colours that suit the local palette. For roofs, a gable or skillion style steel roof is typical (gable roofs with a peak or skillion which is a single slope).  We might also see Zincalume (silvery metal) if cost’s a concern, but Colorbond is tougher on the eyes and holds up better to corrosion. Since we’re near the coast, we’ll choose a corrosion-resistant grade and regular paint upkeep – salt air can be sneaky on fixings. Walls of a sports shed can be open, closed, or a mix. Open sides with rafters keep airflow for players. Enclosed areas can be used for storage or change rooms.  Frequently, we add features like roller doors for equipment storage, or lockable gates if it’s an open frame. Windows or polycarbonate panels can let in daylight. Don’t forget gutters and downpipes – heavy rain must be carried away from the structure. Consider adding insulation if you plan to use it as a covered court (helps reduce heat). It ups the cost, but in midsummer the extra comfort is worth it. Also, pre-wiring for lights or fans during construction saves headaches later. Here’s a quick table of common materials: Component Options Pros Cons Frame Material Galvanized steel (C4 grade) Very strong, durable Heavy (labor cost) Aluminium (less common) Lightweight, corrosion-proof More expensive Wall Cladding Colorbond® steel UV/coating, many colours Higher cost Zincalume steel Cheaper, reflective Silver (limited look) Polycarbonate panels (sectional) Lightweight, light-transmit Scratches, less secure Roofing Colorbond® corrugated Long-lasting, watertight Warps if improperly fastened Insulated panel system Quiet (no rain noise), insulated Very expensive Miscellaneous Sealant and seal tape Weatherproof joints Needs reapplication over decades Concrete slab (Reinf. mesh) Very stable foundation Costly, heavy to pour Durability and Cyclones We’re not messing around with storms here. A quality sports shed for the Whitsundays will be built to the local cyclone standard. That means thicker steel (often from Bluescope’s Building with BlueScope steel), special anchor bolts into the slab, and extra bracing on walls.  It also means following the Australian Standard AS/NZS 1170.2 for wind loads. The engineering drawing will specify everything: frame sizes, roof purlin spacings, fixings pattern, etc. That’s why working with a trusted sports sheds builder in Whitsundays is gold – they know how to hit these specs out of the park. Construction: Steps to Assemble Once you have your approvals and materials, the build goes something like this: If you’ve hired a pro builder, they’ll handle all this with smooth efficiency. DIY? Expect it to take much longer (and definitely get an engineer’s stamp on the design!). Either way, planning is key. Costs: Budgeting Your Sports Shed Alright, the big question: “What’ll it set me back?” Well, it depends. Key factors are size, complexity, and materials. To ballpark it: To give you real numbers, here are indicative ranges (including GST): Project Type Dimensions (m) Approx.

Scroll to Top